


Subway tile might seem like an easy choice, but the right decisions can make the difference between something that looks standard and something that feels thoughtfully designed. From layout direction to tile proportions and grout contrast, each detail plays a role in how the space comes together. Because of this, taking a more intentional approach can help you get a result that feels more refined and aligned with your style. In this blog, we’ll walk through what to know before using subway tile so you can make choices that bring out the best in your space.

The Classic Subway Tile
Subway tile is defined by its clean rectangular shape, most commonly in a 3 × 6-inch size that feels familiar yet highly adaptable. It is typically installed in a horizontal layout with a 50% offset, creating a staggered pattern that mirrors the look of traditional brickwork. Because of this arrangement, the surface feels balanced and easy on the eyes, which is part of what makes it work so well across different spaces. These tiles are usually made from ceramic or porcelain, both known for their durability and low-maintenance qualities. Over time, this combination of practicality and visual simplicity has helped subway tile remain a reliable choice in both modern and more traditional interiors.
While its appearance feels timeless, its origins are rooted in a very specific purpose that shaped how it is still used today. Subway tiles were first introduced in New York City’s subway stations in 1904, where designers needed a material that could handle constant use while still looking clean and orderly. At the time, glazed ceramic tiles stood out because they were resistant to stains and easy to wipe down, which made them ideal for public spaces. As the stations took shape, these tiles helped create a bright and structured environment that felt both functional and visually reassuring. Because of this, what started as a practical solution quickly became a defining design feature.
As you look closer, it becomes clear that this early design decision was influenced by more than just durability. During the Victorian era, hygiene was a growing concern, so materials that reflected light and appeared clean were highly valued. The original subway tiles were finished in glossy white, allowing them to bounce light throughout underground spaces that otherwise lacked natural brightness. This not only improved visibility but also helped create a sense of safety for passengers adjusting to a new form of transportation. Even now, that same balance of cleanliness, brightness, and simplicity continues to shape how subway tile is used in homes today.

Modern Patterns for Subway Tiles
Once you understand the traditional layout, it becomes easier to see how small changes can completely shift the look of subway tile. Instead of sticking to the standard offset, adjusting the pattern allows you to introduce movement, structure, or even a sense of height depending on how the tiles are arranged. Below, we’ll walk through several layout options that keep the classic feel intact while giving the design a more intentional and updated direction.
One-Third Offset
A one-third offset offers a subtle shift from the traditional half-offset layout while still keeping the overall look familiar. Instead of aligning tiles at the midpoint, each row is staggered at roughly 33%, which creates a softer and more gradual rhythm across the surface. Because of this, the pattern feels slightly more relaxed and less repetitive without becoming too noticeable. It works especially well in spaces where you want a clean look but with a bit more variation. This approach is often chosen when the goal is to update the layout without moving too far from the classic style.
One-Fourth Offset
If you want a layout that feels more structured, the one-fourth offset introduces a clearer sense of direction. By shifting each tile by 25%, the pattern creates a step-like progression that adds movement while still feeling controlled. As the eye follows the layout, it naturally moves across the surface in a steady rhythm, which makes the design feel more intentional. This works well in areas where you want to add interest without relying on bold colors or materials. Because of its balance, it sits comfortably between traditional and more modern layouts.
Horizontal Grid
For a more uniform look, the horizontal grid removes offsets entirely and aligns each tile in straight, even rows. This creates a clean and structured surface where every line feels precise and consistent. Because there is no staggering, the layout highlights the shape of each tile while keeping the overall design simple. It is often used in modern or minimalist spaces where clarity and order are more important than movement. In smaller areas, this approach can also help the space feel more open and organized.
Vertical Grid
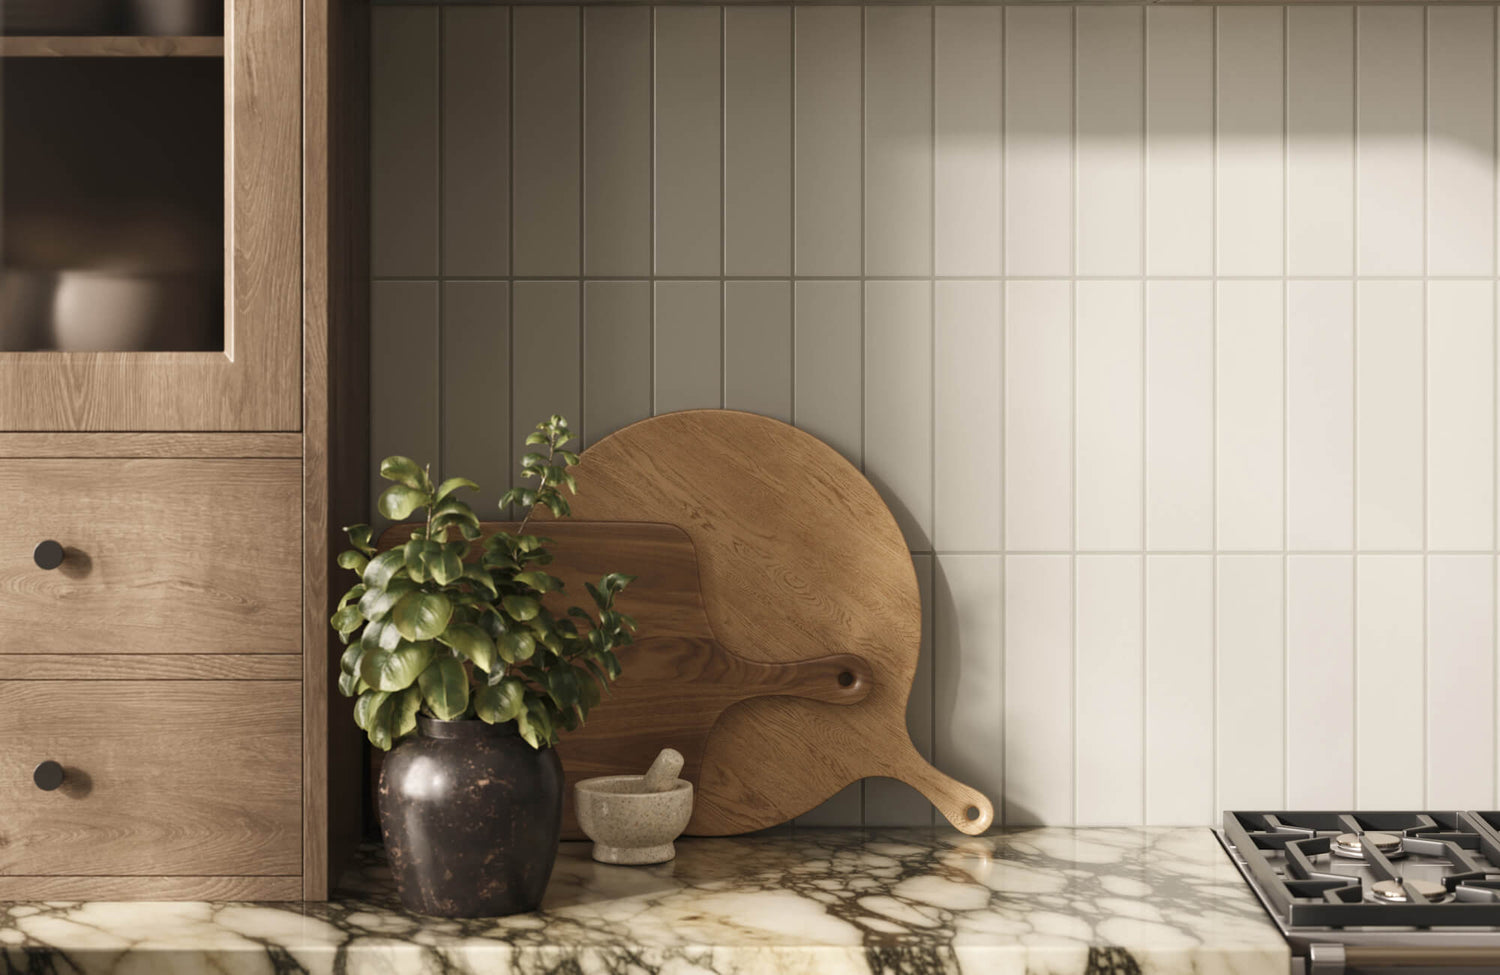
While horizontal layouts feel grounded, a vertical grid shifts the focus upward and changes how the space is perceived. By stacking tiles vertically, the layout naturally draws the eye along the height of the wall, which can make ceilings feel taller. This is especially useful in tighter kitchens or bathrooms where creating a sense of height can improve the overall feel of the space. In some cases, rotating the layout slightly into a diagonal grid can add even more visual interest without overwhelming the design. Whether kept straight or slightly angled, this approach offers a clean but more dynamic alternative.
As shown in the image above, the vertical grid layout creates a calm, elongated backdrop that works seamlessly with light wood tones and warm metallic fixtures. Our Madilyn 3x12 Glossy Ceramic Tile in Pearl enhances this effect with its elongated silhouette, helping stretch the visual height of the wall. Its glossy surface reflects light softly, while the gentle ripples and cushioned edges introduce a subtle handcrafted feel. This balance of structure and softness makes it a strong choice for backsplashes where you want both clarity and a bit of visual depth.
Herringbone Pattern
For a layout that introduces more movement, the herringbone pattern creates a distinct zigzag arrangement that immediately stands out. Each tile is placed at an angle to form a continuous V-shaped sequence, which gives the surface a more active and layered look. Because of this, it is often used as a focal point rather than a background element. At the same time, the pattern still feels connected to traditional design, which helps it blend into different styles. However, it does require careful planning since the angled placement involves more precise cuts and alignment.
Straight Herringbone Pattern
A straight or 90-degree herringbone keeps the same concept but introduces a more structured layout. Instead of forming angled zigzags, the tiles alternate between vertical and horizontal placement, creating a sharper and more geometric pattern. This gives the design a cleaner and more controlled feel while still adding visual interest. Because the lines are more defined, it works well in spaces that lean toward modern or transitional styles. It is a good option if you like the movement of herringbone but want something that feels more organized.
Diagonal Herringbone Pattern
If you prefer a more expressive version, the diagonal herringbone shifts the pattern sideways to create a wider visual effect. The tiles form repeated directional shapes that move across the surface, which can make the area feel more expansive. Because of this, it is often used in backsplashes or feature walls where you want to stretch the visual width of the space. The layout feels more fluid compared to the straight version, which adds a different kind of energy. Even with this variation, it still maintains the familiar structure that makes subway tile easy to work with.

Taking Your Subway Tile Design to the Next Level
Once you move beyond layout, subway tile opens up even more room for creativity through color, scale, and subtle detailing. Small design choices can shift the overall feel of a space without losing the familiarity that makes subway tile so easy to work with. Below, we’ll look at a few ways to push the design further while still keeping everything cohesive and intentional.
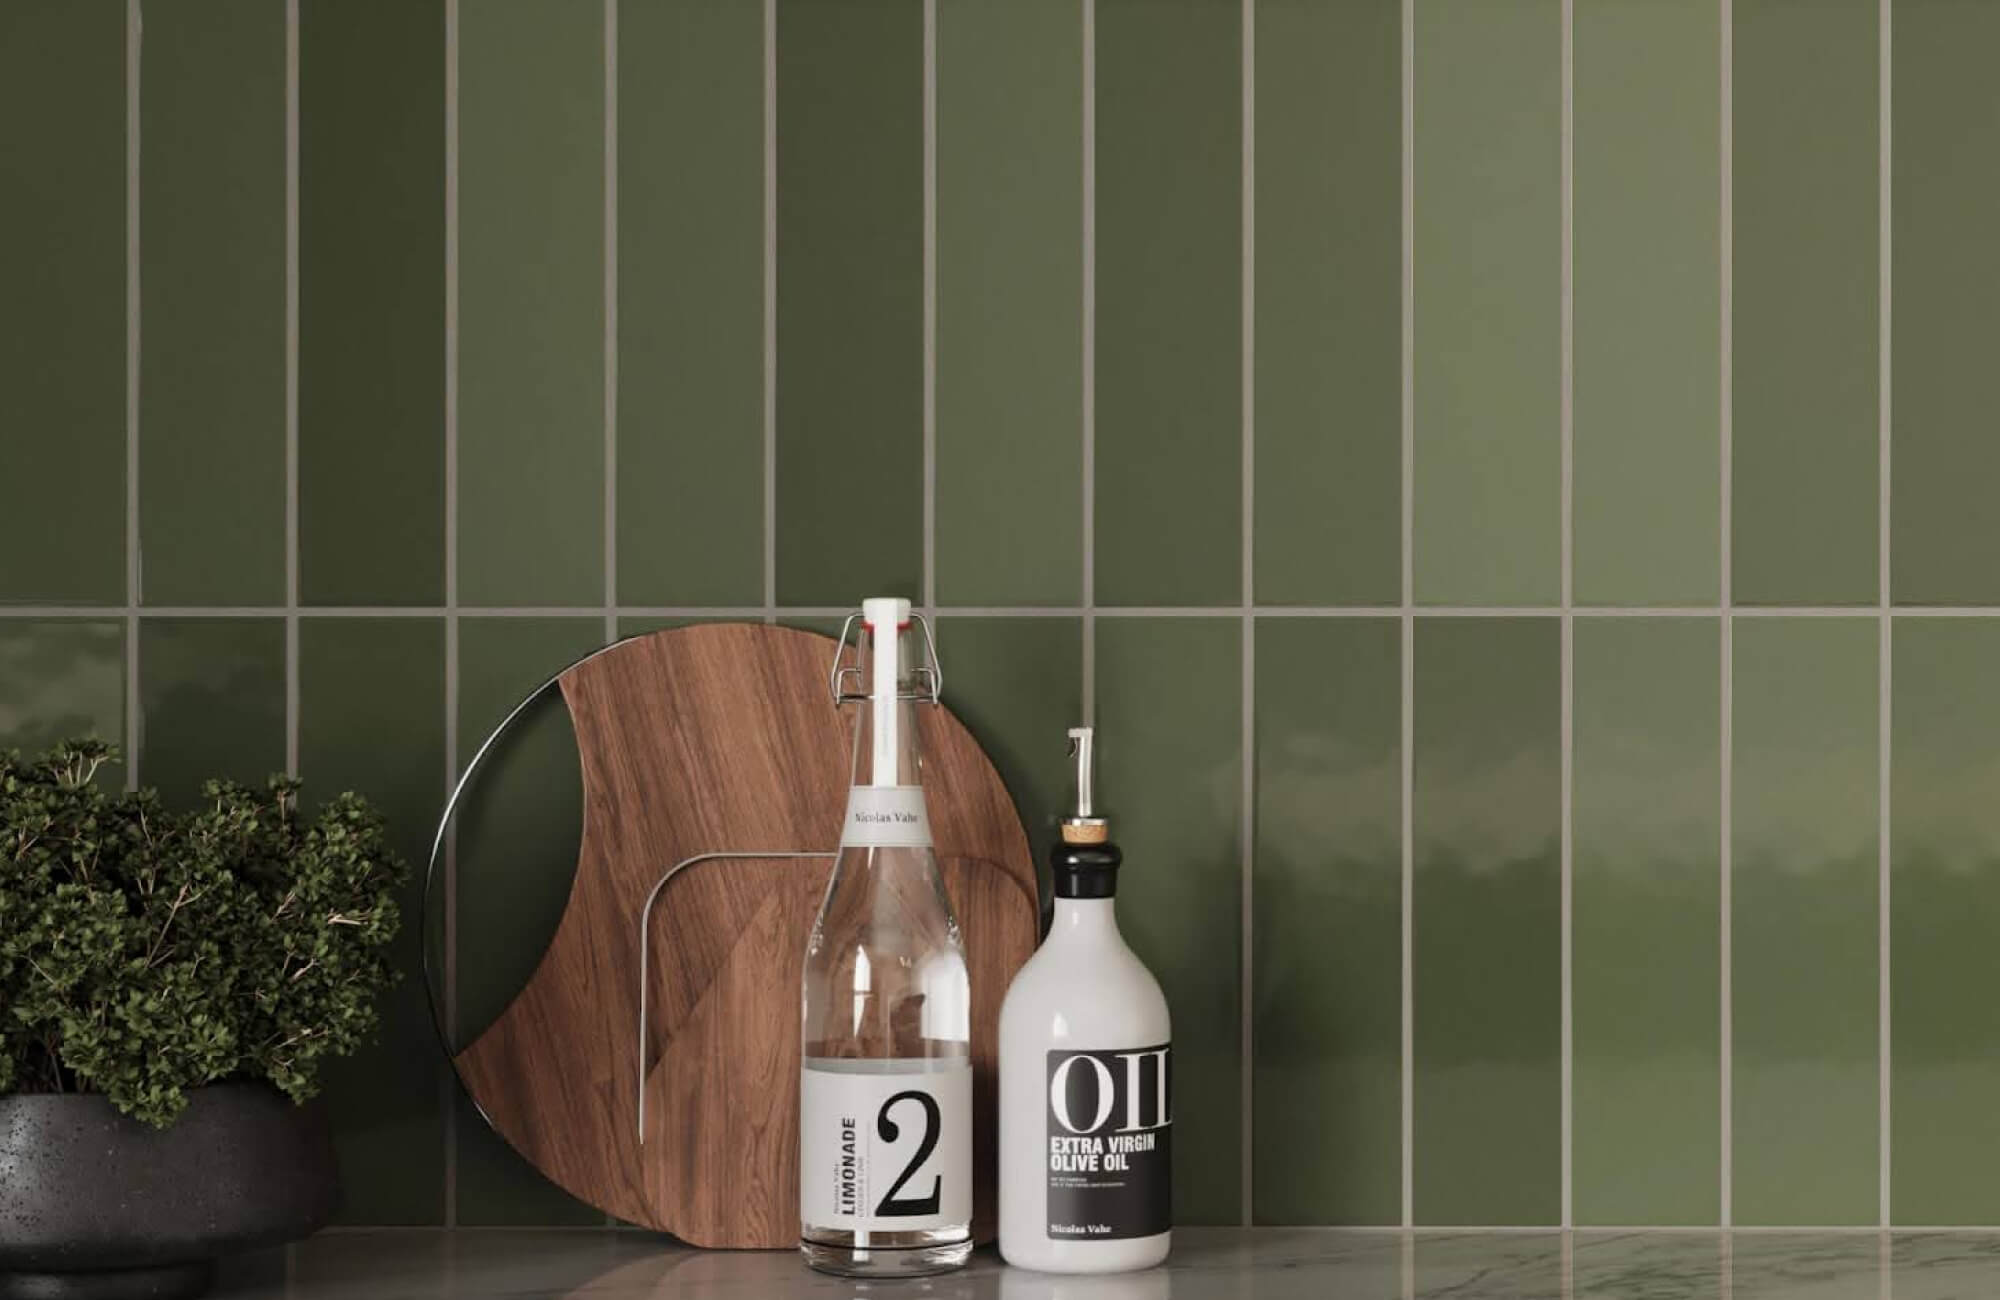
Change the Color
Subway tile does not have to stay within the traditional white palette, especially if you want the space to feel more expressive. Introducing color can completely shift the mood, whether you lean toward deeper tones like cobalt for contrast or softer shades for a calmer atmosphere. Because of this flexibility, color becomes one of the easiest ways to personalize the design without changing the layout itself. If committing to a single shade feels limiting, mixing multiple tones can create a more layered and playful result. This approach works well when the goal is to add personality while still keeping the overall structure clean. As the colors interact across the surface, the installation starts to feel more custom and less predictable.
Use a Pattern or Natural Look
Beyond color, subway tile can also take on more character through surface detail and pattern. Some designs mimic natural materials like marble or wood, which introduces variation without overwhelming the space. At first glance, the surface may appear simple, but a closer look often reveals subtle veining or soft movement within the tile. This kind of detail works especially well in spaces that aim to feel refined but not overly decorative. It allows you to keep the classic format while adding a bit more depth to the overall design. Over time, these quieter details tend to feel more lasting because they do not rely on bold contrast to stand out.
Play with Tile Sizes
Tile size can shift how the entire installation is perceived, even when everything else stays the same. Smaller subway tiles tend to create a more detailed surface, which works well in compact areas where you want to add texture without overwhelming the space. On the other hand, larger formats reduce the number of grout lines, resulting in a cleaner and more continuous look. This makes them especially effective in larger areas like shower walls, where simplicity helps the space feel more open. Mixing sizes within the same layout can also introduce a more custom feel, especially when done with intention. As long as the proportions are balanced, this combination can bring variety without making the design feel disconnected.
Change the Dimensions
Adjusting the proportions of subway tile can subtly reshape its overall character while still keeping its recognizable form. Longer, more elongated tiles can stretch the layout visually, which helps create a more streamlined and modern appearance. At the same time, slightly shorter or wider tiles can introduce a more grounded and structured feel. Because of this, even small changes in proportion can influence how the space reads as a whole. Pairing these dimensions with different layout directions, such as vertical or diagonal arrangements, adds another layer of variation. This makes it easier to tailor the design to the proportions of the room without relying on more dramatic changes.
Add Depth with Texture & Shape
If the goal is to bring more dimension into the space, texture is one of the most effective ways to do it. Textured subway tiles introduce subtle variation across the surface, which helps catch light differently throughout the day. This creates a more dynamic look without needing bold colors or patterns. Beveled tiles take this a step further by adding angled edges that create soft shadows between each piece. As light moves across the wall, these edges help define each tile more clearly. The result is a surface that feels more layered and visually active while still staying within a clean, classic framework.
Add Tile Accents for a Personalized Touch
Another way to refine the design is by introducing accents that guide how the eye moves across the space. A simple border can frame the layout and give it a more finished appearance without changing the main tile field. Focal points, such as a contrasting section or a patterned insert, can also help break up larger surfaces in a more intentional way. These accents do not have to be bold to be effective, as even subtle variations can add depth. When placed thoughtfully, they help create a sense of structure while still allowing the overall design to feel cohesive. This approach works well when you want to add personality without overwhelming the base layout.
Color the Lines for a Bold or Seamless Effect
Grout often feels like a small detail, but it plays a major role in how the final design comes together. Choosing a contrasting grout color makes each tile stand out more clearly, which highlights the layout and adds definition. On the other hand, matching the grout to the tile creates a smoother and more continuous surface. This softer approach works well in spaces where you want the material to feel more unified. There is also room to experiment with muted or unexpected grout tones if you want to introduce color in a more subtle way. Because of this flexibility, grout becomes a quiet but powerful tool in shaping the overall look.
Stagger It for a Seamless Transition
Transitions are often overlooked, but they can make a big difference in how cohesive the design feels. Instead of ending tiles in a straight, abrupt line, staggering the edges allows the layout to taper more naturally. This creates a softer visual shift between areas, especially when moving between different colors or materials. It also works well when blending subway tile into other shapes, such as hexagons or squares, without creating a harsh boundary. Because the transition follows the natural rhythm of the layout, it feels more intentional and less forced. Over time, these subtle details help the entire space feel more connected and thoughtfully designed.

Creative Uses for Subway Tiles Throughout Your Home
Subway tile is often associated with kitchens and bathrooms, but its versatility goes well beyond those familiar spaces. Because it balances durability with a clean, adaptable look, it can be used in different areas without feeling out of place. Here, we’ll take a closer look at where subway tile works best and how it can be applied in a way that feels both practical and intentional.
Backsplashes
Backsplashes are one of the most common places to use subway tile, especially in kitchens where both function and appearance matter. The classic rectangular format works easily with different cabinet finishes, countertop materials, and lighting styles, which makes it a reliable choice when tying a space together. Because of its glazed surface, ceramic and porcelain subway tile can handle moisture, splashes, and everyday messes without much effort. This makes cleaning more straightforward while helping maintain a consistent look over time. At the same time, layout and grout choices allow you to adjust how subtle or defined the design feels. With the right combination, a backsplash can stay practical while still contributing to the overall character of the space.
Feature Walls
Moving beyond smaller applications, subway tile can also be used across full walls to create a more defined focal point. Instead of acting as a background element, it becomes a surface that draws attention while still keeping a structured and familiar look. Choosing a different color or finish, such as a soft gray or a more textured surface, can add depth without overwhelming the room. This works well in living areas, entryways, or even bedrooms where you want a subtle but noticeable feature. Because the format remains simple, it is easier to layer with furniture and décor without creating visual conflict. Over time, this approach helps the wall feel intentional rather than overly decorative.
Fireplace Surrounds
Subway tile can also bring both warmth and structure to fireplace surrounds, especially when you want something that feels refined but not overly formal. Porcelain options are particularly well-suited for this use because they can handle higher temperatures while maintaining their appearance. Choosing deeper or more natural tones can help ground the fireplace and connect it to the rest of the room. At the same time, the rectangular layout adds a sense of order that keeps the design from feeling too heavy. This balance makes it easier to integrate the fireplace into both modern and more traditional interiors. With the right finish, the surround can feel like a natural extension of the space rather than a separate feature.
Showers
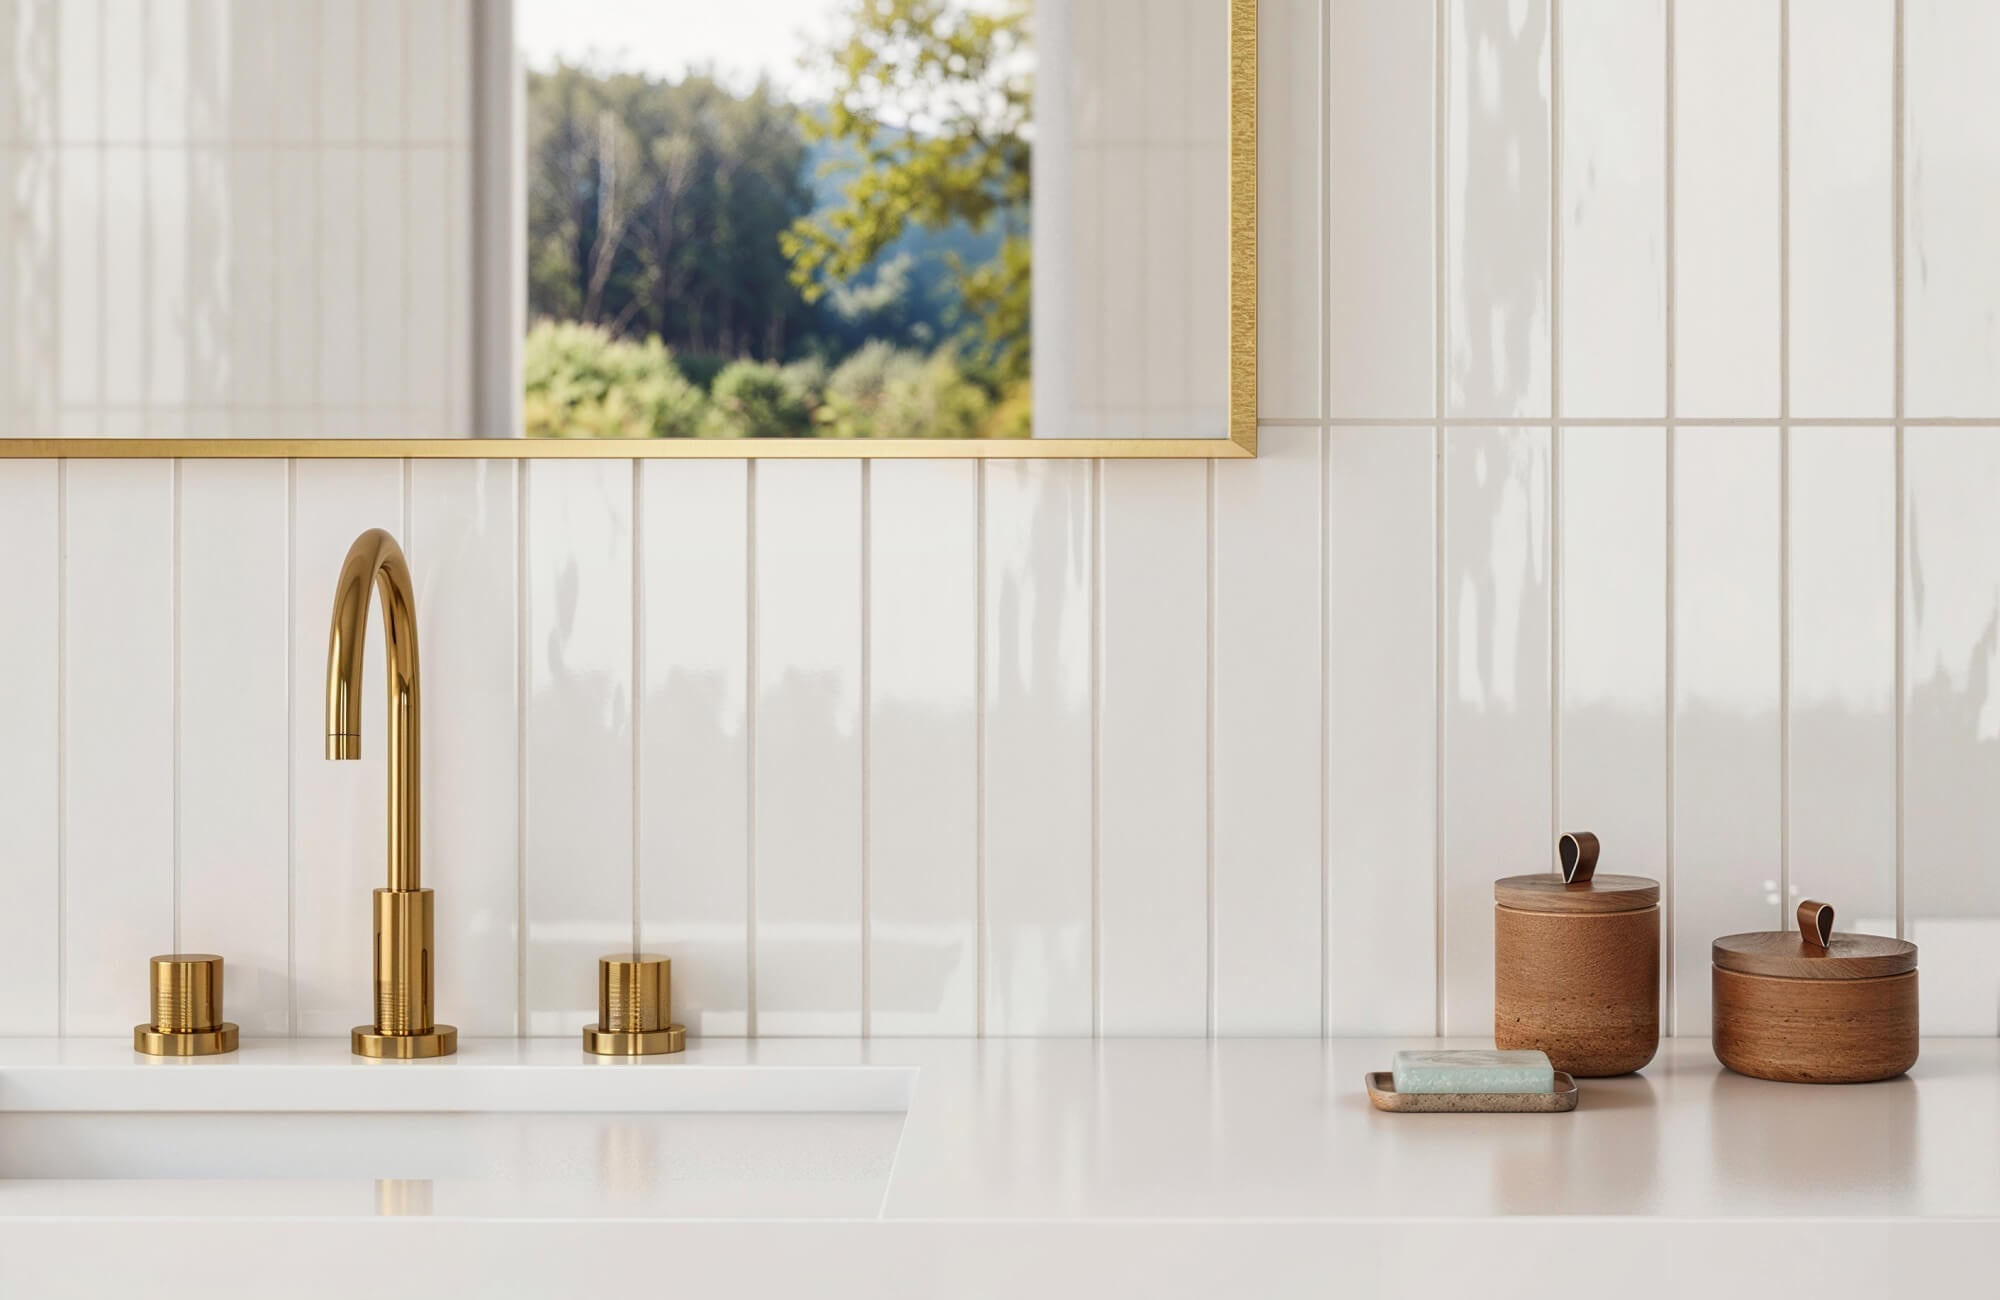
In bathrooms, subway tile continues to be a reliable choice for shower walls because it combines durability with a clean and familiar look. The smooth surface of ceramic and porcelain tiles helps resist moisture, which makes upkeep more manageable over time. Lighter tones can help reflect light within the shower, making the space feel brighter and more open. At the same time, different layouts or grout choices allow you to introduce subtle variation without complicating the design. For flooring, it is important to pair the walls with slip-resistant options, often in smaller mosaic formats that provide better traction. When everything is considered together, subway tile creates a shower space that feels cohesive, functional, and easy to maintain.
As seen in the image above, a vertical layout using elongated subway tiles creates a calm, continuous backdrop that works beautifully in a bathroom setting. Each piece of our Mariel 1x12 Glossy Porcelain Tile in Cloud carries a softly rippled glaze in gentle white tones, adding movement without disrupting the clean look. Its slender format enhances the vertical flow, helping the wall feel taller while maintaining a refined, handcrafted feel. This balance of durability, subtle variation, and light-reflective finish makes it a strong choice for shower walls or full-height installations.

The Enduring Appeal of Subway Tile
Subway tile has remained a consistent presence in interior design for over a century because it balances simplicity with everyday practicality. What started in New York City subway stations in 1904 has gradually found its way into kitchens, bathrooms, and living spaces where both function and visual clarity matter. Because of its straightforward form, it adapts easily to different styles without feeling out of place. This flexibility allows it to work just as well in modern spaces as it does in more traditional interiors.
At the same time, subway tile continues to evolve through new sizes, finishes, and layout options that keep it from feeling repetitive. While the classic 3 × 6 format and staggered pattern still hold their place, there is now more room to tailor the design to suit your space. Its durability and easy maintenance make it a practical choice, especially in areas that see daily use. If you are looking to bring subway tile into your home in a way that feels more considered and cohesive, you can book a Personalized Design Consultation with Edward Martin to explore options that align with your layout, style, and overall vision.
Common Subway Tile Questions Answered
If you still have a few details to sort out, this section covers the most common questions homeowners ask before getting started. These answers are meant to guide your decisions, although it is still best to follow your specific product and installation requirements for the best outcome.
What is the standard size of a subway tile?
The most common subway tile size is 3 × 6 inches, which is considered the traditional format. However, any rectangular tile with a 1:2 ratio can achieve a similar look, including sizes like 2 × 4, 4 × 8, and 6 × 12.
What is subway tile typically made from, porcelain or ceramic?
Subway tile was originally made from ceramic because of its smooth finish and easy maintenance. Today, both ceramic and porcelain are widely used, with porcelain offering slightly higher density and durability.
Are subway tiles expensive?
Subway tiles are generally one of the more budget-friendly tile options, especially in standard white ceramic. Costs can increase depending on size, finish, or material, but they remain accessible for most projects.
What should I consider before installing subway tiles?
It helps to plan around your layout, edges, and any areas like corners or niches that require precise cuts. Working with a qualified installer can make a big difference in achieving a clean and consistent result.
How do you properly install subway tiles in the traditional pattern?
The traditional layout uses a 50% offset, where each tile is centered between the tiles above and below it. This creates the classic staggered look that gives subway tile its familiar structure.
How long does it take to install subway tiles?
Installation time depends on the size of the area and the complexity of the layout. Smaller applications like backsplashes can usually be completed quickly, while larger or more detailed designs may take longer.
What grout color is best to use with white subway tiles?
White, gray, and black are the most common grout choices, each creating a different effect. High-contrast grout highlights the pattern, while matching grout creates a softer, more seamless appearance.