Wallpaper can look like an easy way to transform a wall until texture gets involved. What seems like a simple update can quickly turn into visible bumps, lifting seams, or a finish that looks far less polished than expected if the surface underneath is not right for it. The challenge is that not all textured walls behave the same, and the wallpaper itself makes a major difference in the outcome. In this blog, we’ll break down when wallpaper can work on textured walls, when preparation becomes necessary, and which materials are better suited for less-than-perfect surfaces.

What Kind of Texture You’re Dealing With (And Why It Changes Everything)
Not all textured walls behave the same once wallpaper is applied, and that difference often comes down to how deep and uneven the surface is. Light texture may allow for a workable finish, while heavier patterns tend to show through and affect adhesion. Looking closely at the wall condition helps set realistic expectations before committing to installation.
When Light Texture Is Still Workable Without Major Prep
Light textures, such as subtle orange peel or fine spray finishes, can sometimes support wallpaper without requiring full wall smoothing. Because the surface variation is minimal, thicker wallpaper or certain finishes can help mask minor irregularities once installed. From a distance, these walls may still read as relatively smooth, especially in rooms with softer lighting. This makes them a more forgiving starting point compared to heavily textured surfaces. However, the result depends heavily on the wallpaper type and how closely you inspect the wall. Slight imperfections may still be visible up close, even if they don’t dominate the overall look.
That said, skipping prep doesn’t always mean skipping effort entirely. Proper priming is still important to help the adhesive bond evenly across the surface. Without it, wallpaper may adhere inconsistently, especially in areas where the texture creates small peaks and dips. Over time, these inconsistencies can lead to minor lifting or uneven seams. While light texture offers more flexibility, it still requires a controlled approach to achieve a clean finish. Going in with the right expectations helps avoid disappointment once the wallpaper is in place.
Heavily Textured Walls That Will Show Through No Matter What
Heavily textured walls, such as knockdown, popcorn, or rough plaster, present a different challenge altogether. The depth of these surfaces creates shadows and uneven contact points that wallpaper cannot fully conceal. Even thicker materials struggle to bridge those gaps, which means the texture often remains visible after installation. Instead of a smooth finish, the wall may appear uneven or distorted, especially under direct lighting. This can affect both the visual outcome and how well the wallpaper sits against the surface. In most cases, the texture becomes part of the final look, whether intended or not.
Beyond appearance, adhesion becomes less reliable on rough surfaces. Wallpaper needs consistent contact with the wall to bond properly, but deep texture creates gaps where the adhesive can’t fully hold. This increases the likelihood of bubbles, loose edges, or sections that fail to stick over time. Even if the wallpaper initially appears secure, long-term performance can be affected as the material settles. For these types of walls, smoothing the surface isn’t just about aesthetics—it’s necessary for stability. Without that step, the result often falls short both visually and structurally.
Why the Surface Condition Matters More Than You Think
The condition of the wall surface plays a significant role in how wallpaper performs, even when the texture itself looks manageable. Painted textured walls tend to provide a more stable base because the paint seals the surface and reduces porosity. This allows the adhesive to spread more evenly and bond with greater consistency. In many cases, a well-prepared painted wall can handle wallpaper more predictably than an untreated one. The smoother coating also helps reduce how much the texture interferes with the final finish. This makes painted surfaces generally more forgiving during installation.
Raw or unsealed textured walls behave very differently. Without a sealed surface, adhesive can absorb unevenly into the wall, leading to weak bonding or areas that dry too quickly. This makes it harder to position the wallpaper correctly and increases the risk of peeling later on. The texture itself may also feel more abrasive, which can affect how smoothly the wallpaper lies across the surface. Priming becomes essential in these cases, not just as a recommendation but as a necessary step. Treating the surface properly before installation helps create a more controlled and reliable result.

When Wallpaper Can Work Without Fully Smoothing the Wall
There are situations where wallpaper can still work on textured walls without going through a full smoothing process, but the results depend on where it’s applied and what materials are used. Minor texture can sometimes be managed rather than removed, especially when expectations are adjusted. The key is knowing where imperfections will be less noticeable and choosing wallpaper that can handle those conditions.
Rooms Where Slight Imperfections Won’t Stand Out Visually
In certain rooms, minor wall texture is less likely to stand out once wallpaper is installed. Spaces with softer or indirect lighting, such as bedrooms or low-lit living areas, tend to hide surface irregularities better than brightly lit rooms. The absence of harsh shadows reduces how much depth and unevenness are visible across the wall. This makes it easier to work with lightly textured surfaces without needing to fully smooth them out. Walls that aren’t the main focal point, such as those behind furniture or in smaller areas, are also more forgiving. In these cases, the overall look can still feel cohesive even if the surface isn’t perfectly flat.
However, this approach has its limits depending on the layout and how the room is used. Walls that receive direct sunlight or strong artificial lighting will highlight any unevenness, making the texture more noticeable through the wallpaper. Accent walls or large, open surfaces also draw more attention, which can make imperfections harder to ignore. Even with the right placement, the finish may not look as refined as it would on a fully smooth wall. Choosing where to apply wallpaper becomes just as important as the material itself. Managing visibility rather than eliminating texture is what makes this approach work.
Using Thicker or Textured Wallpaper to Minimize Surface Irregularities
Wallpaper type plays a major role in how well it can handle minor surface variation. Thicker materials, such as vinyl or non-woven options, are better at bridging small dips and softening the appearance of light texture. These wallpapers have more structure, which helps them sit more evenly across uneven surfaces compared to thinner papers. Some textured wallpaper designs also introduce their own surface pattern, which can visually mask inconsistencies underneath. This makes the wall feel more intentional rather than imperfect. In these cases, the wallpaper works with the surface instead of trying to completely hide it.
That said, material alone won’t completely eliminate the effects of texture. Even thicker wallpaper can still reflect subtle bumps or uneven areas when viewed up close or under certain lighting conditions. The goal is to reduce how noticeable the texture is, not to achieve a perfectly smooth finish. Choosing the right pattern, finish, and thickness helps control the outcome, but it doesn’t replace proper wall preparation when it’s truly needed. Being realistic about what the material can and can’t do leads to better results. This approach works best when expectations are aligned with the condition of the wall.
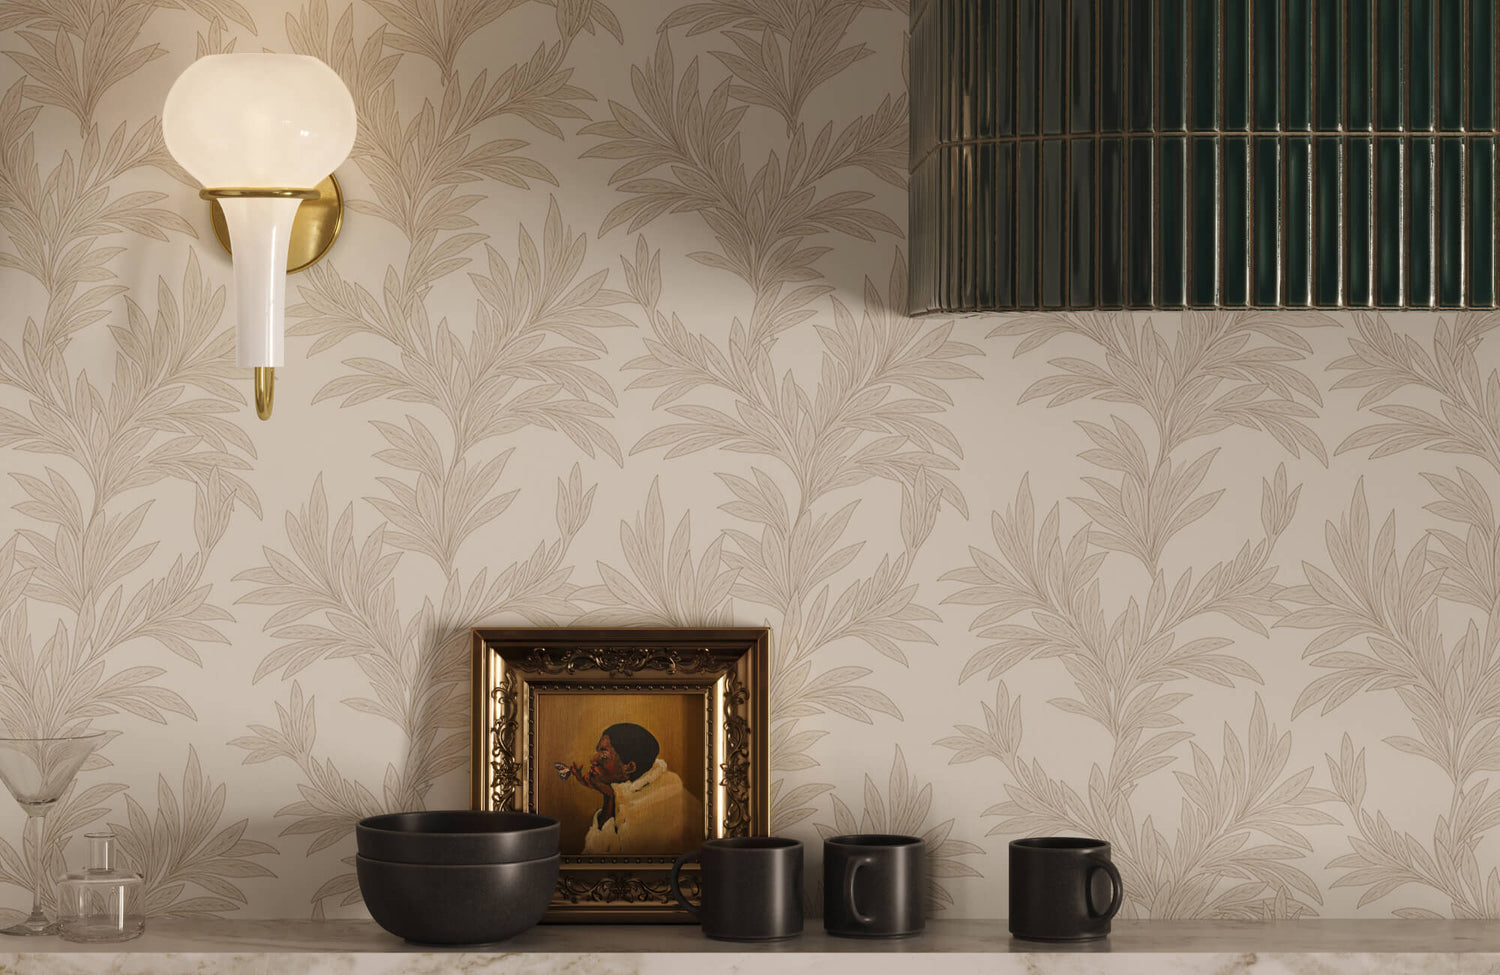
The laundry space shown above reflects how wallpaper can sometimes work successfully on less-than-perfect walls when the material itself brings enough structure to help soften minor irregularities. Our Bower Wallpaper in Taupe II works especially well in this kind of application because its digitally printed surface on lightly textured DreamScape Terralon introduces its own visual dimension, while the delicate botanical pattern helps break up subtle inconsistencies that might otherwise stand out more clearly on a flatter design. Its extra-wide, full-height format also reduces the number of seams across the wall, which can help create a cleaner overall finish when working with lightly textured surfaces where precision matters.

When You’ll Need to Smooth the Wall First
Some textured walls go beyond what wallpaper can realistically handle, and this is where smoothing becomes necessary rather than optional. The goal isn’t just to improve appearance but to create a surface that allows proper adhesion and long-term stability. Understanding when prep is required helps avoid results that look uneven or fail over time.
Visible Gaps, Shadows, and Uneven Adhesion: Signs Prep Can’t Be Skipped
Certain visual cues make it clear that smoothing the wall isn’t something you can work around. Deep textures create shadows and uneven surfaces that remain visible even after wallpaper is applied, especially in well-lit areas. If the wall has raised peaks, rough patches, or inconsistent depth, the wallpaper won’t sit flush against it. This leads to visible distortions that affect both the pattern and overall finish. In many cases, the texture becomes more noticeable once the wallpaper is installed rather than less. These are signs that surface prep is needed before moving forward.
Adhesion is another issue that shows up quickly on rough walls. Wallpaper needs consistent contact with the surface, but uneven textures create gaps where adhesive can’t fully bond. This can result in bubbles, lifting edges, or sections that fail to stick over time. Even if the installation looks fine at first, these problems often appear after a few days or weeks. The more aggressive the texture, the less reliable the bond becomes. Addressing these issues early prevents both visual and structural problems later on.
The setup shown above is a good example of why surface preparation becomes much more important once the wallpaper itself relies on clean pattern continuity. Our Plateau Wallpaper in Taupe II uses abstract contour-like lines across a light field, which creates a bold, structured look that can make wall irregularities much easier to spot if the surface underneath is too uneven. On a heavily textured wall, raised areas can distort the pattern, create inconsistent shadows, or make seams more noticeable than intended. Since this wallpaper’s crisp composition works best when those lines read cleanly across the surface, proper smoothing becomes far more important if you want the finished installation to look intentional rather than disrupted.
Skim Coating vs Lining Paper: Which One Actually Solves the Problem
When smoothing is necessary, the main options are skim coating or using lining paper, and each serves a different purpose. Skim coating involves applying a thin layer of joint compound over the wall to create a completely smooth surface. This method removes the texture rather than working around it, making it the most reliable solution for heavily textured walls. Once sanded and primed, the wall becomes similar to standard drywall, allowing wallpaper to adhere evenly. While it requires more effort, it provides the most consistent and long-lasting result. For walls with deep or uneven texture, this is usually the better approach.
Lining paper, on the other hand, acts as an intermediate layer between the wall and the wallpaper. It can help reduce minor surface variation, but it doesn’t fully eliminate deeper texture. This makes it more suitable for lightly textured walls where the goal is to improve the surface rather than completely smooth it. It’s quicker to install than skim coating, but it has limitations when dealing with aggressive textures. In some cases, using lining paper alone can still result in visible imperfections underneath. Choosing between the two depends on how much texture you’re trying to correct and how clean you want the final finish to be.
What the Prep Process Really Looks Like Before Installation Starts
Preparing a textured wall for wallpaper involves more than a single step, especially when smoothing is required. The process typically starts with cleaning the surface to remove dust, grease, or loose material that could affect adhesion. If skim coating is needed, multiple layers of compound may be applied and sanded down to achieve a smooth finish. This step takes time, as each layer needs to dry before the next is added. Once the surface is even, priming becomes essential to create a stable base for the adhesive. Skipping any of these steps can lead to issues once the wallpaper is installed.
The time and effort involved often depend on the condition of the wall and the level of finish you’re aiming for. For lightly textured walls, prep may be limited to minor smoothing and priming, which is more manageable. Heavily textured surfaces, however, require more extensive work to achieve a clean result. This can extend the timeline but improves both appearance and durability. In the long run, proper preparation tends to save time by reducing the need for repairs or reinstallation. Knowing what the process involves helps set realistic expectations before starting the project.

Wallpaper Types That Handle Imperfect Walls Better
Not all wallpaper performs the same on uneven surfaces, and the difference often comes down to how thick, flexible, and structured the material is. Some options can soften minor irregularities, while others tend to highlight every bump underneath. Knowing how each type behaves helps you choose something that works with the wall instead of against it.
Why Thin Wallpaper Makes Texture More Noticeable
Thin wallpaper tends to follow every contour of the wall, which means it doesn’t hide texture; it exposes it. Even light surface variation becomes more visible once the paper is applied, especially under direct lighting. Instead of creating a clean finish, the wallpaper can look uneven or slightly distorted as it settles into the wall’s texture. This is more noticeable with solid colors or minimal patterns, where there’s nothing to visually break up the surface. Over time, these imperfections become easier to spot as the material fully adheres and tightens across the wall. What may seem subtle during installation can stand out more once everything dries.
This also affects how seams and edges appear once installed. Thin wallpaper doesn’t provide enough structure to bridge small gaps, which can make joins look inconsistent or more visible. If the wall has dips or raised areas, the paper may pull unevenly, creating slight tension differences across the surface. This can lead to minor lifting or misalignment in certain spots, especially if the adhesive doesn’t distribute evenly. While thin wallpaper can work well on smooth walls, it offers little forgiveness when texture is present. In these situations, the material ends up amplifying the problem rather than minimizing it.
Vinyl and Non-Woven Options That Sit Better on Uneven Surfaces
Vinyl and non-woven wallpapers tend to perform better on imperfect walls because they have more body and flexibility. Their added thickness allows them to sit more evenly across a light texture, reducing how much of the surface shows through. Unlike thinner papers, these materials don’t immediately conform to every small dip or ridge, which helps create a more balanced appearance. This makes them a more reliable choice when full wall smoothing isn’t part of the plan. They also tend to be more durable, which helps during installation when adjustments are needed. Overall, they offer more control over the final finish.
That said, they still have limits depending on the severity of the texture. While they can soften minor irregularities, deeper patterns or aggressive surfaces will still affect how the wallpaper looks once installed. Even with thicker materials, shadows and unevenness can appear under certain lighting conditions. Installation also requires proper adhesive and surface preparation to ensure the wallpaper bonds correctly. If the wall is too rough, these materials may not fully adhere in recessed areas, leading to long-term issues. They perform better than thinner options, but they don’t replace proper wall prep when it’s needed.
Some wallpaper materials naturally do a better job of softening minor surface inconsistencies because they bring more structure and visual depth to the wall. That becomes especially helpful when the goal is to make a light texture feel less noticeable instead of perfectly invisible. In the bathroom shown above, our Brocade Wallpaper in Black/Tan II does exactly that through its richly layered damask-inspired pattern and softly distressed detailing, which helps break up the visibility of subtle imperfections that flatter designs would make much easier to spot. Its digitally printed finish on lightly textured DreamScape Terralon also gives the material more body than thinner wallpaper options, helping it sit more evenly across lightly imperfect surfaces.
Where Peel-and-Stick Works and Where It Struggles on Texture
Peel-and-stick wallpaper is often seen as an easier alternative, but its performance on textured walls is more limited than expected. Because it relies on a pressure-sensitive adhesive, it needs consistent contact with the wall to stay in place. On smooth surfaces, this works well, but texture creates gaps that reduce how much of the adhesive actually bonds. This can lead to edges lifting or sections peeling away over time, especially in areas with temperature changes. Even if it sticks initially, long-term hold can be unreliable on uneven surfaces. This makes it less suitable for walls that aren’t properly prepared.
There are situations where peel-and-stick can still work, particularly on lightly textured or well-primed walls. In these cases, the surface variation is minimal enough for the adhesive to maintain contact across most of the area. However, expectations need to be realistic, since the finish may not look as smooth as it would on a flat wall. Repositioning can also be more difficult if the material stretches or loses adhesion during adjustments. While it offers convenience, it doesn’t perform well as a solution for deeper texture issues. For more demanding surfaces, traditional wallpaper with proper prep tends to be more reliable.

Installation Problems You’ll Likely Run Into
Installing wallpaper on textured walls often brings issues that don’t show up right away. Some problems appear after the adhesive sets or once the wall is exposed to light and daily conditions. Knowing what to expect early helps prevent results that look fine at first but don’t hold up over time.
Adhesion Issues That Show Up After a Few Days
Adhesion problems often develop after installation rather than during it, which makes them harder to anticipate. As the adhesive cures, areas where the wallpaper didn’t fully make contact with the wall begin to weaken, especially on uneven surfaces. Small gaps created by texture prevent consistent bonding, which leads to sections loosening or peeling back slightly. This tends to show up near seams, corners, or areas with deeper surface variation. Changes in temperature or humidity can accelerate the issue, causing the material to shift or contract unevenly. What starts as a clean finish can gradually lose stability, making repairs more likely if the surface wasn’t properly prepared.
Air Bubbles and Lifting Edges on Uneven Walls
Air bubbles are a common issue when applying wallpaper over textured walls, and they’re often more persistent than expected. The uneven surface traps air in small pockets where the wallpaper can’t fully press against the wall, especially in recessed areas. Even with careful smoothing during installation, these pockets can reappear as the adhesive dries and settles. Edges are particularly vulnerable since they rely on full contact to stay sealed, which is harder to achieve on rough surfaces. Over time, these lifted edges can collect dust or start to peel further, affecting both the look and durability of the wall. In spaces with frequent temperature changes, this problem tends to become more noticeable as the material expands and contracts.
Pattern Alignment Problems on Textured Surfaces
Pattern alignment becomes more difficult when the surface underneath isn’t consistent. Texture can slightly shift how each panel sits, which affects how patterns line up across seams. Even small variations in depth can cause misalignment, especially with geometric or highly detailed designs where precision matters. As the pattern continues across the wall, these inconsistencies can become more noticeable, breaking the visual flow. Adjustments during installation can help, but they don’t fully correct the issue if the surface itself isn’t even. This often results in a finish that looks slightly off rather than clean and continuous.
Why Seams Become More Visible on Rough Walls
Seams tend to stand out more on textured walls because the surface prevents edges from sitting flush against each other. When two panels meet, any raised or uneven areas underneath can create slight ridges or gaps that catch light differently. This makes seams easier to spot, particularly in rooms with strong lighting or large wall surfaces. Over time, these lines can become more defined as the wallpaper settles and reacts to the environment. Even with careful alignment, the texture underneath limits how seamless the finish can look. The end result often feels less polished compared to wallpaper applied on a fully smooth surface.

Deciding If It’s Worth It for Your Wall
Choosing whether to install wallpaper on a textured wall comes down to how much prep you’re willing to take on and what kind of result you expect. In some cases, the texture can be worked with, while in others, it becomes a limitation that affects both appearance and durability. Looking at the trade-offs early helps you avoid committing to a finish that doesn’t hold up the way you want.
When Wallpaper Still Works Despite Texture
Wallpaper can still be a workable option when the texture is light, and the wall isn’t a major focal point. In these situations, small surface variations don’t dominate the overall look, especially in rooms with softer lighting or partial wall coverage. Choosing thicker materials or designs with pattern and texture can help minimize how noticeable the wall condition is. This approach tends to work best in bedrooms, secondary spaces, or accent areas where the finish doesn’t need to be perfectly flat. While the result may not look completely smooth up close, it can still feel cohesive within the room. In these cases, wallpaper works because expectations are aligned with the condition of the surface.
A practical way to make this work is to test a sample directly on the wall before committing to a full installation. Viewing it at different times of day helps reveal how lighting affects the visibility of texture underneath. It also gives you a clearer sense of how much imperfection is acceptable in that specific space. Choosing patterns with movement or variation can further reduce visual inconsistencies. This small step helps avoid surprises once the full wall is covered.
When It’s Smarter to Choose Paint or Another Wall Finish
There are situations where wallpaper creates more problems than it solves, particularly on heavily textured or uneven walls. If the surface has deep patterns, rough patches, or inconsistent areas, wallpaper is likely to highlight those issues rather than hide them. In these cases, paint often becomes the more practical choice since it adapts to the surface without requiring the same level of precision. Other options, like wall panels or decorative finishes, can also provide a cleaner result without extensive prep. This is especially true in high-visibility areas where a smooth, consistent finish matters more. Choosing an alternative can save time and effort while still achieving a strong visual outcome.
If you’re unsure which direction to take, try evaluating the wall from a distance where it’s most often viewed. If the texture already stands out from across the room, wallpaper will likely make it more noticeable rather than less. In those cases, investing in a finish that works with the surface instead of against it tends to lead to a better result. It’s also worth factoring in long-term maintenance, since simpler finishes are easier to manage over time. This approach helps you avoid committing to a solution that requires more correction later.
Matching Your Expectations to the Level of Prep Required
The final result depends heavily on how much preparation is done before installation. A fully smoothed wall will always produce a cleaner, more seamless finish compared to applying wallpaper directly over texture. If you’re aiming for a more refined or polished look, skipping prep will likely lead to visible inconsistencies that become more noticeable over time. On the other hand, a less formal or layered aesthetic can tolerate some variation without feeling unfinished. The key is understanding what each level of preparation actually delivers in terms of appearance. This helps align the outcome with what you expect to see once the project is complete.
A useful approach is to define your acceptable level of imperfection before starting. Looking at reference images of wallpaper installed over similar textures can give you a realistic benchmark. It also helps to decide whether the wall is meant to stand out or blend into the space. For more visible areas, investing in prep tends to be worth it, while less prominent walls can handle a more relaxed finish. Making that distinction early helps guide both your effort and budget.
Finding a Practical Balance Between Effort and Final Look
The decision often comes down to balancing the effort required with the result you want to achieve. Smoothing the wall takes time and adds cost, but it creates a more controlled and predictable finish. Skipping that step reduces upfront effort but can lead to a look that feels less refined, especially under certain lighting conditions. For some homeowners, that trade-off is acceptable, particularly in spaces that aren’t heavily used or closely inspected. Others may prefer to invest more time up front to avoid noticing imperfections later. The right choice depends on how the space is used and how important the finish is to the overall design.
To find that balance, it helps to consider both short-term convenience and long-term satisfaction. If the wallpaper is meant to be a key design feature, spending more time on preparation usually leads to a better result. If it’s more of a temporary update or applied in a low-impact area, a simpler approach may be enough. Breaking the decision down this way makes it easier to prioritize where effort matters most. It also helps prevent overcommitting to work that may not significantly improve the final outcome.
Making The Right Call For Your Walls
Wallpaper can absolutely work on textured walls, but only when the wall condition, material choice, and preparation level all make sense together. In some spaces, light texture and the right wallpaper are enough to achieve a result that still feels cohesive, while deeper textures often require more preparation than most homeowners expect. The goal is not simply getting wallpaper onto the wall, but choosing an approach that will actually hold up and look right in the long term.
If you’re unsure whether your walls are workable as they are, or whether a different wallpaper type or wall finish would make more sense, our Personalized Design Consultation can help you sort through the options with more clarity. Sometimes the smartest decision is moving forward with wallpaper, and other times it’s choosing a solution that better fits the condition of the space from the start.