


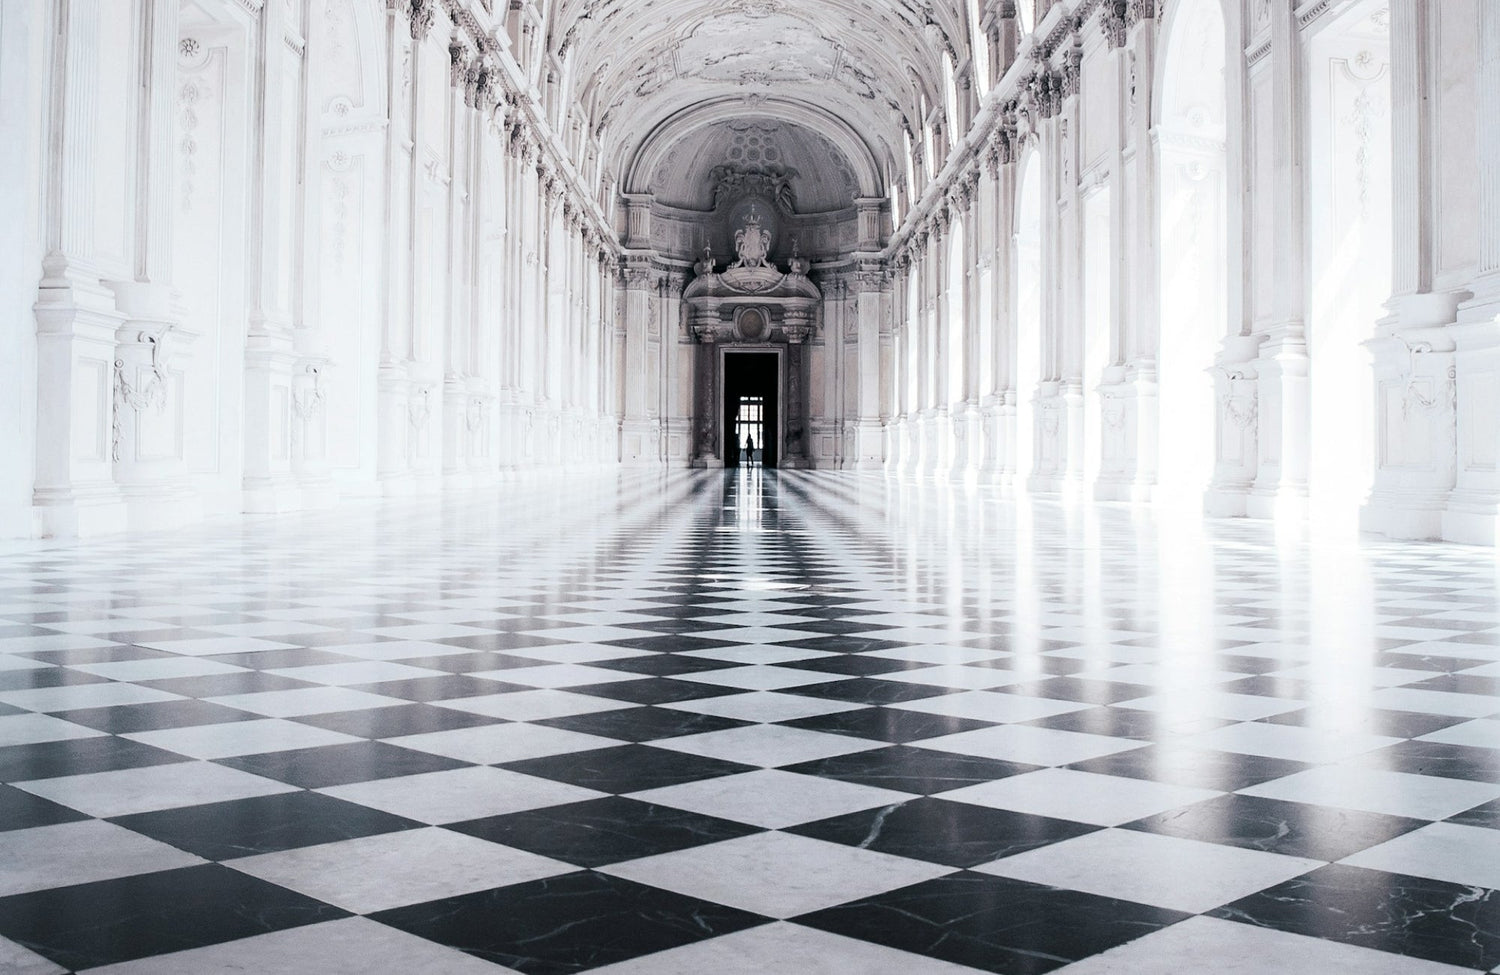
Checkerboard floors have stood the test of time, offering a bold yet balanced look that works in everything from classic interiors to modern spaces. Their alternating tile pattern delivers instant visual impact, making any room feel more structured and intentional. Whether you're aiming for a dramatic entryway or a soft, vintage-inspired kitchen, checkerboard flooring is a design move that never feels dated.
In this guide, we’ll walk through the materials, layout options, and practical steps to bring a checkerboard floor to life; plus affordable alternatives, tips for installation, and room-by-room inspiration to help you get the look just right.

What to Consider When Selecting Checkerboard Floor Tiles
Choosing the right tiles for your checkerboard flooring isn’t just about picking black and white. From tile material and size to color combinations and layout, several design choices will shape the final result. Below, we break down key factors to help you select tiles that not only look stunning but also feel right for your space and lifestyle.
Style Considerations
Start by thinking about the overall tone of the room where the checkerboard flooring will go. Is it a formal space with elevated details like crown molding and dramatic lighting? Or is it a casual area like a laundry room, where comfort and practicality matter most? Your tile choice should reflect the atmosphere you want the space to project.
Classic black and white tiles may feel right at home in traditional interiors, while earth-toned or softly contrasting combinations lend themselves to more relaxed or contemporary designs. It’s also worth considering the finishes, matte, honed, or polished, to fine-tune the mood. Style isn’t just about color; it’s about how your tile decisions interact with the room’s architecture and décor. A well-matched style brings balance, even in high-contrast layouts.
Size and Scale
Tile size plays a major role in how the checkerboard pattern is perceived. Larger tiles offer a cleaner, more modern look and can visually expand a space, especially in open floor plans. Smaller tiles, on the other hand, bring more intricacy and vintage charm, making them a popular choice for bathrooms, mudrooms, or entryways.
As a general rule, aim to have at least three full tiles span both the width and length of the room to keep the layout feeling balanced. Too few tiles can make the pattern feel cramped or visually chaotic. Also, consider how furniture and architectural features (like doorways or islands) will interact with the tile lines—size and placement matter just as much as color.
Color Coordination
While checkerboard floors are known for their high-contrast look, they don’t have to be limited to black and white. Warm beige and off-white combinations, or even muted gray tones, such as our Blair 24x24 Checkerboard Polished Porcelain Tile in Oniciata Grey and Volakas White above, can create a softer, more livable effect while maintaining visual interest. The colors you choose should reflect not just your personal style, but also the rest of the home’s palette.
Look at your cabinetry, wall colors, and existing flooring transitions to ensure everything feels connected. If you’re mixing warm and cool tones, be intentional with where and how you use them. Checkerboard floors can be playful or refined depending on the color pairing, so think about the feeling you want to evoke in the space.
Planning Your Color Palette and Layout
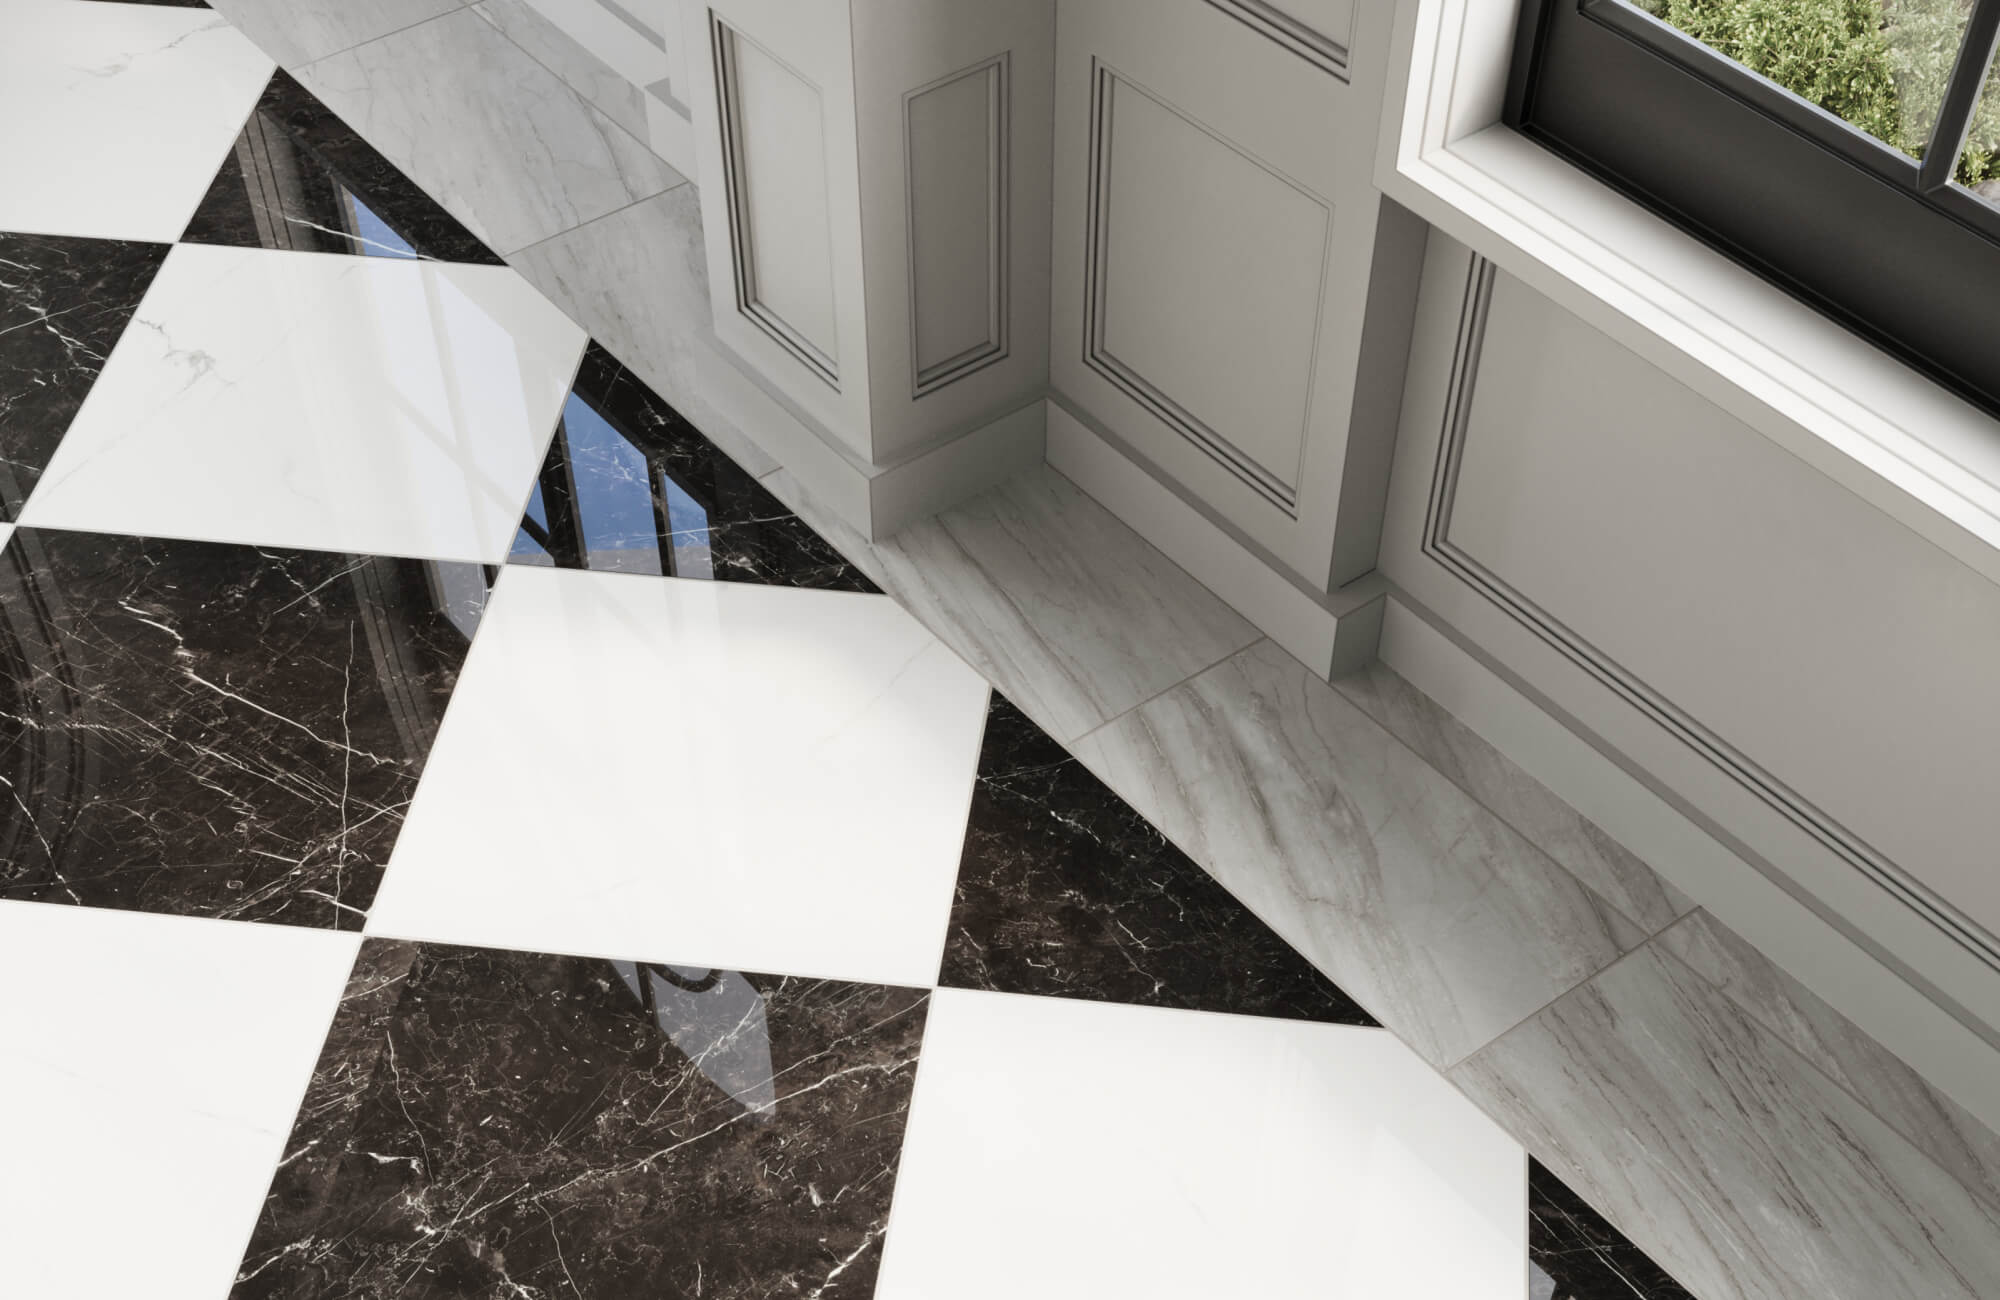
Once you've narrowed down your tile style and colors, it’s worth considering how the layout will affect the room’s overall tone. Checkerboard floors are traditionally laid in a grid with tiles aligned square to the walls, but shifting the pattern on a diagonal can change the room’s visual flow. Diamond layouts often feel more dynamic and can visually expand smaller or transitional spaces like hallways, laundry rooms, or mudrooms.
Color pairings like black and white deliver sharp contrast, while soft beige and off-white lend a quieter, more grounded look. The layout you choose should align with the style of your home and how you want the space to feel—whether that’s crisp and bold or warm and subtle. Combined with the right tones, layout decisions help create rhythm and direction underfoot without overwhelming the rest of the décor.
Gather Some Samples
One of the best tips before committing to a tile is to see it in your actual space. Lighting, wall colors, and room size can all influence how a tile looks once installed. Ordering 4" x 4" samples from Edward Martin lets you test how different materials and colors will interact with your room’s design, so you can make confident decisions without guesswork.
Laying out the samples side by side on the floor can reveal nuances in tone, texture, and finish that might not be obvious in photos. For added clarity, Edward Martin also offers an AR visualization tool, which allows you to preview how different tile combinations will appear in your room using your phone or device. Combined, these tools make it easier to narrow down the perfect tile before moving forward.

Affordable Alternatives for Checkerboard Flooring
While marble brings undeniable elegance to checkerboard floors, it’s not always the most practical or affordable option. Fortunately, there are several stylish and budget-conscious alternatives that still deliver visual impact, durability, and design flexibility. Below, we explore materials that balance aesthetics with everyday function; ideal for creating a checkerboard floor that looks great and fits your lifestyle.
Porcelain
Porcelain, such as our Leona 24x24 Checkerboard Matte Porcelain Tile in Calacatta and Amani Grey, seen above, is easily one of the best substitutes for marble in checkerboard floors. Known for its strength and low maintenance, this material resists scratches, stains, and moisture, making it ideal for kitchens, bathrooms, mudrooms, and entryways. It also comes in a wide range of designs that mimic natural materials like marble, terrazzo, or limestone, offering the same visual impact with added resilience. For homeowners who want long-term value and style, porcelain strikes a perfect balance between beauty and durability.
Design-wise, porcelain tiles are available in multiple sizes and finishes, so you can tailor the checkerboard pattern to your space. Larger tiles can make smaller rooms feel more open, while smaller formats lend themselves well to vintage-inspired layouts. You can also choose from glossy or matte finishes, depending on the overall aesthetic you're after. It’s a smart option for busy households that want both visual appeal and peace of mind.
Luxury Vinyl Tile (LVT)
Luxury vinyl tile (LVT) offers the look of stone or ceramic with more flexibility underfoot. It’s a great solution for homes with pets or kids, thanks to its water-resistant surface and cushioned feel. LVT also installs easily, especially with peel-and-stick or click-lock formats, making it a favorite for quick DIY updates. For checkerboard designs, it comes in a range of contrasting tones and can hold its shape well in high-activity zones like playrooms or laundry areas.
That said, there are a few trade-offs to consider. LVT may not have the same longevity as porcelain or stone and can sometimes show wear or scratches in busy areas. Some types also emit VOCs, which may be a concern in closed environments, so it’s best to look for low-emission options when possible. Still, for temporary solutions or low-cost renovations, LVT offers great design flexibility without the higher price tag.
Ceramic
Ceramic tiles remain a widely used and affordable option for checkerboard patterns. They're generally less expensive than porcelain but still offer solid performance in areas with moderate usage. Ceramic tiles come in many finishes and colors, which makes them a great pick for homeowners who want a budget-friendly way to experiment with classic black-and-white floors or softer combinations like taupe and ivory.
However, ceramic is slightly more porous than porcelain, so it's better suited for wall applications or dry areas unless sealed properly. With careful planning and installation, though, it can create a clean, polished look that still feels high-end. It’s a good option for powder rooms, guest bathrooms, or accent floors that won’t face heavy daily use.
Peel-and-Stick Tiles
For renters or anyone seeking a fast and budget-conscious upgrade, peel-and-stick tiles offer a temporary way to achieve the checkerboard look. These adhesive-backed tiles are easy to apply and remove without damaging the floor underneath. They’re available in a variety of materials and finishes, including vinyl and laminate, and work best in small areas like laundry nooks, mudrooms, or closets.
While peel-and-stick tiles aren’t built for long-term wear and tear, they’re an approachable way to test out checkerboard styling without the permanence of traditional tile. Just be sure to install them on a clean, flat surface for the best results, and keep in mind that moisture-heavy areas may require additional sealant or adhesive.

Installing Your Checkerboard Floor
Checkerboard flooring has the power to transform a room with its timeless contrast and visual charm. Whether you're refreshing an existing space or planning a brand-new installation, proper preparation is key to achieving that crisp, high-impact finish. Below is a general guide to the installation process, but for best results, it’s always wise to bring in professional flooring installers. They can address surface-specific concerns and ensure your checkerboard layout is not only beautiful but built to last.
Subfloor Preparation
If you're working with a newly constructed space, subflooring is typically already in place. In renovation settings, though, any old flooring will need to be removed to reveal the subfloor underneath. This surface should be checked for cracks, moisture issues, or unevenness, all of which can affect the outcome of your tile work. If the surface isn’t in good shape, it’s best to replace it or reinforce it with cement boards to provide a smooth, stable foundation.
Getting the subfloor right is one of the most important steps in the process. A flawed base can lead to cracked tiles, uneven surfaces, or alignment issues over time. Taking the time to inspect and prep this layer properly can save you from costly repairs down the line and help ensure a professional-looking finish from the ground up.
Tile Placement
Once your subfloor is prepared, it’s time to map out the tile layout. In rooms with clear symmetry, beginning the layout from the center and working outward helps the checkerboard pattern feel balanced and intentional. Use a laser level or chalk lines to keep everything aligned as you go; this step is crucial for maintaining consistent lines, especially with bold, contrasting tile colors.
Before permanently setting any tiles, do a dry layout. This allows you to test spacing, confirm placement, and make adjustments before adhesive is involved. It's also a helpful way to catch any misaligned cuts or pattern shifts that could disrupt the final look.
Applying Mortar
With your layout planned, the next step is applying mortar to the back of each tile using a method called back-buttering. Spread a layer of mortar evenly across the cement board, then add a thin coat to the tile itself. A notched trowel creates ridges in the mortar, allowing for a better grip and preventing air bubbles that could weaken the bond. Match your trowel size to the tile dimensions; larger tiles require deeper grooves to hold securely.
Work in small sections to prevent the mortar from drying out before tiles are set. Apply pressure as you press each tile into place, checking that it’s firmly bonded. Take your time with this stage, solid adhesion is key to long-term durability and a clean, even appearance.
Spacing and Leveling
Spacers are essential for maintaining even grout lines and ensuring your tiles are all level with one another. A standard 1/8-inch spacer works well for most checkerboard tiles, though tighter grout lines can be achieved with slimmer spacers if that’s your aesthetic preference. Place spacers at each corner and double-check alignment as you work across the floor.
Keep a small level on hand and check each section before moving on. Uneven tiles or inconsistent spacing can break up the visual rhythm of the checkerboard pattern, so small adjustments during installation can make a big difference in the finished look.
Choosing and Applying Grout
Grout color can either reinforce your checkerboard contrast or soften it. Many homeowners opt to match the grout to the lighter tile for a subtle, balanced finish, while others prefer darker grout for added definition and easier upkeep in busy areas. No matter the color, unsanded grout is best for most marble-look or high-gloss tiles, as it reduces the risk of scratching.
Be sure to mix your grout to the right consistency and work it into the joints evenly with a rubber float. After a short set time, clean the tile surfaces with a damp sponge, working diagonally to avoid pulling grout from the joints. With careful application, your grout lines will enhance the pattern rather than distract from it.

Best Areas to Showcase Checkerboard Flooring
Porcelain tiles offer both durability and design flexibility, making them a standout choice for checkerboard flooring across different areas of the home. Whether mimicking marble, stone, or concrete, these tiles combine style with practicality, bringing classic charm and long-term performance to any room.
Entryway
Checkerboard flooring in the entryway creates an immediate focal point that sets the tone for the rest of the home. Large-format, high-gloss porcelain tiles in a black and white pattern lend a timeless, dramatic touch. This layout not only looks polished but also handles heavy usage with ease, especially when paired with darker grout that conceals wear. The result is a durable, eye-catching entrance that leaves a lasting impression.
Kitchen
Porcelain checkerboard floors are ideal for kitchens, as seen with our Palmer 12x12 Checkerboard Matte Porcelain Tile in White and Grey above, where performance and visual impact go hand in hand. Stone-look or terrazzo-inspired tiles offer durability while blending seamlessly with a range of cabinetry finishes. The pattern adds a sense of movement and contrast, helping to energize the room without overwhelming it. It’s a smart design choice that balances beauty with everyday functionality.
Living Room
In the living room, checkerboard tile can introduce structure and visual flow to an open space. Lighter finishes like polished stone help ground the room while maintaining an airy, elegant feel. The bold pattern naturally leads the eye toward focal points, such as a fireplace or central seating area. For added comfort, consider underfloor heating beneath the tiles to make the space even more inviting.
Bathroom
Using porcelain checkerboard tiles in the bathroom elevates the space with timeless style and clean contrast. The alternating colors can visually enlarge a small room, while the durable material stands up well to daily moisture. Choose slip-resistant finishes for added safety in wet areas without sacrificing aesthetics. The end result is a bathroom that feels both refined and highly functional.
Laundry Room
In laundry rooms, porcelain tiles in a checkerboard layout offer both durability and a design boost. Concrete- or stone-look tiles can handle splashes, spills, and humidity without showing wear. The patterned floor adds charm to an otherwise utilitarian space while helping to hide minor messes. It’s a low-maintenance upgrade that makes daily routines feel a bit more refined.
Bringing Your Checkerboard Vision to Life
Checkerboard floors are more than a passing trend; they're a timeless design move that brings structure, contrast, and charm to any room. With the right materials and a thoughtful layout, you can create a space that feels both elevated and personal. Whether you’re drawn to bold black and white or prefer softer, more subtle tones, this classic pattern can be tailored to suit any style.
To help you get started, Edward Martin offers high-quality 4" x 4" samples that accurately reflect the color and finish of each tile collection. Our team is here to guide you from your first idea through to the final details. You’ll receive personalized support, curated samples, and expert recommendations every step of the way. If you’re ready to bring your vision to life, reach out to our design team for one-on-one assistance and a smoother, more inspiring design journey.

Frequently Asked Questions About Checkerboard Flooring
Even with a solid design plan, you may still have a few lingering questions before committing to checkerboard flooring. From material choices to upkeep and layout tips, the details matter when creating a space that lasts. Below, we answer some of the most common questions to help you move forward with clarity and confidence.
What are the best materials for checkerboard flooring in busy areas?
Porcelain is one of the top choices for busy spaces thanks to its durability and low maintenance. It resists scratches, moisture, and stains, making it ideal for kitchens, entryways, or laundry rooms. Plus, it offers the look of marble or natural stone without the added upkeep.
Can checkerboard flooring be used in outdoor settings?
Yes, it’s possible to bring the checkerboard look outdoors using durable materials like porcelain or natural stone. Just make sure the tiles have the proper slip resistance and are installed over a base suited for exterior use. With the right prep, checkerboard floors can handle changing weather while looking sharp year-round.
How do I maintain checkerboard flooring to keep it looking new?
Regular sweeping and cleaning with a pH-neutral floor cleaner will help preserve the finish. Porcelain tiles require very little effort, though occasional deep cleaning can help keep grout lines fresh. Avoid abrasive products, especially on high-gloss or polished surfaces.
Are there any eco-friendly options for checkerboard flooring?
Yes, many eco-conscious options are available, especially from Edward Martin. Our tiles are made with 95% locally sourced materials and contain up to 45% recycled content. This helps minimize environmental impact while maintaining the quality and design flexibility you're looking for.
How do I choose the right size tiles for my checkerboard flooring project?
Tile size plays a key role in how the pattern looks and feels within a space. Larger tiles can help open up small rooms, while smaller tiles offer a more intricate, traditional look. Aim to choose a size that creates balance across the room, allowing full tiles to be visible wherever possible.
