



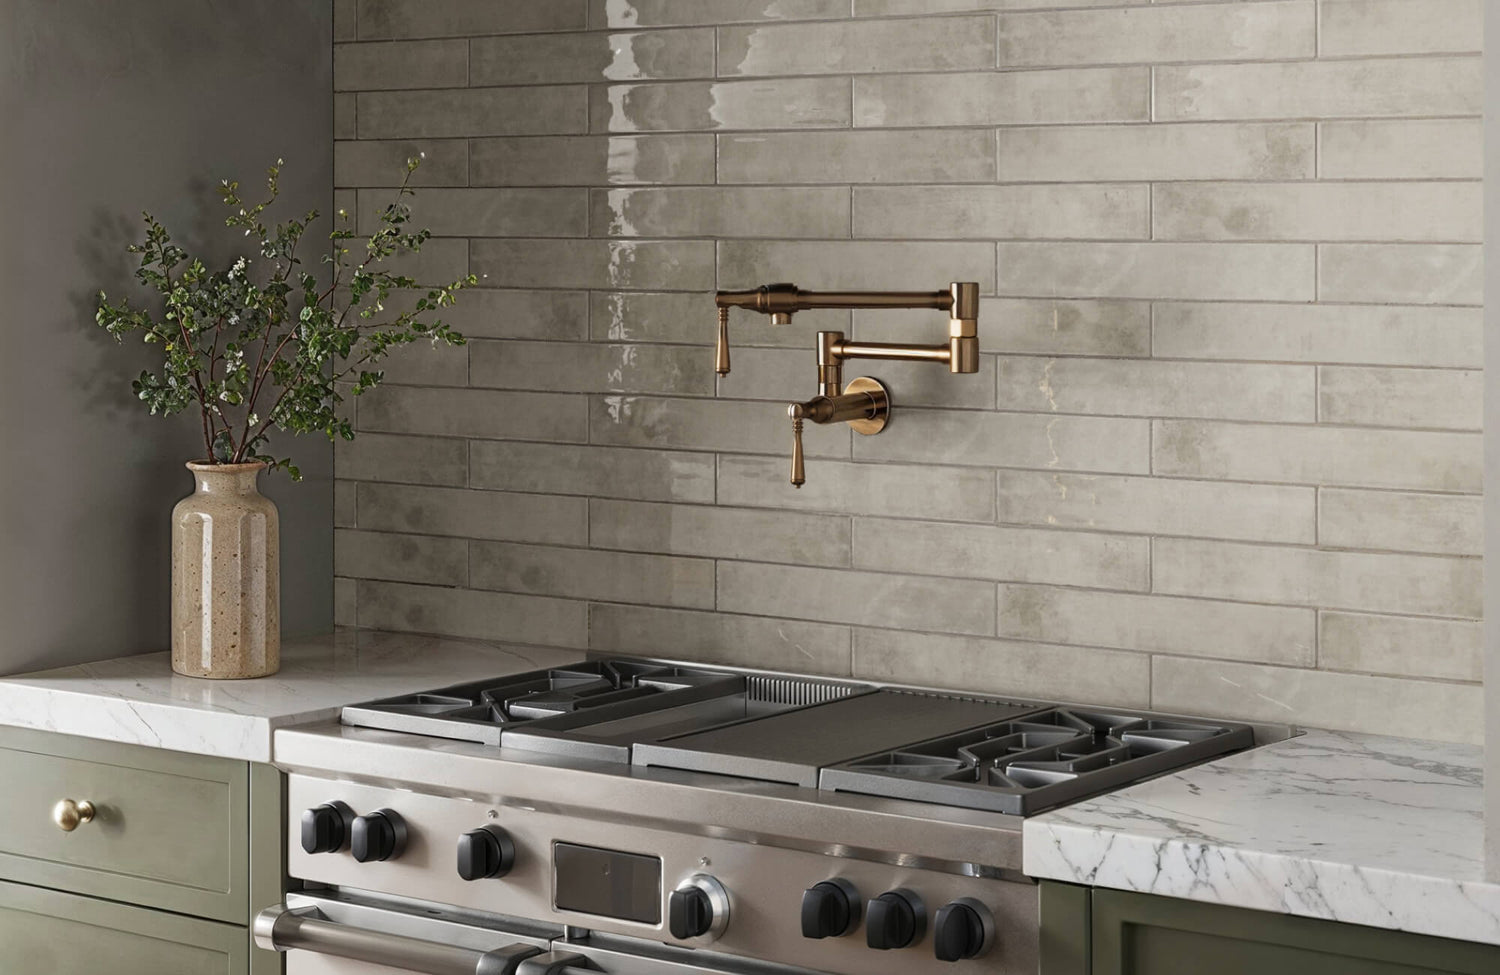
Subway tiles are a timeless design choice, known for their versatility and clean, classic appeal in kitchens, bathrooms, and beyond. While selecting the color and pattern might feel straightforward, determining where the subway tiles should end often proves more challenging. The endpoint plays a crucial role in shaping both the look and functionality of your space.
This guide will walk you through key design principles and practical tips to help you achieve a polished, cohesive finish that perfectly complements your space. From aligning with architectural features to addressing practical considerations like moisture protection and maintenance, thoughtful placement can make all the difference.

Following the Natural Lines of the Space
Before deciding how high or far your subway tiles should go, it helps to look at the room itself. Architectural features often provide natural stopping points that make the tile layout feel intentional and well-integrated.
Aligning Tiles with Structural Features
Subway tiles can blend beautifully with the room’s architectural elements when placed thoughtfully. Natural breaks, like windowsills, doorframes, or corners, make logical stopping points and help avoid awkward transitions. Tiling up to alcoves, built-in shelving, or ceiling beams can create a visually grounded effect, making the tiles feel like part of the room’s structure.
Ceiling Height and Visual Continuity
Ceiling height greatly influences how open or intimate a tiled space feels. In rooms with high ceilings, extending the subway tiles all the way up can accentuate vertical lines, creating a modern, airy atmosphere. In contrast, stopping the subway tiles partway up the wall adds warmth and coziness, making it an ideal choice for bathrooms or smaller spaces. For sloped or vaulted ceilings, you can follow the angle to introduce a dynamic, architectural element, or opt to stop at a consistent height for a more traditional, balanced look.
Open-Concept Challenges
In open-concept spaces, deciding where subway tiles should end can be challenging without clear, natural dividers. However, subtle design cues can help guide these choices. Aligning tile endpoints with prominent features like kitchen islands, furniture arrangements, or ceiling beams creates gentle visual boundaries while preserving the open, airy feel of the space. By thoughtfully incorporating these elements, the subway tiles enhance the room's natural flow, resulting in a unified look that seamlessly connects the different areas.

Creating Visual Impact with Tile Endpoints
Once you’ve identified natural boundaries, you can start using tile endpoints more deliberately as a design feature. Where subway tiles end can either subtly blend into the space or create a striking visual statement.
Incorporating Borders or Edging for a Finished Look
To give your subway tiles a clean, intentional finish, incorporating borders or trim pieces like bullnose tiles or metal edging is key. These details prevent tiles from appearing abruptly cut off while creating a smooth transition to adjacent surfaces. Beyond their practical role, trim pieces can also introduce contrast, texture, or subtle definition that enhances the overall design.
For example, the Jaden 0.75x16 Glossy Ceramic Bullnose Tile in Hunter, as shown above, adds a sleek, refined edge that frames subway tiles beautifully. Its glossy finish brings depth and a hint of boldness, helping define tile endpoints without overwhelming the space. For a more understated look, neutral trims can create a seamless transition that blends effortlessly with surrounding materials.
Half-Wall Tiling for a Classic Wainscoting Look
For a more traditional approach, consider stopping subway tiles halfway up the wall, similar to classic wainscoting. This layout adds texture while allowing room for complementary paint or wallpaper above, creating a balanced contrast without overwhelming the space.
In many bathrooms and powder rooms, half-wall subway tile is typically installed at around 36 to 42 inches high, or roughly one-third of the wall height, depending on ceiling proportions and trim details. This placement not only enhances visual structure but also protects lower walls from moisture, scuffs, and daily wear, making it both practical and timeless.
Full Wall Tiling for a Dramatic Effect
Extending subway tiles across an entire wall creates a sleek, modern look that works especially well in kitchens and bathrooms. Running tile from floor to ceiling emphasizes vertical space, making ceilings feel taller and the room more cohesive.
Full-wall tiling is particularly effective behind vanities, ranges, or open shelving, where a continuous surface enhances both function and visual impact. Glossy finishes further amplify light reflection, helping smaller spaces feel brighter and more open while maintaining a clean, streamlined aesthetic.

Tailoring Tile Endpoints to Different Spaces
While general design principles are helpful, the ideal tile endpoint often depends on the room itself. Each space comes with its own functional needs and layout considerations that influence where tiles should begin and end.
Bathroom Walls and Shower Areas
In bathrooms, subway tiles serve both functional and aesthetic purposes. In shower areas, extending tiles from floor to ceiling ensures full water protection while creating a clean, uninterrupted look. For example, the Maisie 2.5x16 Glossy Ceramic Tile in Ocean, as shown above, brings depth and a calming, spa-like feel, while its glossy surface reflects light to make smaller showers appear more open.
Outside the shower, half-wall applications, often around 36 to 42 inches high, offer a classic look that pairs well with complementary paint or wallpaper above. For a more cohesive design, extending tiles to the ceiling around vanities can unify the space and create a more finished appearance.
Since bathrooms are exposed to frequent moisture, proper installation and waterproofing are essential to maintain durability and prevent long-term issues like mold or grout deterioration.
Kitchen Backsplashes
In kitchens, subway tile backsplashes typically extend from the countertop to the underside of upper cabinets, a space that is often around 18 inches high. This standard height provides practical protection against splashes while maintaining a clean, proportional look.
In kitchens without upper cabinets, extending subway tiles to the ceiling, or aligning them with features like range hoods or open shelving, creates a more seamless and elevated design. This approach draws the eye upward and enhances the sense of space, especially in open or airy layouts.
Pairing glossy white subway tiles with darker grout adds contrast and definition, helping highlight the layout while coordinating with cabinetry, countertops, and hardware for a cohesive finish.
Laundry Rooms and Powder Rooms
Laundry rooms and powder rooms are ideal for experimenting with more expressive subway tile designs. In laundry areas, installing tiles behind washers, dryers, or utility sinks helps protect against moisture and detergent splashes while adding visual interest.
For instance, the Harper 3x12 Glossy Ceramic Tile in Cerulean introduces a rich, saturated blue tone that instantly elevates the space. Its glossy finish reflects light beautifully, helping smaller or utilitarian areas feel brighter, while the elongated 3x12 format adds a modern update to the classic subway tile layout.
In powder rooms, these tiles can be used as an accent wall, commonly behind the sink or toilet, to create a focal point without overwhelming the space. Paired with contrasting fixtures or warm materials, subway tiles bring depth, personality, and durability to smaller areas that benefit from thoughtful design.

Balancing Aesthetics with Practicality
Beyond visual appeal, it’s important to consider how tile placement supports everyday use. The right endpoint should not only look cohesive but also protect surfaces and simplify maintenance.
Protecting Vulnerable Areas
Tiles act as a barrier in spaces prone to spills, splashes, and stains. In kitchens, subway tiles typically extend from the countertop to the bottom of the upper cabinets, protecting walls from cooking splatter. In bathrooms, subway tiles around sinks, bathtubs, and vanities prevent water damage while adding style. Extending tiles slightly beyond these heavy-used zones can offer extra protection and a more polished finish.
Long-Term Functionality and Adaptability
When planning your tile layout, it’s important to consider not just how the space looks now, but how it might evolve over time. If you anticipate future renovations, appliance upgrades, or furniture rearrangements, choosing flexible endpoints for your subway tiles can help you avoid unnecessary work and expenses later on. For example, stopping the tiles at a height that accommodates potential cabinetry updates allows for changes without the hassle of retiling. This thoughtful approach ensures your design remains versatile and continues to complement your space as it transforms over the years.
Easy Maintenance and Cleaning Considerations
Subway tile placement significantly impacts the ease of cleaning and maintaining your space, affecting both the functionality and durability of your design. Areas that experience frequent use, such as behind stoves, sinks, or laundry appliances, benefit from tiled surfaces that resist splashes and are easy to wipe clean, keeping everyday messes under control. To make upkeep even simpler, choosing darker grout or stain-resistant materials can reduce the visibility of dirt and grime, ensuring your space stays looking fresh with minimal effort.
Beyond selecting the right materials, proper installation is essential to ensuring your subway tiles remain durable and visually appealing over time. Hiring a professional installer guarantees a precise, polished finish while reducing the risk of issues like cracking or water damage in the future. To further protect your investment, following the manufacturer’s care recommendations will help maintain the tiles' appearance and performance, keeping your space both beautiful and easy to care for for years to come.

Smart Choices for Every Project
With both design and function in mind, your final decisions often come down to budget and efficiency. Strategic planning can help you achieve a refined look while making the most of your materials and resources.
Stretching Your Budget with Strategic Tile Placement
Maximizing your budget starts with focusing on high-impact areas where subway tiles will make the most visual difference. In kitchens, this often means limiting tiling to the backsplash area, which protects the walls while adding a stylish focal point behind the stove or sink. This targeted approach enhances the overall design without the added cost of tiling full walls.
Similarly, in bathrooms, creating a single accent wall, perhaps behind the vanity or in the shower, can add depth and character without requiring extensive tile coverage. This not only saves on materials and labor but also draws attention to key features in the space. By thoughtfully selecting where to place your subway tiles, you can achieve a polished, cohesive look that feels intentional and upscale, all while staying within the budget.
Reducing Waste with Thoughtful Layouts
Thoughtful planning plays a crucial role in minimizing waste and keeping your project within the budget. Start by measuring your space accurately and selecting tile sizes that align with the dimensions of your walls or floors. Opting for standard subway tile sizes such as 3x6 inch, and simple layouts, such as the classic brick pattern, can significantly reduce the number of cuts required, leading to less material waste and lower labor costs.
Additionally, planning the layout to avoid excessive cuts around windows, outlets, or corners not only conserves tiles but also contributes to a cleaner, more professional finish. For example, aligning subway tiles with the edges of cabinets or countertops creates seamless transitions and reduces the need for custom cuts. By approaching your tile layout with precision and efficiency, you can achieve a refined look while making the most of your materials and budget.
Mixing Materials for Budget-Friendly Design
Combining subway tiles with other materials, such as wood panels, wallpaper, or paint, is a great way to create dynamic, visually interesting spaces while keeping costs down. Mixing different textures and finishes also adds depth and gives you more flexibility in your design. For example, a tiled backsplash paired with wooden open shelving brings warmth and character to a kitchen, balancing modern and rustic styles. This approach elevates the overall look without the added expense of fully tiling the walls, making it both stylish and budget-friendly. By blending materials thoughtfully, you can create a space that feels natural and well put together.
Achieving the Perfect Finish with Subway Tiles
Hence, there’s no single rule for where subway tiles should end, it ultimately depends on your space, layout, and how you want the design to function and feel. The most successful tile endpoints align with architectural features, support daily use, and create a clean, intentional finish.
To make the process easier, use our Augmented Reality (AR) Visualization Tool to preview how different subway tile layouts and endpoints will look in your own space. You can also order tile samples to see colors, textures, and finishes up close, helping you make confident, well-informed decisions before installation.


