


Installing a ceramic tile backsplash might seem like a small detail, but it can make a big difference, both in style and in how your space handles daily wear. Whether you're working in a kitchen, bathroom, or utility area, a well-installed backsplash protects your walls while giving the room a clean, finished look. In this guide, we’ll walk you through the entire installation process, from planning and choosing tiles to sealing and long-term care. Whether you're doing it yourself or working with a pro, the steps below will help you make informed decisions and get lasting, polished results.

Planning and Measuring Your Space
Before you start tiling, take time to plan and measure your ceramic backsplash area thoroughly. Begin by calculating the total surface area, measuring both height and width, and don’t forget to subtract the space taken up by windows, cabinets, or appliances. It’s also important to factor in obstacles like electrical outlets, as they’ll require extra cuts and could affect your layout. By mapping things out ahead of time, you’ll know how much tile to buy and where to place your first row, helping avoid awkward gaps or uneven finishes.
Also, consider how the tile pattern will sit within your space. For instance, if you’re using a centered layout, you’ll want to ensure any cuts fall evenly at the ends for a clean look. Sketching or taping out your planned layout directly on the wall can help you visualize spacing and alignment before adhesive enters the mix. It’s tempting to jump into materials or tool selection here, but staying focused on layout and measurement now sets the tone for a smoother installation later.
To make planning easier, you can also use Edward Martin’s AR Visualization Tool. It allows you to preview different tile styles directly on your wall, giving you a clearer idea of spacing, alignment, and overall fit. It’s a helpful step for anyone wanting to feel confident in their layout before installation begins.

Choosing the Right Ceramic Tiles
Selecting the right ceramic tile sets the foundation for both the look and performance of your backsplash. From color and finish to size and shape, each detail contributes to the final result. Below, we’ll walk through the key factors that guide tile selection so your ceramic backsplash feels intentional and well-balanced, not just visually appealing but practical, too.
Tile Finish and Glaze
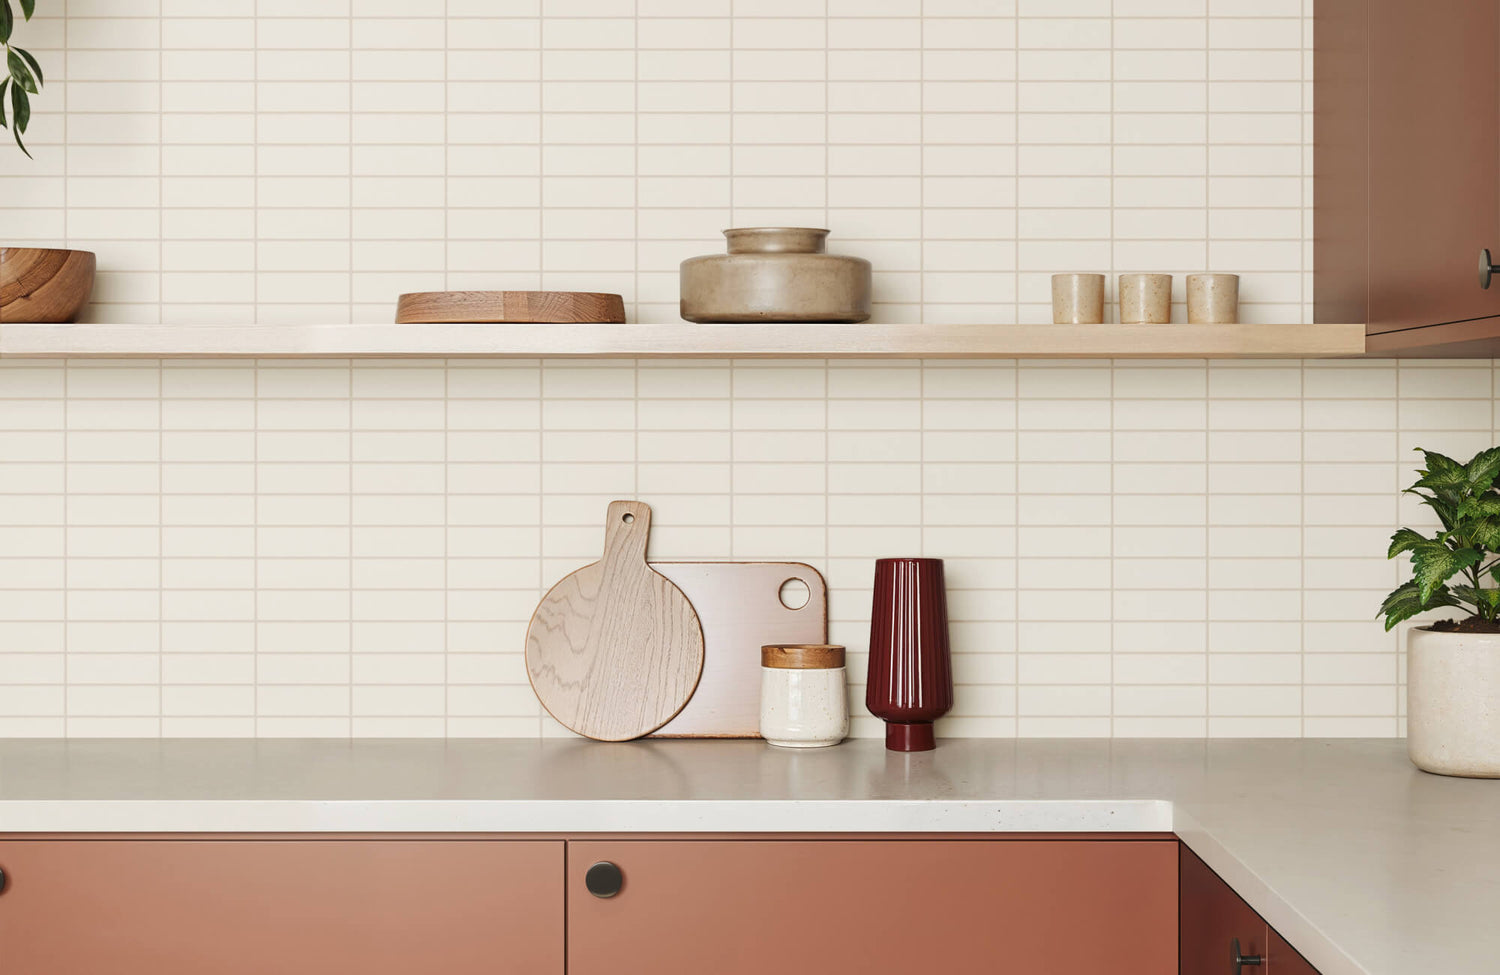
The finish of your tile plays a big role in both appearance and practicality. Glossy tiles, such as our Sarina 3x12 Glossy Ceramic Fishscale Tile in Cloud above for instance, reflect light beautifully, making them a great choice for kitchens that could use a brightness boost. They're also easy to wipe clean, which comes in handy for areas behind the stove or sink that tend to see more splashes. Still, their high-shine surface can sometimes highlight fingerprints or water spots more than you'd like.
Matte tiles, on the other hand, such as our Ellie 2.5x8 Matte Ceramic Tile in Eggshell, create a softer, more relaxed look and tend to hide smudges better. They’re ideal if you prefer a natural, understated aesthetic that blends seamlessly with wood cabinetry or stone counters. When it comes to glaze, highly glazed options resist moisture and staining better, which makes them a smart pick for kitchen environments. As you compare finishes, think about how much light your space gets and how hands-on you want your maintenance to be. A good balance between style and ease of care will go a long way.
Color and Pattern
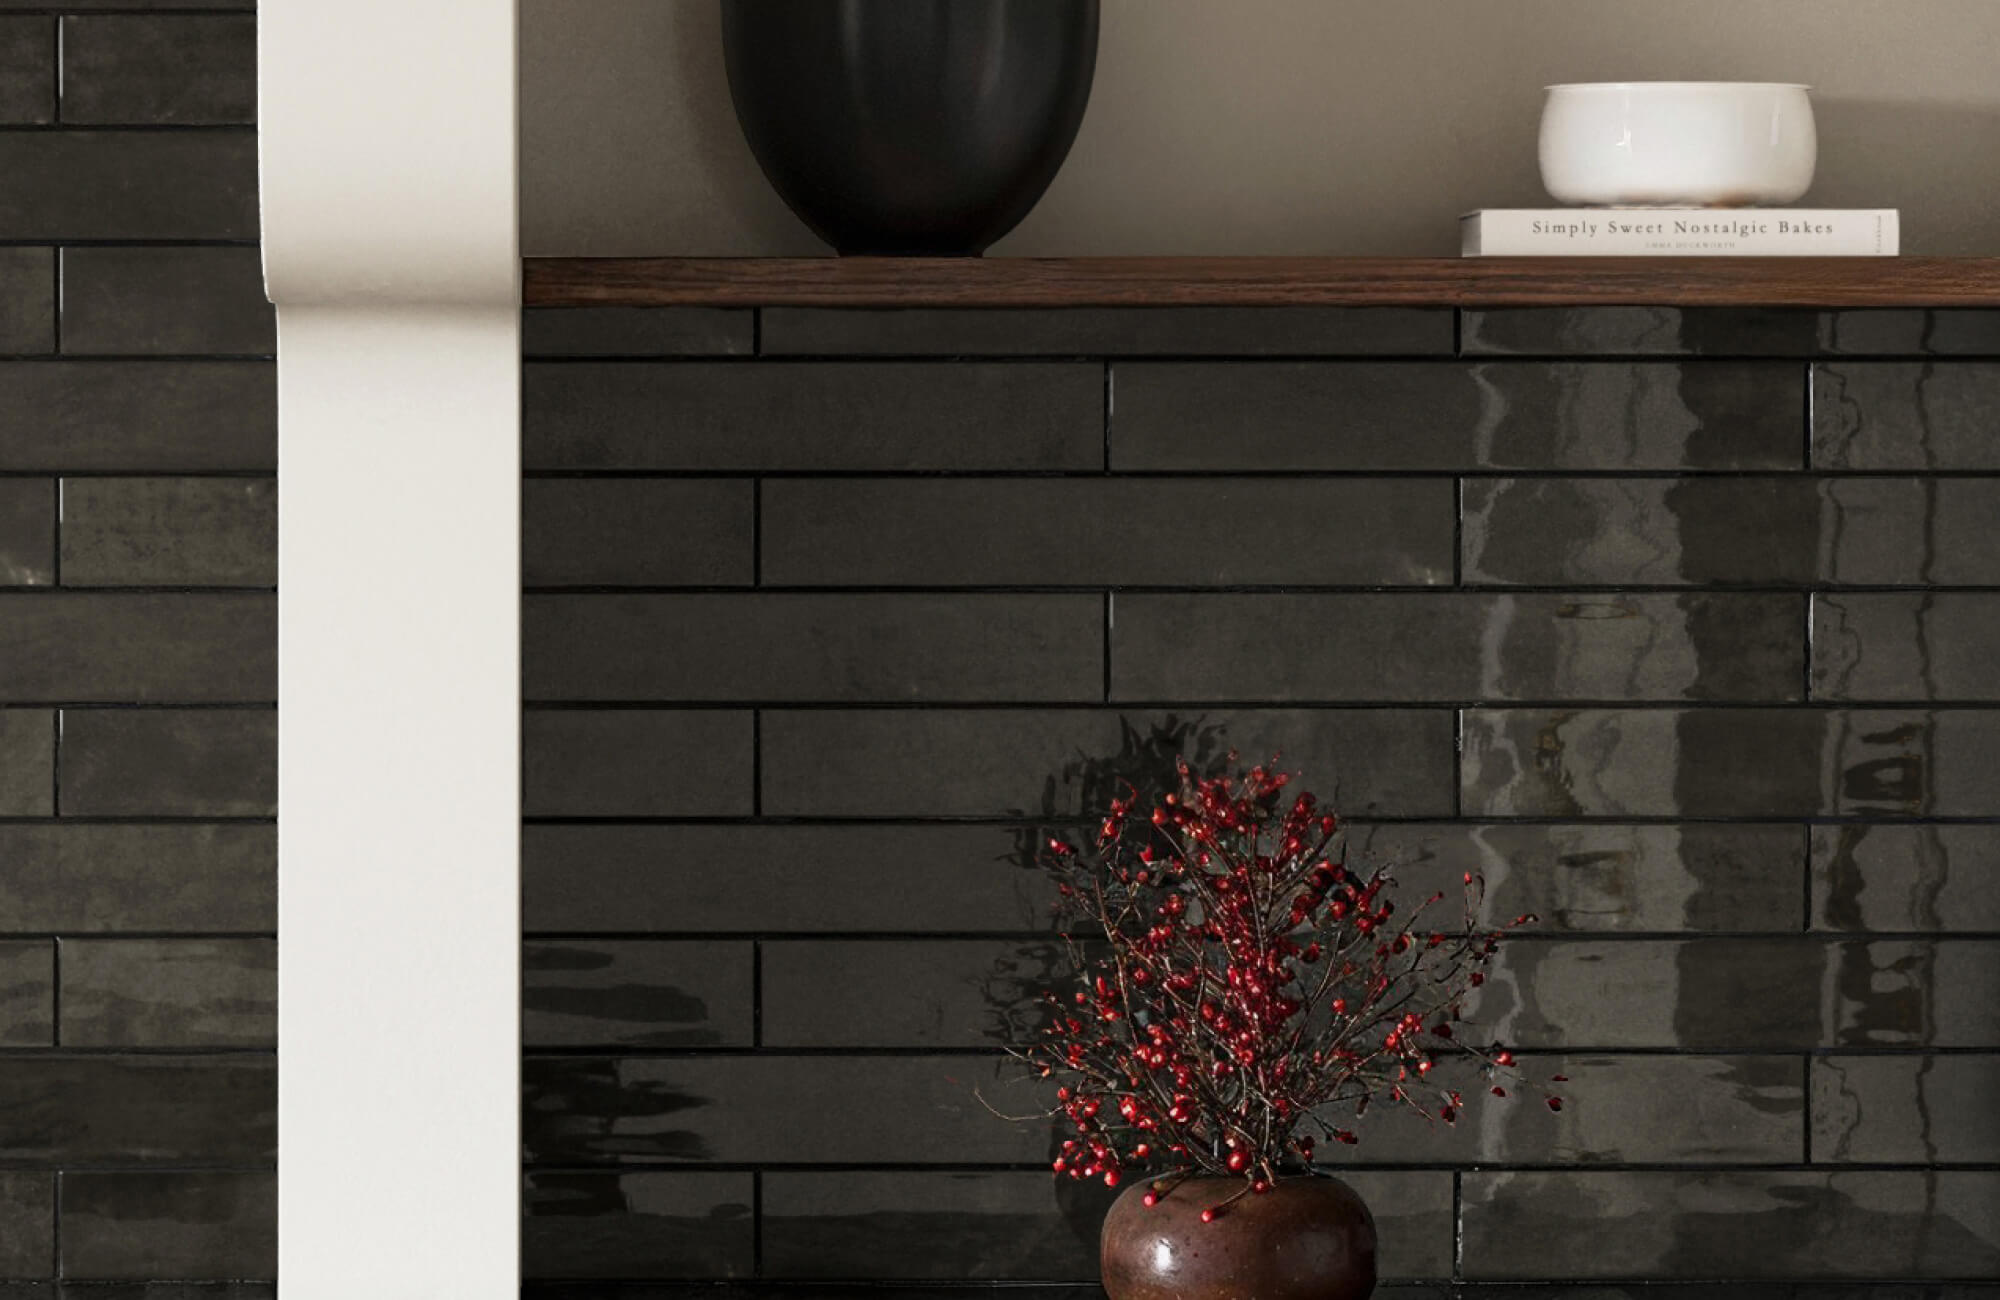
Tile color should work in harmony with the rest of your kitchen, your cabinets, countertops, flooring, and even wall paint. Light-colored tiles can make smaller kitchens feel more open, while darker ones add contrast and mood, especially when paired with white or natural wood elements. Neutrals are a safe bet if you're looking for something timeless that adapts well as your style evolves. They also help balance out bolder design features elsewhere in the room.
At the same time, don’t overlook the impact of pattern and texture. Solid tiles offer simplicity, but tiles with subtle tonal shifts or textures can bring depth without overwhelming the space. Just make sure patterned tiles don’t compete with busy countertops or detailed cabinetry. For example, if your counter has a lot of veining, a more muted backsplash tile may be the better choice.
Samples are especially helpful here, viewing a tile in your space will tell you more than a photo ever could. To help with your decision, we offer 4" x 4" samples that reflect the exact color and finish of our full-size tiles. This lets you see and feel the product in your home before committing to a full order.
Tile Size and Shape
Size and shape affect not just how your ceramic backsplash looks but how it functions day to day. Smaller tiles like mosaic or the classic 3x6 subway tiles are a go-to for many kitchens because they fit easily around outlets, cabinets, and other obstacles. Their neat proportions make them ideal for the backsplash area between upper and lower cabinetry, and they offer plenty of layout options, from stacked to staggered or even herringbone.
Larger sizes bring a different kind of appeal. They reduce grout lines, which can make a kitchen feel more streamlined and modern. However, they do require more precise planning, especially to avoid awkward cuts around corners or appliances. These are best for open wall spaces or contemporary kitchens where minimalism is the goal. Whichever size you choose, make sure it aligns with your kitchen’s scale and the feeling you want the space to convey.

Gathering Tools and Materials
Before you begin installing your ceramic backsplash, it’s a good idea to gather all the tools and materials you’ll need ahead of time. Being fully equipped not only keeps the process running smoothly but also helps avoid mid-project delays that can throw off your momentum. Whether you're tackling a full kitchen wall or just a small backsplash area, solid prep work sets the tone for a hassle-free installation.
Start with the basics: tile spacers, a notched trowel, and a tile cutter—either manual or electric, depending on your tile size and layout. You’ll also need setting materials like thin-set adhesive or mastic, depending on the type of wall and tile. A rubber float for spreading grout and a sponge for cleanup are just as essential. Don’t overlook safety gear, too—gloves, goggles, and a dust mask help protect you when mixing or cutting materials.
It’s also helpful to have a few extras within reach. For instance, painter’s tape can help mark your layout lines, and a utility knife comes in handy for trimming backing sheets or underlayment. A bucket and clean water will be needed for mixing and rinsing. With everything laid out beforehand, you can focus entirely on the install instead of scrambling for supplies midway through.

Prepping the Wall Surface
Getting your wall ready before tiling is one of the most important steps in ceramic backsplash installation. A clean and even surface ensures that your tiles will stick properly and stay in place over time. Skipping or rushing this step can lead to poor adhesion, crooked lines, or even loose tiles down the road.
Begin by cleaning the wall thoroughly, using a damp sponge to remove grease, dust, or any leftover debris. If the surface is glossy or previously painted, lightly sand it to help the adhesive grip better. Look out for holes, dents, or uneven patches as well. These should be filled with a patching compound and sanded smooth after drying. It’s also important to check for flatness by holding a straight edge against the wall; any major bulges or dips should be corrected before moving forward.
You’ll want to make sure the area is dry and fully cured before applying any adhesive. For instance, if you've done any patching or sanding, give the surface a final wipe to remove fine dust. A properly prepped wall not only improves the final look of your backsplash, but it also makes the actual tiling process much smoother.

Installing the Ceramic Tile
This is where your backsplash truly starts to take shape. With your layout finalized and tools ready, you’ll begin adhering the tiles to the wall using thinset or mastic. Each step in this process, from dry layout to final grouting, builds on the one before it, so patience and precision go a long way. If you're unsure about cutting tiles or applying adhesive, it’s always smart to consult a licensed tile installer to avoid mistakes and ensure your ceramic backsplash stands the test of time.
Laying Out the Tile Pattern
Before any adhesive goes down, dry-laying your tiles gives you one last chance to visualize the pattern and make final tweaks. Center your layout on the wall to avoid awkward cuts at the edges, and be sure to plan for how full or partial tiles will frame outlets or cabinets. It's also smart to mix tiles from different boxes to balance out any slight color variations.
Taking this time upfront can prevent design regrets later. You’ll also want to double-check spacing with your tile spacers and confirm that your starting point is level. Once satisfied, you’re ready to move into setting the tile permanently.
Setting the Tiles in Place
Once you're happy with your layout, it's time to start installing the tiles. Apply thinset or mastic adhesive using a notched trowel, working in small sections so the adhesive doesn’t dry before tiles are placed. Press each tile firmly into the wall, using spacers to maintain even gaps and a level to check your lines as you go.
Start from the centerline or bottom edge, depending on your layout plan, and work outward in rows. Be sure to periodically step back and check the alignment to catch any shifting or uneven lines early. This part takes patience, but a steady pace helps ensure clean, consistent results that last. Let the tiles sit undisturbed for the time recommended by the adhesive manufacturer, usually around 24 hours, so the bond fully sets before grouting.
Cutting Tiles for Edges and Outlets
Cutting is often where ceramic backsplash projects get a bit more hands-on. Use the appropriate tile cutter, manual for straight cuts, or a wet saw for more complex shapes, to size pieces that fit along the wall’s edges or around outlets and corners. Always measure carefully and mark each tile before cutting to avoid waste or crooked lines.
Safety is important here, so wear goggles and gloves to protect yourself from shards or dust. While it may feel tedious, precise cuts make a huge difference in the finished look. Focus on achieving clean edges that sit flush against trim or fixtures for a polished, professional result.
Grouting and Finishing the Surface
After the tiles have fully set, it’s time to complete your ceramic backsplash with grout. Choosing the right grout color makes a big impact; it can either blend seamlessly with your tiles or create a bold contrast to highlight the pattern. Using a rubber float, spread the grout diagonally across the surface, pressing it into the joints evenly. Be sure to work in small sections to avoid the grout drying too quickly before you wipe it down.
Once the joints are filled, use a damp sponge to remove excess grout from the tile surfaces, rinsing frequently for a clean finish. It’s important to let the grout cure for the time recommended on the packaging, usually 24 to 72 hours, before exposing it to moisture or heavy use. For added protection, especially in moisture-prone areas, consider applying a grout sealer once it’s fully cured. This final step helps preserve the finish and keeps your backsplash looking sharp over time.

Sealing and Maintenance Tips
Once your grout has cured, sealing it is a quick but essential step that protects it from stains, moisture, and daily wear. Most grout sealers are easy to apply; just use a sponge or brush, let it absorb, then wipe off any excess. Be sure to choose a sealer that works with your specific grout type; for instance, water-based options dry faster, while solvent-based ones often provide more long-lasting protection. Depending on how often you use and clean the space, reapplying the sealer every six months to a year is usually enough to keep things in good shape.
When it comes to ongoing care, keeping your ceramic backsplash looking great is all about small, consistent habits. A quick wipe with a soft cloth or mild cleaner after cooking helps prevent grease and grime from setting in. It’s also a good idea to periodically check for cracked grout lines or any loose tiles that may need attention. Avoid abrasive pads or strong chemicals that could scratch the tile or break down the sealer. With just a bit of upkeep, your ceramic backsplash will stay vibrant, clean, and durable for years to come.

Common Mistakes To Avoid
Even with a clear plan, it’s easy to overlook key steps that impact the final result of your ceramic backsplash. One of the most common missteps is rushing through wall prep; tiles won’t adhere properly to uneven, dusty, or damaged surfaces. Skipping the layout stage is another issue. Without a dry layout, you might end up with poorly centered designs or tiny, awkward tile slivers at the edges.
Adhesive choice also plays a big role. Using the wrong type for your setting, like applying mastic where thinset is needed, can lead to poor bond strength or moisture-related issues. Grouting mistakes are just as common, whether it’s waiting too long to wipe off excess grout or applying it unevenly. These oversights can dull the final appearance and make future cleaning harder than it needs to be. By avoiding these avoidable pitfalls, you’ll get a more polished, durable result with far fewer regrets.
Bringing Your Backsplash Vision to Life
Installing a ceramic backsplash is one of those upgrades that brings both function and style to your space when done thoughtfully. Each phase, from planning and layout to tile selection and sealing, plays a part in the final result. Taking the time to prep carefully and avoid common mistakes helps ensure your backsplash looks polished and performs well over time.
If you’re unsure where to start or need help tying your vision together, our design experts are here to support you. Book a personalized consultation and get guidance on tile pairings, layout strategies, and practical finishes tailored to your home. With the right advice, creating a backsplash you’ll love becomes a whole lot easier.