


Removing a ceramic backsplash might seem like a small task, but it can reveal more than you expect once you start. From hidden wall damage to stubborn adhesives, a simple demo can quickly grow into something bigger without the right prep.
In this article, we’ll walk through what to check before removing tile, how to handle cleanup, and when to bring in a professional. Whether you're planning to repaint, re-tile, or fully update your space, knowing what lies behind the backsplash helps you move forward with confidence.

Know What You’re Working With Before You Start
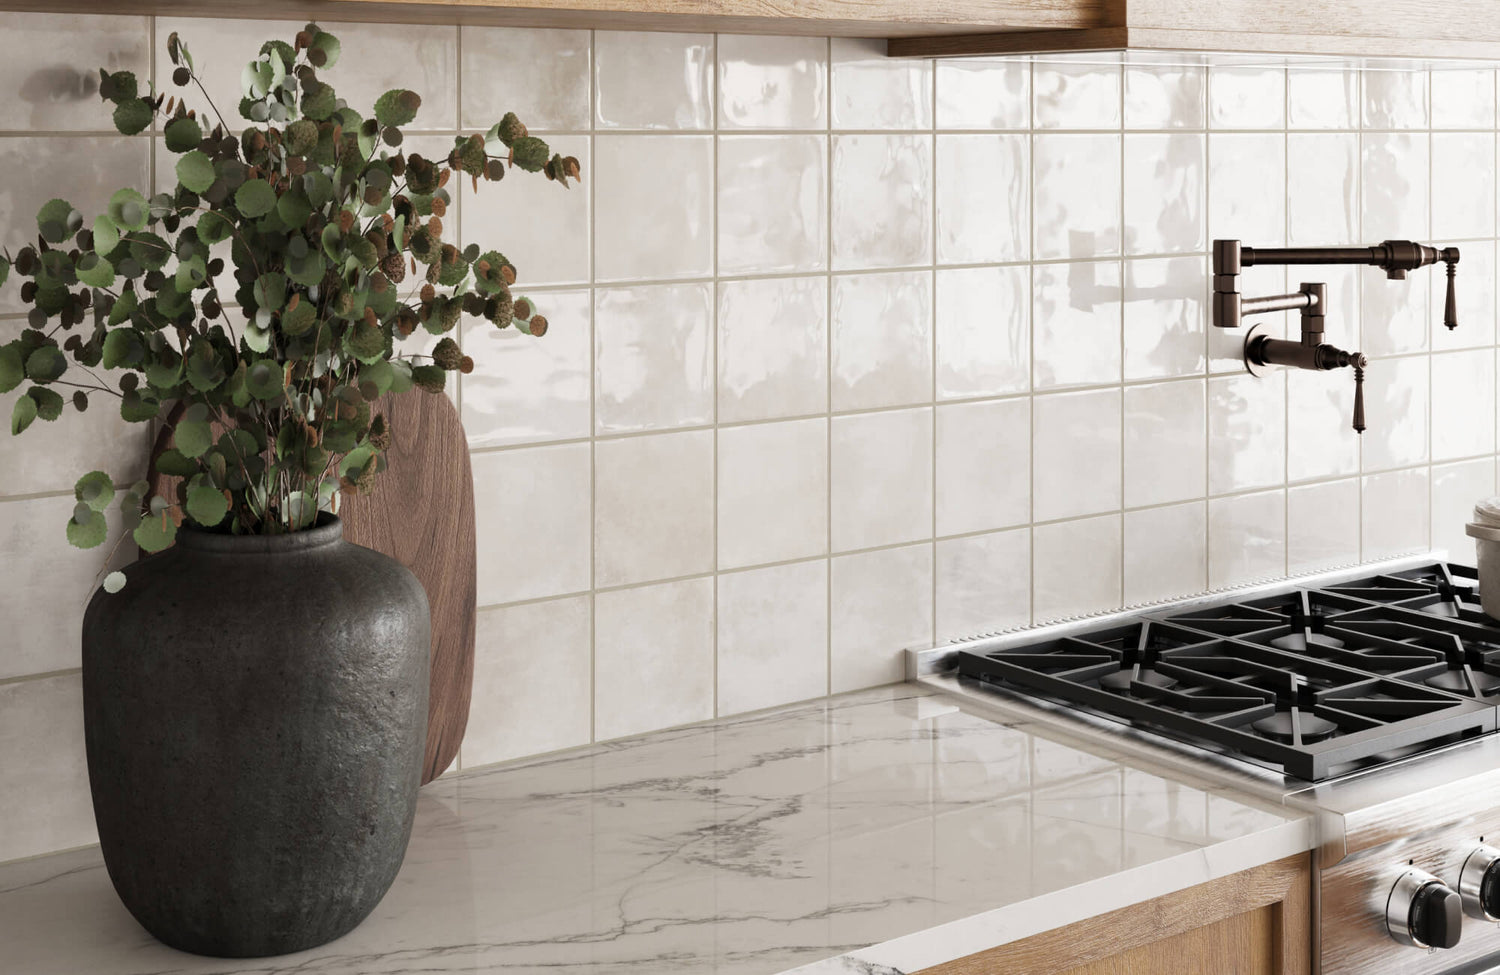
Before jumping into removal, it’s important to know exactly what kind of tile you’re working with. Ceramic tiles, such as our Catalina 2x16 Matte Porcelain Tile in Cream above, come in different finishes, like glazed or unglazed, which affect how easily they chip or crack during removal. Glazed tiles tend to have a glassy coating and are more brittle, while unglazed options are thicker and more textured. You should also take note of the tile size and thickness—larger tiles or extra-thin ones might require a more careful approach later on.
Equally important is the wall surface underneath the tile. Some backsplashes are set on drywall, while others might be installed over cement board or even old plaster. Each of these materials reacts differently once the tile starts coming off—for instance, drywall is prone to tearing, while cement board holds up better but can chip. Knowing what’s behind the tile helps you prepare mentally for what kind of patching or cleanup you might be facing once everything’s removed.

How to Tell If Your Tile Was Installed with Mastic or Thinset
Before tackling tile removal, it helps to know what kind of adhesive you're dealing with: mastic or thinset. Each behaves differently during removal and affects both the time and care needed. Spotting the difference early can help you avoid unnecessary wall damage and better plan your next steps.
Quick Ways to Spot Adhesive Type
Start by checking the texture and color left behind the tiles. Mastic is usually cream or tan, sticky, and softer, even a bit rubbery if it hasn’t fully cured. Thinset tends to be gray or white, gritty, and rock-solid to the touch. For instance, if the adhesive crumbles into powder when you scrape lightly, it’s likely thinset. Also, mastic is common in dry areas, while thinset is typically found in kitchens or bathrooms with higher moisture.
Why It Matters for Removal
Knowing the adhesive type lets you set realistic expectations and choose the right strategy. Mastic may peel away more easily, but can leave sticky patches that still need careful cleanup. Thinset, however, is harder to break up and usually takes more elbow grease, especially on cement board. Also, understanding what you’re working with early on helps reduce the chances of gouging the wall or over-scraping areas that need a gentler hand.

What to Know About Wall Damage Before Starting
Before pulling off any tile, it’s important to understand what kind of wall damage you might uncover or even cause during the process. Ceramic backsplash removal isn’t always clean, especially if the adhesive was strong or the wall wasn’t properly sealed. Being aware of these risks helps you take a more cautious approach and avoid turning a simple project into a full repair job.
Walls behind tile often suffer from torn drywall paper, small holes, or crumbling spots, especially if the tiles were installed with thinset. For example, even gentle prying can rip through the top drywall layer if it's not done slowly. You might also notice uneven surfaces where the adhesive pulled away chunks of wallboard. These issues are common and manageable, but still something you’ll want to spot early rather than halfway through.
Sometimes the damage you find runs deeper than just surface wear. Dark spots or musty smells behind tiles could be signs of hidden moisture or even mold, especially in older kitchens or poorly ventilated areas. In rare cases, you might uncover structural problems like wood rot or unstable framing behind the wall. If anything looks suspicious or feels soft to the touch, it’s best to pause and bring in a professional before continuing.

How Long Does It Take to Remove a Ceramic Backsplash?
Timing can vary depending on your setup, but it helps to know what to expect before jumping in. Whether you're doing it yourself or hiring help, having a realistic idea of how long the process might take can prevent frustration and poor planning. Below, we’ll explore the average timelines and what tends to slow things down.
DIY vs. Professional Timeline Expectations
If you’re handling the removal yourself, expect it to take anywhere from a full afternoon to an entire weekend, depending on your pace and the size of the space. Pros usually work faster thanks to experience and proper tools, often completing removal in a few hours for smaller areas. That said, unexpected issues, like stubborn adhesive or tricky corner tiles, can extend even to a professional job. It’s better to plan for more time than less, especially if you're juggling other renovation steps.
Factors That Can Slow You Down
Several elements can stretch out the timeline beyond what you might first expect. For instance, larger or thicker tiles often take more effort to dislodge, especially if installed with a strong adhesive like thinset. Previous repairs under or around the backsplash, like patched drywall or uneven seams, can also add extra steps. And if the tiles were custom-fit around outlets or fixtures, you’ll need more precision (and patience) to work through those sections carefully.

Tools and Prep Work You’ll Need
Before you start chipping away at your backsplash, it’s worth taking the time to gather the right tools and prep the area properly. Having everything ready makes the process safer, cleaner, and far less frustrating. You won’t need anything too specialized, but a few basic tools and protective items go a long way in keeping things on track.
Start with essentials like a utility knife, pry bar, painter’s tape, dust mask, and heavy-duty gloves to protect your hands from sharp tile edges. A sturdy chisel and safety goggles are also useful, especially if tiles break as you remove them. Then, focus on the space itself: cover your countertops with a drop cloth or cardboard to prevent damage, and be sure to turn off power to any nearby outlets. These simple steps not only make cleanup easier but also help avoid accidental mishaps while you work.

Step-by-Step Guide to Removing Ceramic Tile Backsplash
Once you're prepped and ready, the actual tile removal process becomes more manageable when broken down into clear steps. Taking it slow and following a logical sequence helps reduce the risk of damaging your wall or surrounding surfaces. If you're unsure about your wall type or adhesive, it’s best to check with a professional first to avoid costly mistakes.
Loosening the First Few Tiles Safely
Getting started is often the hardest part, especially if the tile edges are sealed tightly with grout or caulk. Begin by scoring along the grout line using a utility knife to create a break in the seal. This makes it easier to wedge in your tools without putting too much pressure on the surface beneath. For example, check near outlets or the end of a tile row; these spots often have a looser edge to begin with.
Once you've made your first cut, ease in a thin pry tool or putty knife and gently lift the tile. Avoid using too much force; applying pressure too early can crack the wall or chip the surrounding tiles. It’s better to wiggle the tile slightly to test its movement before committing to a full lift. Taking your time at this stage makes the rest of the process go more smoothly as well.
Removing Remaining Tiles in Sections
After the first tile comes off, the rest usually follow more easily, especially when removed in small sections. Use a flat tool or chisel to apply steady pressure behind each tile, working slowly to avoid tearing into the wall. Also, try to stay level with the wall as you push; the more consistent your angle, the less likely you’ll damage the surface behind.
Take occasional breaks to assess your progress and check for leftover adhesive that may need extra scraping. For instance, if tiles start pulling off chunks of drywall, pause and adjust your approach. Removing tiles in sections helps you stay organized and reduces cleanup time later. It keeps the workspace manageable, too, which is especially helpful if you're doing this alone.
Dealing with Stubborn Tiles Without Causing Damage
Some tiles may be extra stubborn, either because they’re brittle or because the adhesive has bonded too tightly to the wall. In these cases, avoid forcing them out all at once. Instead, use a hammer and chisel gently with controlled taps to loosen the tile from behind. For example, angling your chisel shallowly against the wall can help separate the tile without tearing the surface.
If a tile won’t move after a few attempts, don’t keep hammering—It’s often better to come back to it later. You might find that working around it loosens the grip naturally. Also, soaking the area briefly or applying a bit of heat can help soften stubborn adhesive. The key is to keep your wall as intact as possible while still making steady progress.

How to Clean and Prepare the Wall After Tile Removal
Once the tiles are off, it’s important to take care of the surface before thinking about what goes up next. Cleaning and prepping the wall ensures a smooth foundation and helps you spot any hidden issues early on.
Dealing with Residual Adhesive or Mastic
Leftover adhesive is one of the messiest and most time-consuming parts of backsplash removal. Depending on whether your wall has mastic or thinset, you’ll need a slightly different approach. Mastic can often be softened with warm water or adhesive remover, while thinset might require more effort with a sturdy scraper. It helps to identify the adhesive first, so you’re not wasting time or damaging the wall trying to remove it too aggressively.
As you work, use a putty knife or flat scraper at a shallow angle to avoid digging into the wall. Also, work in small sections rather than trying to clear everything at once; this gives you more control and helps avoid fatigue. If any areas feel especially stuck, go back after softening them a bit longer instead of forcing the issue. The key is staying consistent and patient, so you don’t end up creating bigger problems during cleanup.
Inspecting for Patching or Leveling Needs
Once the adhesive is off, you’ll get a clear look at how much surface repair your wall might need. Small issues like shallow dents, torn drywall paper, or scuffed areas are common and usually don’t require major fixes. For instance, a light spackling job or a skim coat can go a long way in smoothing out imperfections. These basic touch-ups help ensure your wall is ready for whatever comes next, whether that’s paint, tile, or a full redesign.
It’s also important to run your hand along the surface to check for raised spots or divots you might miss visually. Uneven areas can affect how new materials adhere, so catching them now saves time later. If you’re unsure whether a spot needs patching or just light sanding, it’s better to prep conservatively and double-check. Taking a bit more care now helps everything that follows sit cleaner and last longer.
When to Call a Professional
Tackling a ceramic tile removal project on your own can be rewarding, but it’s not always the right move, especially when hidden issues come up. For instance, if your wall feels soft or crumbles under light pressure, that’s a red flag for underlying damage. Older homes may also have tile installed over other tile, or worse, signs of water damage lurking behind the surface.
In cases like these, DIY methods often do more harm than good. You could accidentally tear into the drywall, miss signs of mold, or remove tiles unevenly and make future installation harder. A professional will know how to assess these risks quickly and act accordingly, saving you time and preventing more expensive repairs down the line.
Also, experts can handle tricky adhesive removal, clean up efficiently, and prep the wall for what’s next, whether you’re retiling or installing something new. Their tools and techniques are built for speed and precision, especially when dealing with older or fragile materials. If anything about the project feels uncertain, it’s better to pause and get guidance than push through and regret it later.
What to Keep in Mind as You Move Forward
Removing an old ceramic backsplash can be a straightforward project, but only when you understand what you’re working with and proceed step by step. From identifying tile types and adhesive to prepping your workspace and knowing when to pause, each detail plays a part in protecting your wall and making future installations easier. It’s not just about ripping tile off the wall—it’s about doing it carefully and with the right expectations.
If you’re planning to redesign your space after removal, or you’re unsure about the next step, we’re here to help. Our design experts can guide you through the process, from selecting new backsplash materials to planning a fresh, cohesive look that works with your home.
