


Subway tiles are timeless, adaptable, and ideal for giving your space a polished finish without overwhelming the design. If you're considering a tile project, especially your first one, your chosen pattern can make or break your experience. As tile experts, we’ve helped countless people choose layouts that match their design goals and DIY confidence. In this article, we’ll guide you through the most common subway tile patterns, what makes them unique, and how to choose the layout that best fits your skill level and style.

Prep and Tools Made Simple
Before any tile goes on the wall, it’s essential to start with proper preparation. This early stage lays the foundation for a successful installation and helps prevent avoidable issues like crooked lines or adhesive mishaps.
To begin, make sure your wall or backsplash surface is flat, clean, and completely dry. A level surface simplifies pattern alignment and reduces the risk of uneven results. If you're tiling over drywall or existing tile, applying a primer or installing a tile backer board will give you a more dependable base to work with.
Next, gather the tools you'll need. A notched trowel is ideal for spreading adhesive evenly, while tile spacers help maintain consistent grout lines. You’ll also want a reliable level, a tile cutter for clean edge work, and a rubber mallet to gently secure tiles into place without cracking them.
Before you break out the adhesive, take a few moments to map out your layout directly on the floor. This quick dry run lets you spot potential problem areas, like corners or electrical outlets, before they complicate the process. By getting your tools ready and your surface prepped, you’re already halfway to a smoother installation experience.

Straight Pattern
If you're just getting started with tile installation, the straight pattern is the easiest and most approachable layout to work with. It delivers a clean, structured look and follows a simple setup; tiles are arranged in even rows, either horizontally or vertically. This straightforward alignment helps keep your project organized and manageable from the beginning.
Because the layout is so direct, it’s easier to spot any mistakes as you go and fix them without frustration. Each tile follows the same flow, so cuts are typically predictable and minimal. The simplicity not only speeds up installation but also gives you the confidence to focus on mastering the basics, like spacing, adhesive application, and leveling, without getting bogged down by complex angles or alignment tricks.
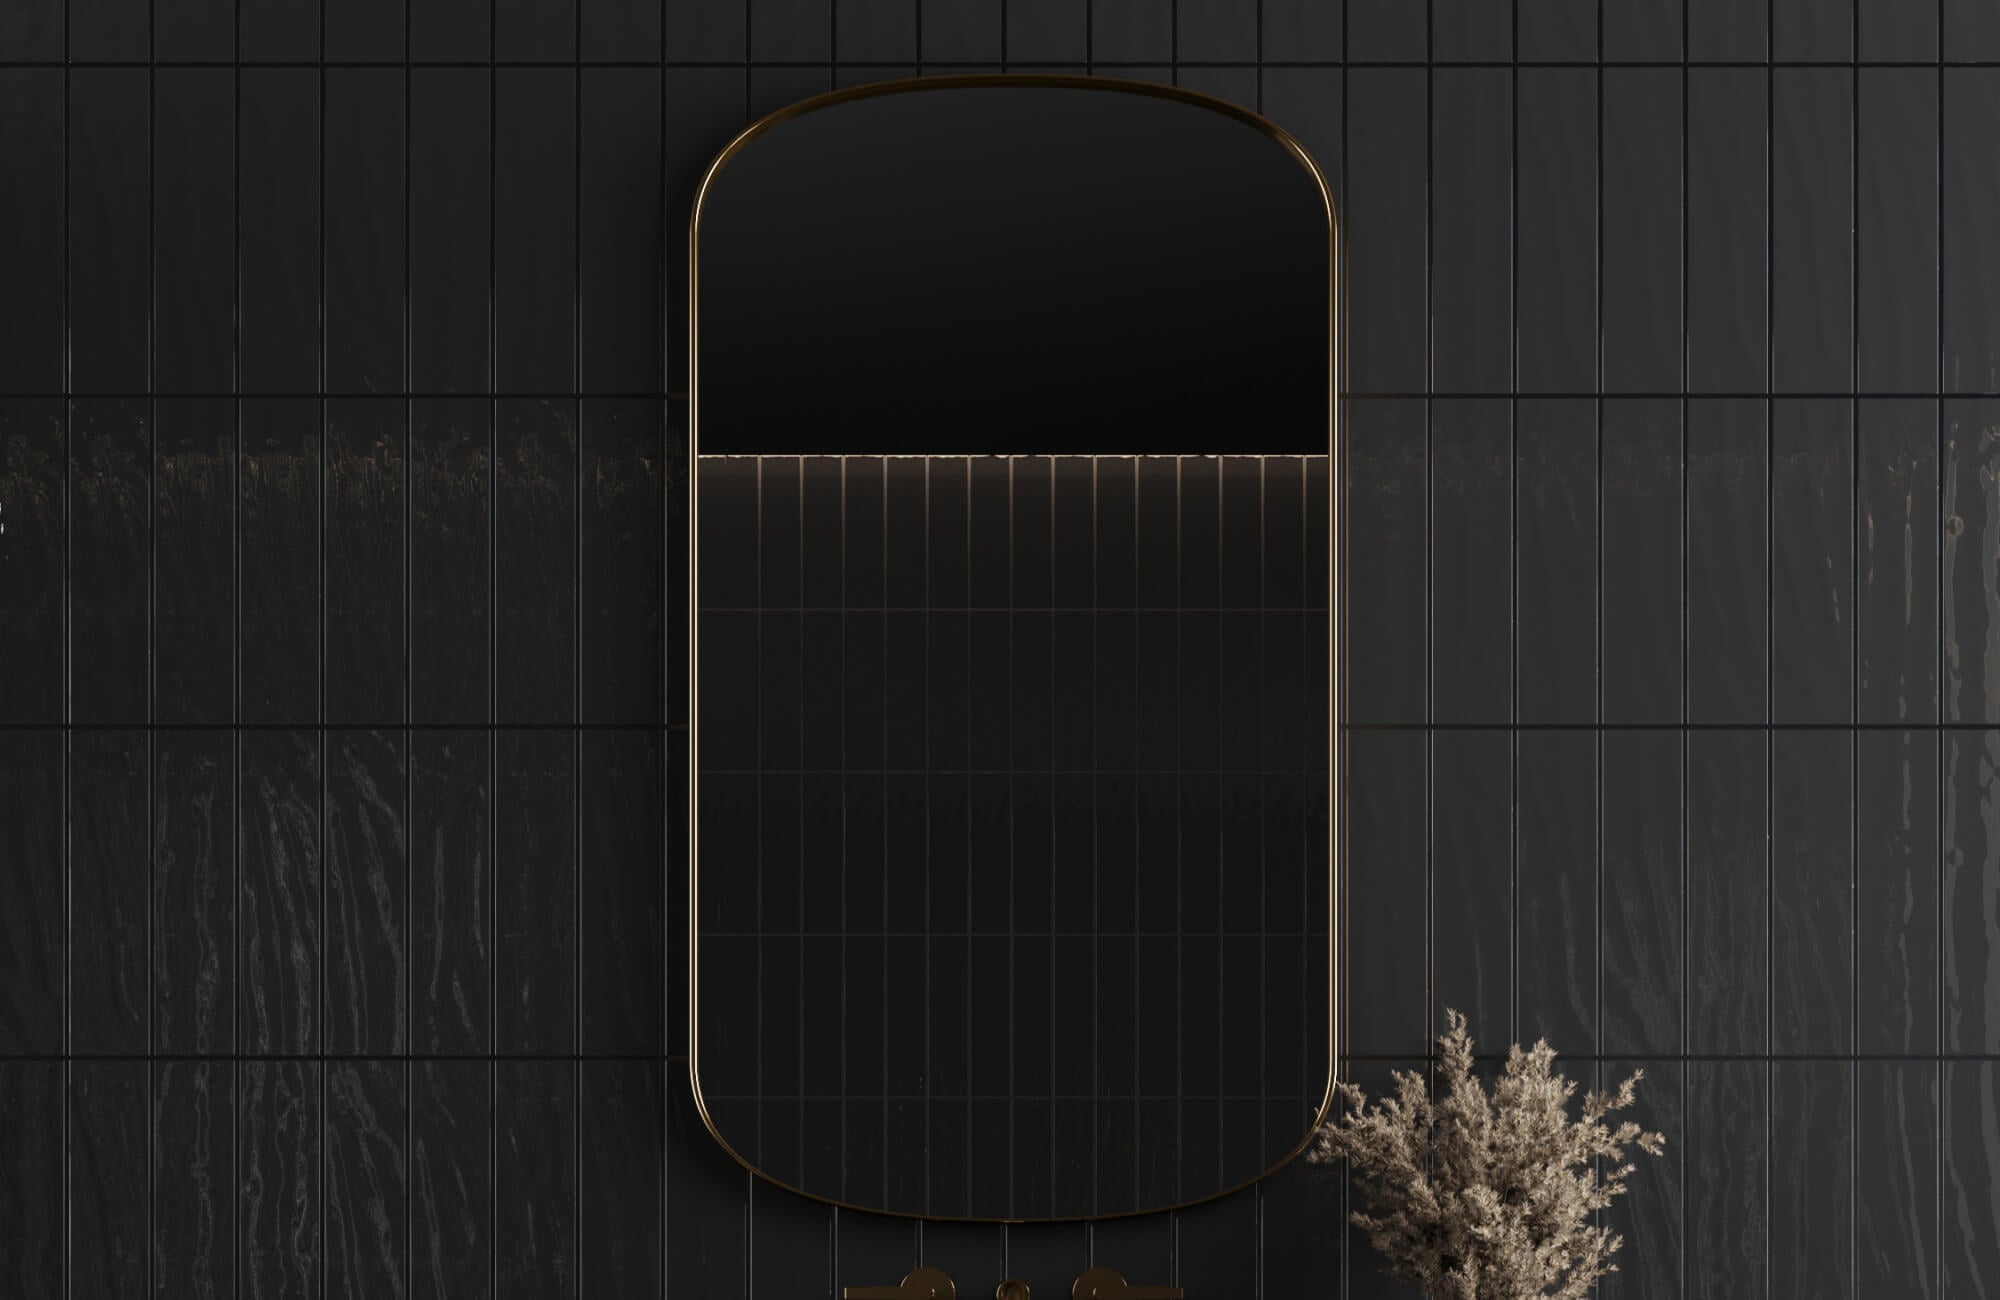
Even though the straight pattern is simple, it still delivers plenty of visual appeal. Paired with a soft matte finish, like our Catalina 2x16 Matte Porcelain Tile in Cream, featured in the photo above, it creates a calm, modern atmosphere. In this design, the vertical layout behind the mirrors draws the eye upward, giving the space a taller, more open feel. The combination of warm wood tones and soft lighting adds to the inviting, refined atmosphere.
As you install, keep a level handy to keep your lines consistent, and press each tile firmly into the adhesive to avoid gaps or uneven spots. While precision helps, the layout allows room to learn, offering a clean result without the stress of complex placement.

Brick Pattern
The brick pattern, also called a running bond, mimics traditional masonry. Each row of tiles is offset by half the length of a tile, creating a staggered look that’s warm and approachable. We often recommend this layout to those seeking something that feels timeless, lived-in, and inviting without feeling overly styled.
One of the reasons why this pattern is so beginner-friendly is its built-in rhythm; it naturally guides the eye across the surface, making small imperfections much less noticeable. This can be especially helpful in busy areas like kitchen backsplashes or bathroom walls, where you want the look of charm and character without the pressure of perfect precision.
Although it requires more measuring at the edges compared to the straight layout, the overall approach remains manageable for most DIYers. The cuts are straight, the placement is intuitive, and the staggered design allows for more flexibility when it comes to alignment.
A great way to elevate the look is by choosing tiles with rich tonal variety or a handmade finish. Edward Martin’s Marsden 3x10 Matte Ceramic Tile in Clay, featured in the photo above, demonstrates this beautifully. The natural variation in color and texture brings depth and personality to the space, while the matte surface complements the warm wood tones and brass accents. Together, the materials create a setting that feels grounded and sophisticated, perfect for transitional interiors that blend classic comfort with modern details.
To enhance that artisanal vibe, consider using a neutral grout that blends subtly with the tile. It also keeps the focus on the texture and tone of the tile itself, allowing the pattern to soften into the background while still anchoring the room with warmth.

Herringbone Pattern
The herringbone pattern adds a sense of movement and visual rhythm that instantly draws the eye. Created by placing rectangular tiles at 45-degree angles in alternating directions, it forms a dynamic zigzag layout that introduces depth and dimension to any space. For those looking to move beyond basic layouts, herringbone offers a bold upgrade with unmistakable visual impact.
That said, executing this pattern requires some careful planning. It starts with marking a clear centerline, placing your first tile precisely, and keeping everything aligned as you go. Since it involves more angled cuts than a brick or straight layout, attention to detail is key. Having some tiling experience or working with a professional can make the process much easier and help ensure a polished result.
We recommend herringbone to those who’ve tiled before or are working with a professional. However, if you’re patient and willing to invest a bit more time, the payoff is substantial. It’s especially effective on feature walls, entryways, or bathroom floors where the eye naturally follows the layout.
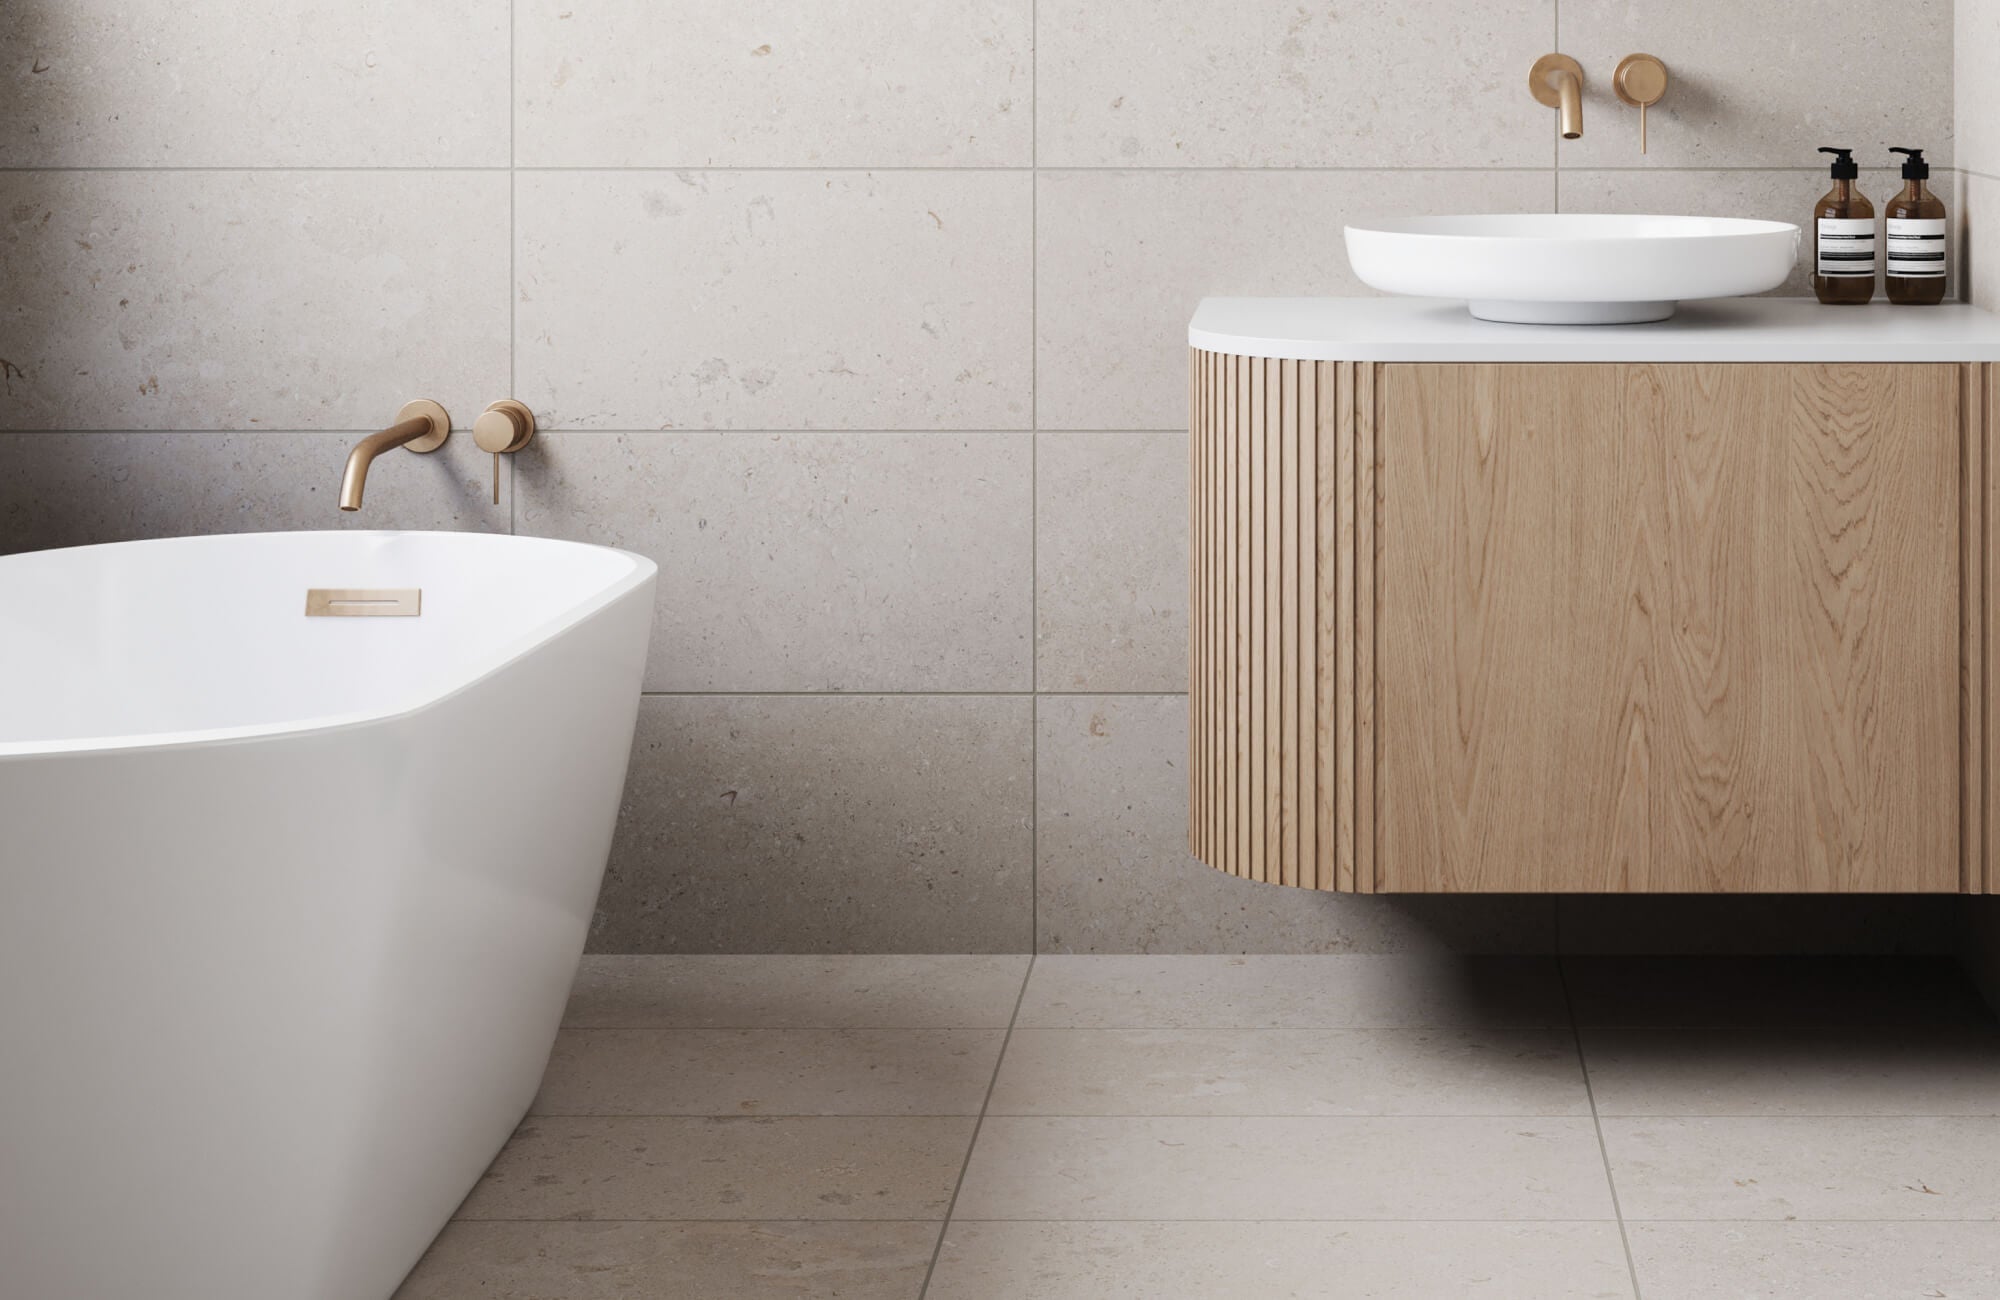
A great example of this pattern is Edward Martin’s Olivia 4x16 Glossy Ceramic Tile in Cotto, as displayed in the photo above. Its warm, sun-kissed tone paired with a glossy finish brings the herringbone layout to life, adding a rich, radiant warmth to the space. The natural light filtering through the overhead beams highlights the gentle color variation and the subtle sheen of the glaze, enhancing the dynamic texture of the wall. Here, the herringbone design leads the eye upward while framing the freestanding tub in a way that feels open, organic, and effortlessly elevated.
To maintain a clean, cohesive look, opt for a grout color that closely matches the tile. This choice also keeps the focus on the pattern itself while ensuring the overall space feels refined and visually balanced.

Basketweave Pattern
For those craving a bit of decorative flair, the basketweave pattern offers intricate charm without overwhelming the overall design. Inspired by the look of woven fabric, this layout alternates between vertical and horizontal tile sets, creating a structured yet engaging surface. Although it's more detailed than a straight or brick pattern, its consistent rhythm makes it easier to manage than it might first appear, with just a bit of planning and care.
What makes basketweave appealing is its balance of structure and visual rhythm. It’s a smart choice for areas where you want detail that feels deliberate without overwhelming the space. Precision is key because the geometry relies on consistent spacing; each tile needs to be placed with care to preserve the balance and flow of the weave.
To get the best results, it’s important to work with tiles that have a consistent shape and finish. Too much variation can cause the layout to feel uneven or disjointed. For a look that’s clean and contemporary with a subtle vintage influence, matte finishes pair beautifully with this layout, especially in cool, calming tones.
A great example of this design in action is Edward Martin’s Natasha 2x6 Matte Porcelain Tile in Ice, featured in the photo above. Its soft blue-grey hue brings a spa-like tranquility to the shower space, while the matte surface keeps it grounded and approachable. The basketweave layout adds just enough structure and depth, turning the shower wall into a visual highlight without overpowering the serene palette. It’s a balanced, confident look that feels both current and timeless.
Before committing to adhesive, take time to dry-lay your tiles and study how the pattern develops. This step can also help you fine-tune spacing and better understand how your chosen tile will influence the overall movement of the design.

Preview Your Pattern in Real Time
After narrowing down your favorite layouts, it helps to see how they’ll look in your space. That’s why we recommend using our AR visualization tool. It lets you preview different tile patterns right in your room, taking into account your dimensions, lighting, and color palette, before you even open a box of tile.
Whether you're choosing between a classic brick layout or something bolder like herringbone, the tool helps you quickly compare designs. It’s particularly helpful when coordinating with existing cabinetry, counters, or finishes, letting you see what truly works.
Using it early in the planning stage not only clarifies your choices, but it can also uncover styles you hadn’t considered. It’s a simple way to explore ideas and move forward with a layout that fits your space and vision.
Choosing the Easiest Subway Tile Pattern with Confidence
Finding the easiest subway tile pattern comes down to more than just looks, it’s about choosing a layout that fits your comfort level and complements your space. The straight pattern is often the best place to start, especially if you're new to tiling, but there are other great options depending on the look you’re going for and how hands-on you want to be.
If you’re unsure where to begin or want help choosing the right tile for your project, we’re here to help. Contact us anytime for expert guidance, design tips, or just a second opinion; we’ll make sure you have everything you need to get started with confidence!