


Choosing the right backsplash size for your bathroom vanity is not just about looks; it’s also about creating balance, function, and visual harmony. The backsplash serves as both a protective surface and a design connector, linking the vanity, countertop, and wall into one cohesive feature. When properly proportioned, it prevents moisture damage while complementing the overall flow of the room. Whether you’re refreshing a compact powder room or designing a spacious master bath, understanding how backsplash height and width relate to vanity style, layout, and material will help you make a confident decision.

Standard Backsplash Dimensions and Their Purpose
Before exploring design variations, it’s important to understand the purpose of a backsplash and how its size supports both function and style. Standard dimensions exist for good reason; they represent the balance between everyday practicality and visual proportion, creating results that work well across a wide range of bathroom designs.
Common Height Ranges
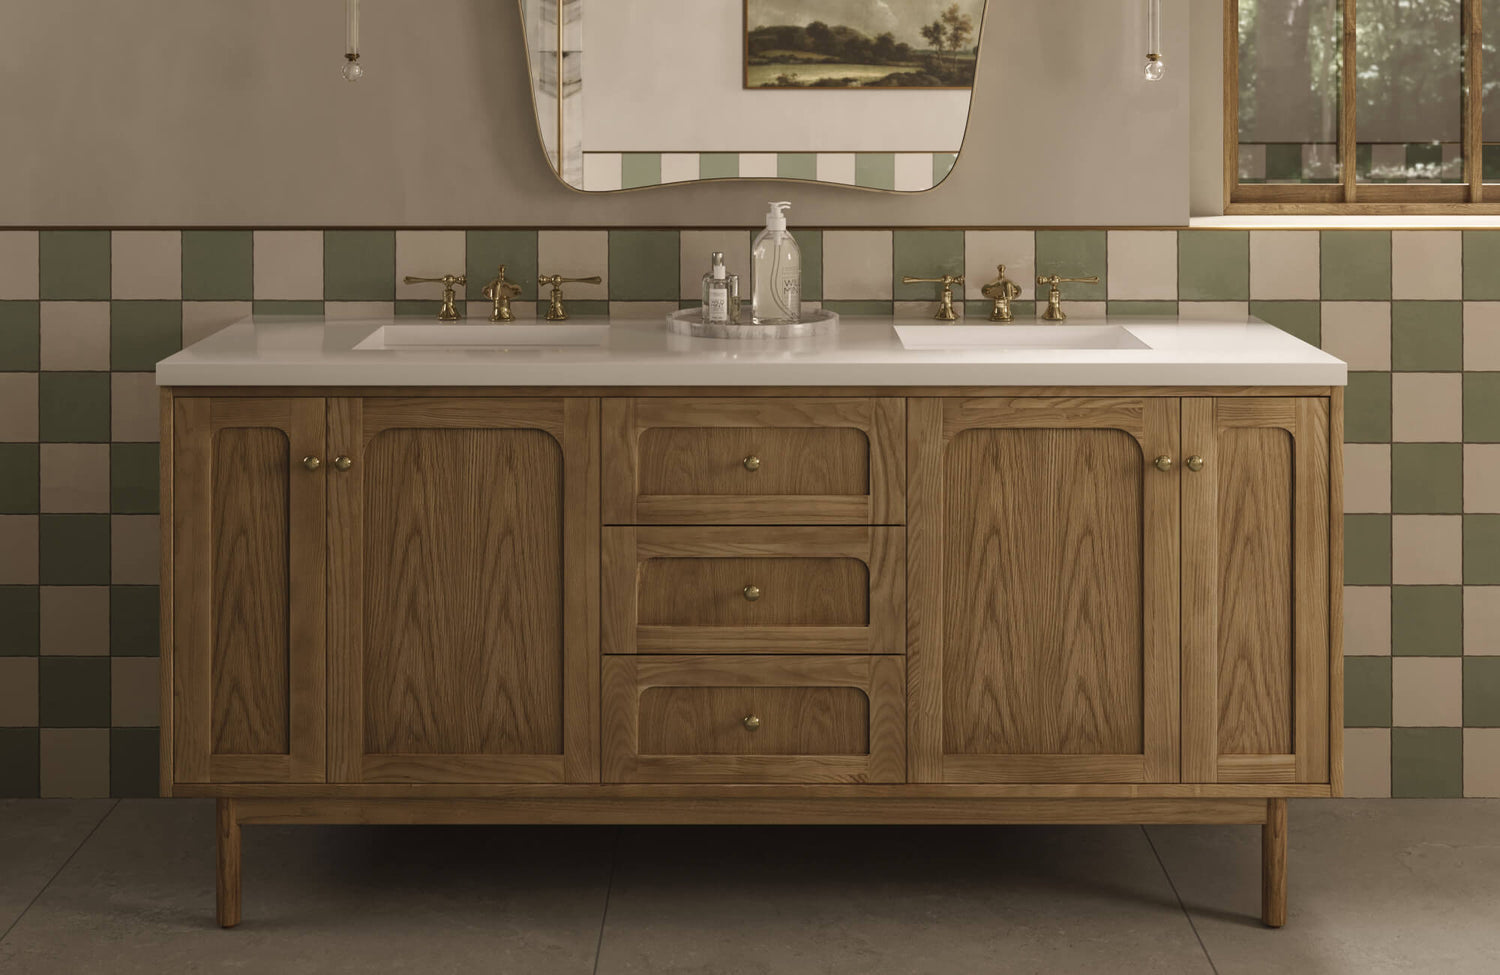
Most bathroom backsplashes range in height from four to six inches, providing dependable water protection while maintaining an open and spacious wall area. In smaller bathrooms, this height helps preserve a balanced look without visually crowding the space. If your sink is deeper or your faucet sits higher, consider extending the backsplash to eight or ten inches for added coverage. The ideal height ultimately depends on how much wall you want visible and how far water typically reaches during daily use.
In this photo displayed above, featuring Edward Martin’s Gabriella 48" Single Vanity in Light Natural Oak with a 3 cm White Zeus Quartz Top, the design shows how a standard-height backsplash can create a clean, proportionate transition between the vanity and wall. The natural wood tones and soft green tiles work together to maintain an airy feel, proving that even a modest backsplash height can achieve both functionality and visual harmony.
Full Wall vs Partial Backsplash
A partial backsplash, typically around four inches high, offers a practical and understated look, perfect for minimalist bathrooms or vanities paired with decorative wall finishes, such as wallpaper or textured paint. In contrast, a full-height backsplash that extends to the mirror or ceiling creates a seamless, dramatic effect, visually linking the vanity and wall. This option not only enhances design continuity but also provides superior moisture protection, making it especially suitable for family or shared bathrooms where splashes are more common.
Function of Vanity Backsplash
More than a decorative feature, the backsplash also serves as a practical shield against water, soap residue, and humidity. Choosing the right height helps prevent moisture from seeping behind the countertop, protecting the wall from peeling paint or warped drywall. How you use the vanity each day should guide your choice; a taller backsplash is particularly practical in family bathrooms or spaces with frequent sink use, as it minimizes splashes, simplifies cleaning, and keeps maintenance effortless over time.

Matching Backsplash Size to Vanity Height and Proportion
After understanding standard sizes, the next step is to find how the backsplash fits naturally with your vanity’s height and overall proportions. The goal is to create visual balance so the backsplash feels naturally integrated into the design rather than appearing as an afterthought.
Compact Vanities and Powder Rooms
In smaller bathrooms or powder rooms, where space is limited, every detail matters. A lower backsplash helps maintain an open, airy feel and prevents the vanity from seeming confined. Choosing a height between three and five inches creates a clean, proportional line that suits compact vanities. To create more depth, select a reflective finish or a lighter color that brightens the surface, making the wall appear more spacious.
Standard and Double Vanities
For wider vanities, the backsplash should maintain proportion along the entire length to create a balanced, cohesive look. A standard height works well with framed mirrors or wall lighting positioned just above it. In double vanity setups, aligning the backsplash’s top edge with the bottom of the mirrors enhances symmetry, while extending it across the full width of the vanity creates a unified, continuous appearance that visually connects both sinks.
In the space above, featuring Edward Martin’s Easton 72" Double Vanity in Whitewashed Walnut with a Glossy White Composite Stone Top, the backsplash aligns neatly beneath the twin mirrors, demonstrating how proper proportion reinforces visual harmony. The horizontal layout and warm finishes highlight how balanced sizing can tie together multiple design elements while maintaining a sense of openness and flow.
Floating and Modern Designs
Floating vanities can create a lighter, more open look, so their backsplash should complement that streamlined aesthetic. A slim, four-inch backsplash preserves the minimalist look and maintains a smooth horizontal flow that complements the floating design. If your wall finish is more delicate or textured, consider extending the backsplash to mirror height for added elegance and extra moisture protection in areas without a base cabinet barrier.

Designing Around Fixtures and Wall Elements
A backsplash’s height works best when considered with the other features that share its space. Coordinating it with faucets, mirrors, and lighting creates a cohesive, well-balanced layout that feels intentional and visually refined.
Faucet Height and Splash Zone
To determine the ideal backsplash height, measure the distance from the countertop to the top of the faucet spout. The backsplash should extend slightly above this point to effectively catch splashes. For wall-mounted faucets, it’s best to bring the backsplash up to meet the base of the fixture, creating a smooth, connected look. This simple adjustment prevents awkward gaps and safeguards the wall in the areas most exposed to water.
Mirror and Lighting Alignment
Mirrors often define where a backsplash should stop. If the mirror sits directly above the countertop, extending the backsplash to meet its lower edge creates a smooth, cohesive transition. For mirrors with integrated or framed lighting, leaving a small gap of about an inch introduces a subtle floating effect that adds depth to the wall. When positioning sconces, ensure the backsplash aligns neatly without disrupting wiring or casting uneven shadows that affect lighting balance.
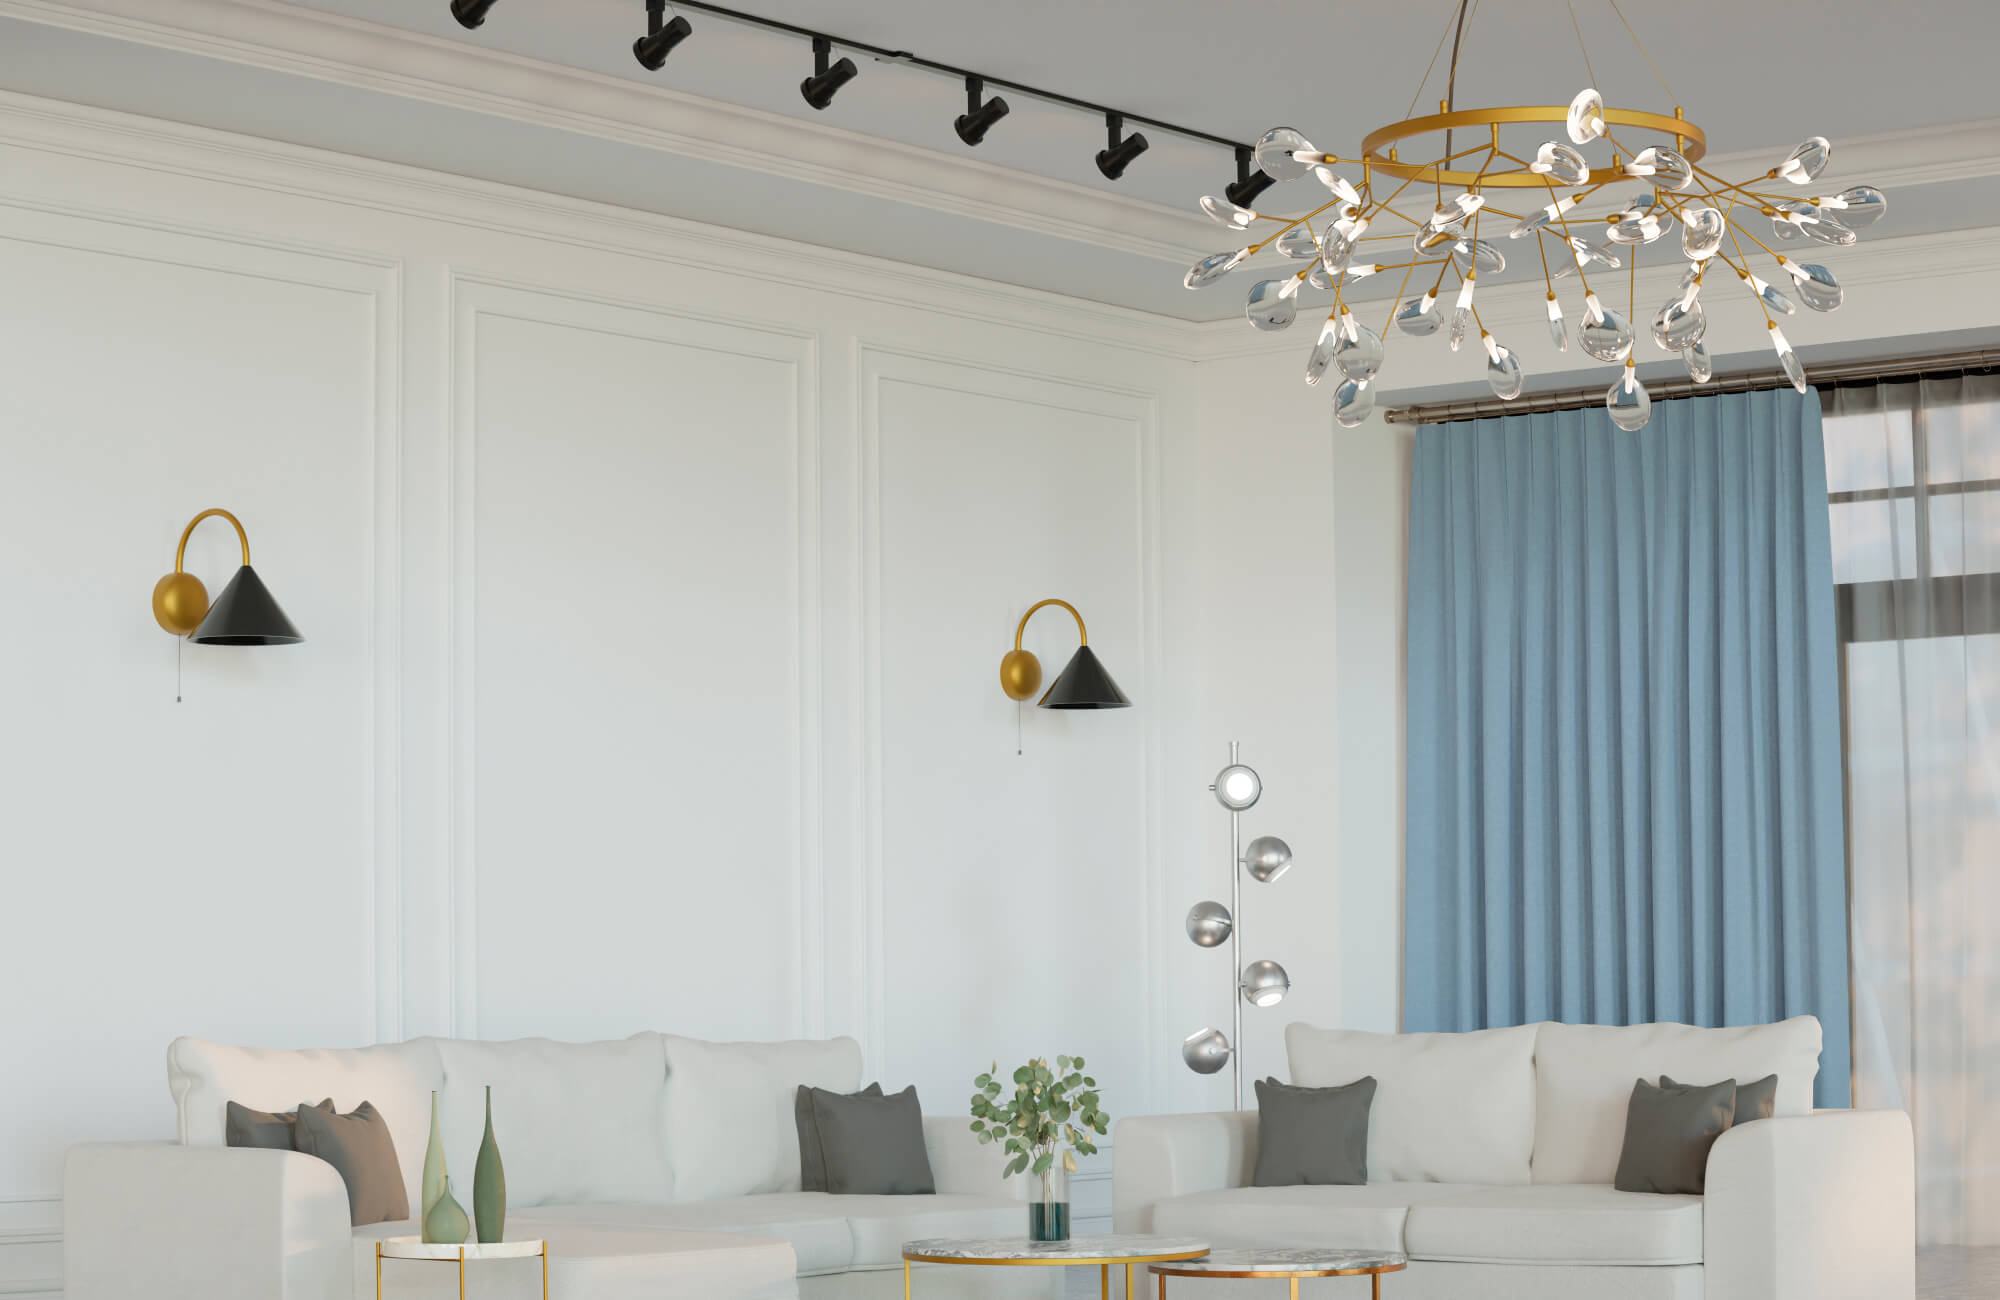
In the photo displayed above, Edward Martin’s Esmeralda Wide Mirror in Polished Brass and Enola Wall Sconce in Aged Brass beautifully illustrate how alignment enhances balance and cohesion. The backsplash aligns perfectly with the mirror’s base, creating a seamless transition, while the sconces cast soft, balanced light that enhances symmetry and gives the space a refined, cohesive look.
Outlets and Switches
Electrical outlets above the vanity can affect how your backsplash fits if they’re not planned. Before deciding on the height, check the placement of outlets and switches in relation to the countertop. Ideally, they should align neatly within or just above the backsplash line to maintain a clean and organized look. If they fall within the backsplash area, select cover plates that match the tile or surface material to maintain a seamless, polished look.

Material Considerations That Influence Sizing Choices
The material you select can significantly affect the height or width of your backsplash. Some materials lend themselves to understated, refined transitions, while others achieve their full effect when extended to make a stronger visual statement.
Tile and Grout Lines
When using tile, the backsplash height often follows the tile’s dimensions. A single row of large-format tiles can create a simple four-inch backsplash, while smaller tiles can be stacked in multiple rows for added height. Aligning grout lines with the countertop edge enhances symmetry and maintains a clean design. Subway tiles, for example, offer versatility—you can stop at one or two rows for a classic look or extend them upward for a more contemporary, elongated effect.
A great example is shown in the photo above, where Edward Martin’s Mikayla 5x5 Glossy Ceramic Tile in Olive extends to the ceiling, demonstrating how repeating smaller tiles can create a striking vertical statement. The uniform grout lines draw the eye upward, adding height and cohesion while maintaining a balanced connection between the vanity, mirror, and wall finish.
Slab and Quartz Backsplashes
Solid-surface materials, such as quartz or porcelain slabs, can create a smooth, continuous connection between the countertop and wall. A four-inch slab backsplash provides a clean, streamlined finish, while extending the slab to full height produces a luxurious, uninterrupted surface. Because these materials naturally resist moisture and stains, you have the flexibility to choose a height that best suits your design. Taller slab backsplashes also make upkeep easier, as their seamless surface eliminates grout lines where residue can build up over time.
Unique or Textured Materials
When using natural stone, glass, or textured ceramic, extending the backsplash a bit higher can emphasize the material’s character and surface detail. For instance, veined marble creates a beautiful sense of flow when carried further up the wall, adding depth and visual interest. With patterned materials, maintaining balanced proportions ensures the backsplash complements the vanity area without overpowering surrounding finishes or interrupting the room’s visual harmony.

Visual Balance and Design Impact of Different Heights
Aside from function, the size of your backsplash shapes the visual connection between the vanity and the surrounding walls. Its height influences whether the bathroom feels open, grounded, or more dramatic, making it important to consider the overall mood and balance you want the space to convey.
Low Backsplash for Airy Spaces
A short backsplash creates a light, open feel; ideal for highlighting wall art, large mirrors, or decorative finishes above the vanity. Keeping it low allows more room to introduce color contrast or patterned wallpaper. This style also works well in smaller bathrooms, where added vertical space helps the room appear taller and more inviting.
Medium Backsplash for Proportion and Flexibility
A medium-height backsplash, typically between six and twelve inches, offers a balanced middle ground between subtle and full-height designs. It provides visual weight without overwhelming the wall, making it a great choice for mid-sized bathrooms or vanities paired with floating mirrors. This height also helps anchor lighting or wall-mounted faucets, creating a cohesive, well-structured layout. It’s a versatile option that combines practical coverage with design flexibility, adapting easily to future style updates.
Full Wall for Bold Statement
A full-height backsplash creates a strong design statement and instantly draws attention to the vanity area. Extending the material to the ceiling produces a seamless, dramatic feature that visually expands the space. This approach also works beautifully with stone slabs or large tiles, where natural veining or texture becomes part of the room’s character. In smaller bathrooms, opting for lighter tones further helps maintain a sense of openness while still achieving that striking, elevated look.

Customizing Backsplash Size for Unique Bathroom Layouts
Every bathroom presents its own layout challenges, whether it’s a sloped ceiling, uneven surface, or asymmetrical wall. Customizing your backsplash to suit these features ensures a result that’s both functional and visually cohesive, seamlessly blending practicality with design harmony.
Corner and Alcove Vanities
When a vanity is placed in a corner or alcove, backsplash sizing needs thoughtful planning. Extending the backsplash along both walls creates a cohesive, built-in appearance while protecting the corners from moisture. If one wall is shorter than the other, slightly lowering that side can maintain visual balance and prevent the design from feeling weighted. This subtle adjustment also keeps the proportions natural and preserves a smooth, uninterrupted flow.
Vessel Sinks and Wall-Mounted Faucets
Since vessel sinks and wall-mounted faucets sit higher than traditional basins, the backsplash should extend further up the wall for proper coverage. A height of about ten to twelve inches is often ideal, though taller fixtures may benefit from additional protection. This extended backsplash not only keeps the wall dry and easy to maintain but also frames the sink gracefully, highlighting its sculptural presence within the design.
Custom Cut and Trim Solutions
Walls aren’t always perfectly level or symmetrical, especially in renovation projects. Custom backsplash cuts make it easier to adapt to irregular shapes or uneven corners. When a wall curves or tapers, trimming the edge or finishing it with a metal or stone cap creates a clean, polished transition. Extending the backsplash slightly beyond the vanity edge can also balance asymmetrical layouts and visually broaden the countertop area.
Choosing What Works Best for Your Bathroom
Selecting the right vanity backsplash size is about finding the ideal balance between function and design. Consider how you use your vanity each day, the height of your fixtures, and the visual focus you want the backsplash to have. A taller design offers greater protection, while a shorter one leaves room for creative wall finishes and flexible mirror placement. Before finalizing your choice, try visualizing different heights with painter’s tape or cardboard templates; seeing the proportions in person often reveals what feels most natural and balanced for your space.
If you’re unsure where to start, contact us or book a design consultation—our team can help you explore materials, proportions, and styles to create a bathroom that feels beautifully complete.