


In subway tile installations, grout isn’t just a finishing detail, it’s a foundational element that impacts both durability and design. While its job starts with holding tiles in place and resisting moisture, grout can also define the visual rhythm of a space, subtly influencing whether the final look feels bold, seamless, classic, or contemporary.
For the standard 3"x6" subway tile, choosing between sanded, unsanded, epoxy, or urethane grout involves more than personal preference. It requires considering joint width, surface sensitivity, and environmental exposure. In this blog, we’ll explore the key grout types suited for subway tile and how to choose the right one for lasting performance and visual harmony.

The Basics of Grout
Before diving into types and finishes, it’s important to understand what grout actually is and why it matters. From holding tiles in place to protecting against moisture, grout does a lot more than most people realize.
What Exactly Is Grout?
To fully appreciate grout's role in tilework, it helps to start with the basics. Grout, at its core, is a thick paste used to fill joints between tiles after placement. It’s typically made from Portland cement, color pigments, and sometimes polymers, though the exact composition varies depending on its intended use.
Building on that, there are several types of grout, each formulated for specific conditions and project demands. The four most common include:
| Cementitious Grout | Epoxy Grout | Furan Grout | Urethane Grout |
| Available in sanded and unsanded versions. Sanded grout, with added aggregates, is best for joints 1/8" or wider, while unsanded grout is smoother and ideal for narrow joints or sensitive surfaces like polished marble. | Made from resins and hardeners, this non-porous, stain-resistant grout is ideal for wet or heavily used spaces such as kitchens and hospitals. | Designed for industrial settings, it resists harsh chemicals and high temperatures but requires specialized handling. | A pre-mixed option favored in residential remodels for its flexibility, stain resistance, and user-friendly application. |
Key Functions of Grout in Tile Installations
With a clear understanding of what grout is and the types available, we can now explore its primary functions in a tile installation. First and foremost, grout locks tiles in place, supports weight distribution, and prevents damage, especially in busy or wet areas.
Additionally, while grout isn’t inherently waterproof, sealed or low-porosity options like epoxy and urethane provide excellent moisture resistance. Just as importantly, grout absorbs minor substrate movement, which reduces cracking risks and protects tile edges from chipping.
Finally, from an aesthetic standpoint, grout defines the tile layout. Whether it creates contrast or blends seamlessly with the tile, the right grout color can elevate the overall visual outcome of a space.

Cementitious Grout Options
When it comes to cementitious grout, not all formulas are created equal, each type is designed with specific tile sizes, joint widths, and performance needs in mind. To choose the right one, it helps to understand how their ingredients and properties affect both function and finish.
Sanded Grout
To start, sanded grout is best suited for joints 1/8 inch or wider. Made from Portland cement, silica sand, and optional pigments, it offers structural stability and helps prevent shrinkage during curing. Its gritty texture enhances joint strength, making it a strong fit for active areas or expansive tiled surfaces.
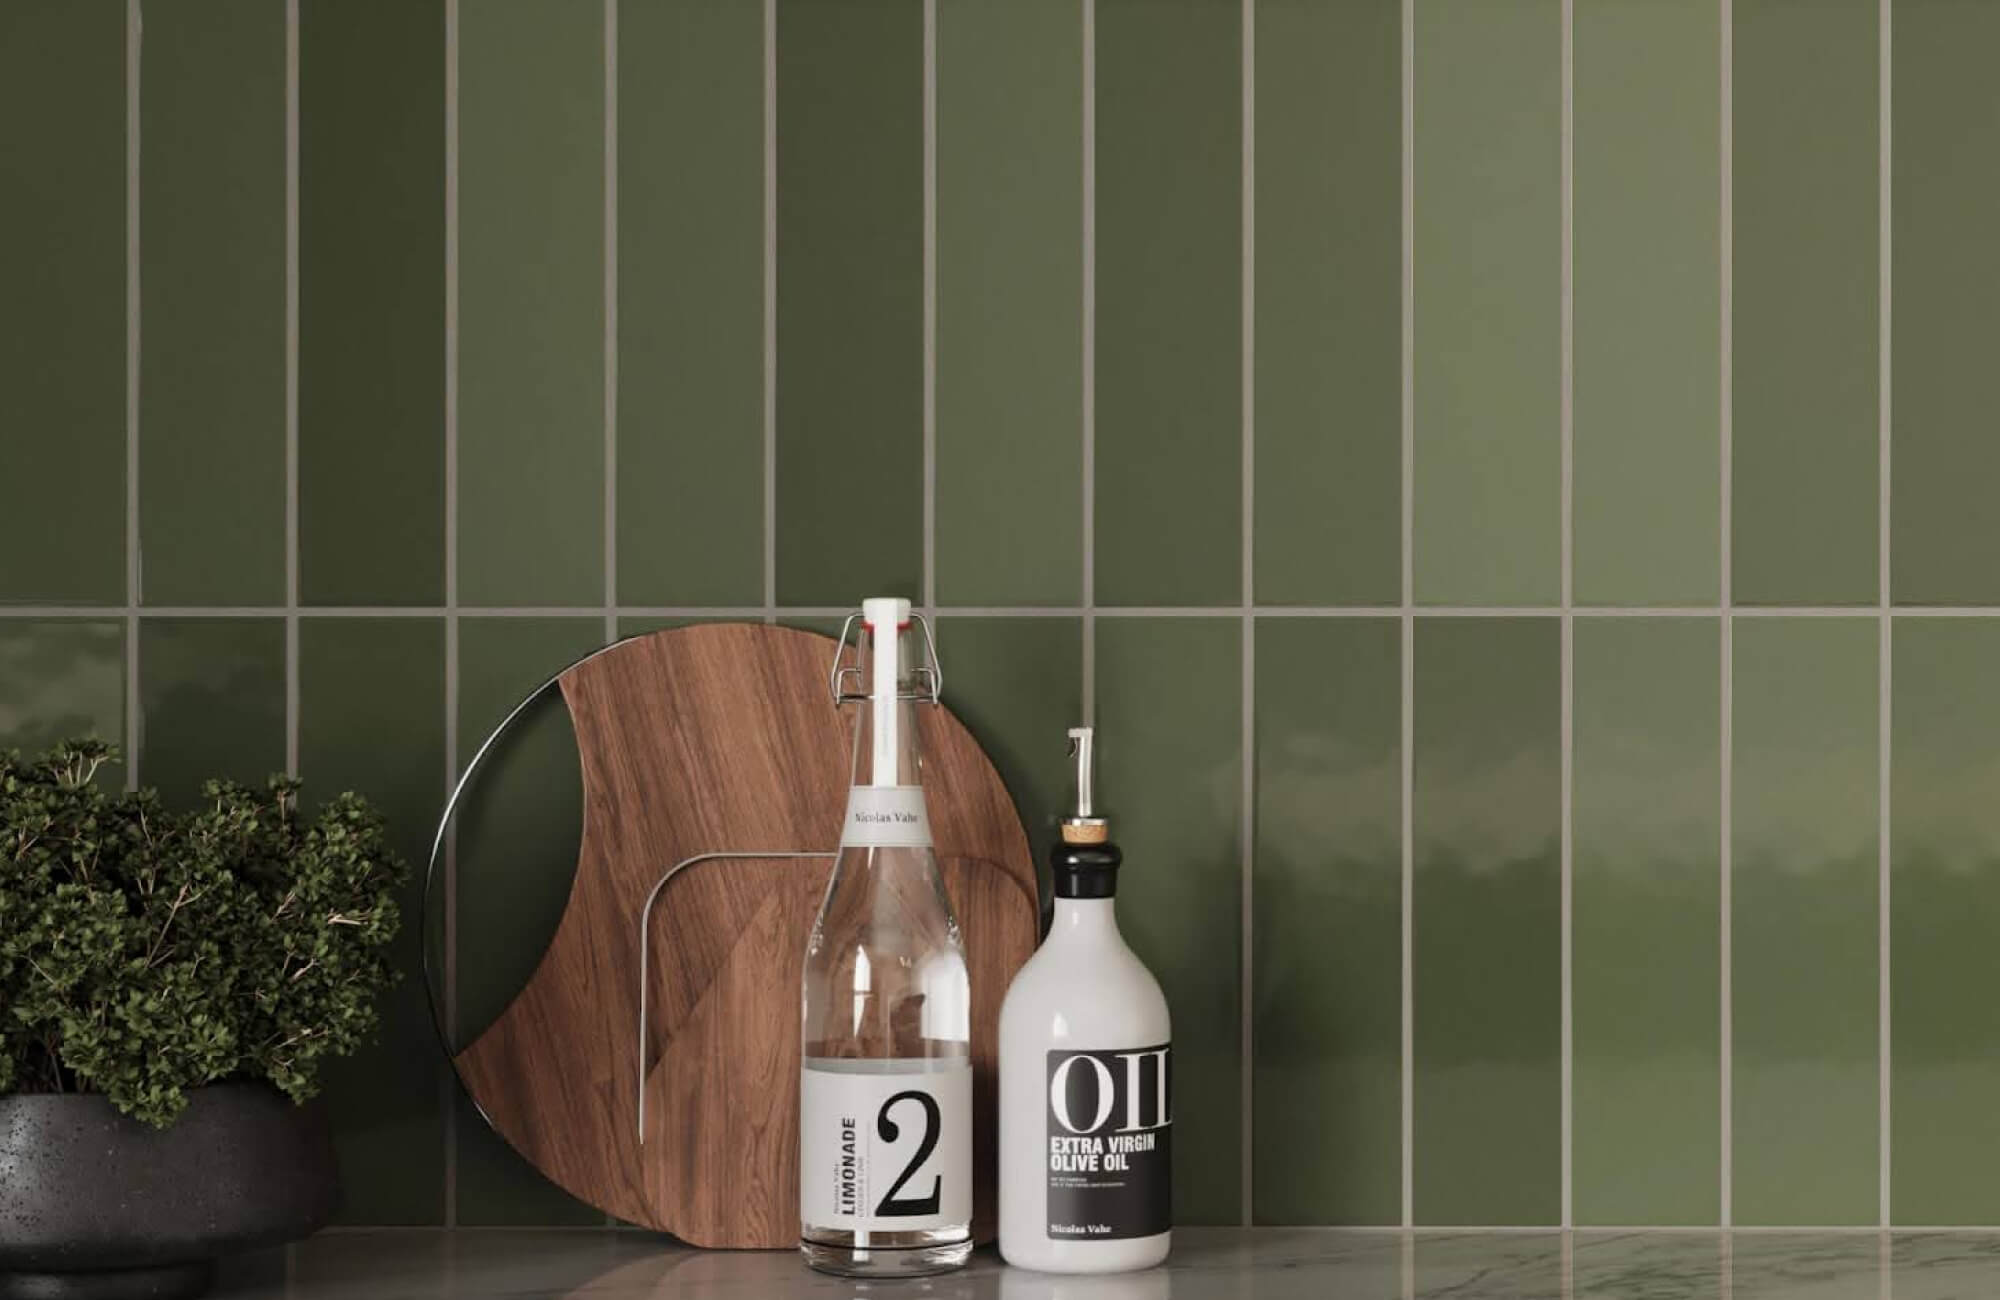
That said, sanded grout isn’t suitable for all materials. Because of its abrasive particles, it may scratch polished or delicate tiles. For instance, with soft, glossy finishes like Edward Martin’s Mikayla 2.5x5 Glossy Ceramic Tile in Olive, as shown in the photo above, a gentler option is recommended, even if wider joints are used.
Nevertheless, sanded grout remains a flexible choice, as it can be sealed or stained for additional protection or aesthetic customization, ideal for projects requiring durability and design versatility.
Unsanded Grout
On the other hand, unsanded grout is formulated without abrasive particles, making it ideal for joints under 1/8 inch and for use with smooth, sensitive surfaces such as glass, natural stone, and glazed ceramics. Its creamy consistency allows it to fill tight joints easily while delivering a dense, polished finish.
Because of this, unsanded grout is particularly effective in vertical applications like shower walls and backsplashes. However, it’s less appropriate for wider joints, where shrinkage and potential cracking may occur. Still, for precise grout lines and surface-sensitive materials, unsanded grout is often the go-to solution.
Polymer-Modified Cementitious Grout
Building on traditional formulations, polymer-modified cementitious grout incorporates latex or acrylic additives to improve flexibility, adhesion, and moisture resistance. These enhancements make it a top choice for environments like bathrooms, kitchens, and outdoor installations where extra durability is needed.
Moreover, its added strength helps mitigate cracking due to minor substrate movement, and its ability to accommodate a range of joint widths simplifies grout selection across varied layouts. Although it comes at a slightly higher price point, the tradeoff is extended longevity and lower maintenance, making it a wise investment for both residential and commercial applications.

Epoxy Grout Characteristics
If you're looking for a grout that goes beyond basic performance, epoxy is in a class of its own. Known for its industrial-grade strength and low-maintenance surface, it brings a host of advantages, but also a few important considerations.
Superior Stain and Chemical Resistance
To begin with, epoxy grout’s non-porous, resin-based composition makes it exceptionally resistant to stains, moisture, and chemicals. Unlike cementitious grout, it doesn’t require sealing, as its dense structure naturally repels common contaminants like wine, oil, and cleaning agents.
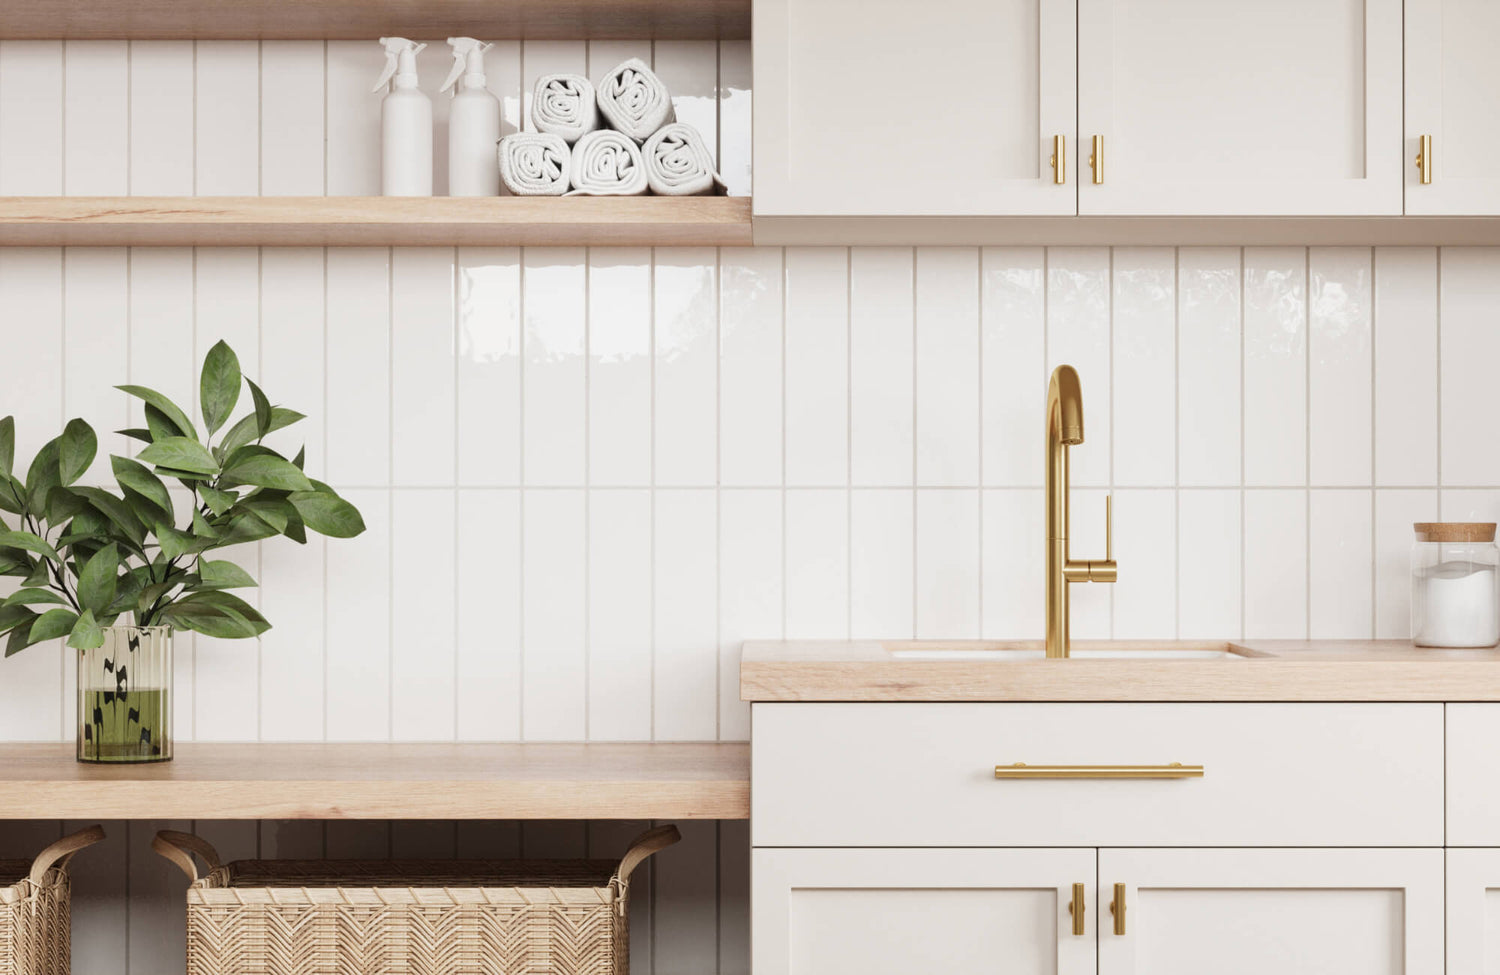
As a result, it’s ideal for environments where hygiene and durability are non-negotiable, such as commercial kitchens, laboratories, and bathrooms. In residential settings, as shown in the photo above, epoxy grout is a smart choice for bathroom installations featuring our Dani 1.6x5 Matte Ceramic Tile in Dove, helping preserve sensitive finishes while keeping grout lines cleaner over time.
Exceptional Durability and Longevity
Beyond chemical resistance, epoxy grout offers exceptional structural performance. Its high compressive and tensile strength make it resistant to cracking, abrasion, and shrinkage, even in areas with significant temperature fluctuations or heavy footfall.
In addition, its flexibility allows it to accommodate minor substrate movement, reducing the risk of grout line separation or edge damage. Epoxy’s natural resistance to efflorescence further enhances its appearance over time. And while it comes with a higher upfront cost, its long service life and low maintenance often make it a cost-effective choice in the long run.
Considerations for Application
That said, epoxy grout does come with a learning curve. It has a relatively short working time, often under 45 minutes, and must be applied and cleaned promptly to avoid setting on the tile surface. Its thick, sticky consistency also requires more effort during installation and the use of specialized tools such as epoxy floats and non-abrasive sponges.
Additionally, temperature control is crucial. Extreme heat or cold can affect how epoxy cures, so it’s essential to follow the manufacturer's guidelines for mixing and timing. Because of these variables, professional installation is strongly recommended, particularly for large-scale or high-visibility projects. However, for those who are prepared and experienced, epoxy grout delivers unmatched resilience and long-term performance.

Exploring Alternative Grout Options
While cementitious and epoxy grouts cover most residential needs, some projects call for more specialized solutions. Depending on the environment and performance demands, alternative grout types like furan and acrylic latex can offer targeted advantages worth considering.
Furan Resin Grout
One such option is furan grout, a highly chemical-resistant product made from furfuryl alcohol polymers and acid-resistant fillers. Unlike water-based grouts, furan cures through an acid-catalyzed reaction, forming an impermeable surface that can withstand aggressive chemicals, high temperatures, and bacterial exposure.
Because of these properties, it’s ideal for harsh industrial settings such as food processing plants, chemical labs, and pharmaceutical facilities. However, furan grout requires expert handling, strict environmental controls, and specialized protective equipment due to its toxicity and complex installation process. As a result, it’s rarely used outside of commercial or industrial contexts.
Acrylic Latex Grout
On the other end of the spectrum, acrylic latex grout, also known as premixed or ready-to-use grout, prioritizes convenience and ease of use. Especially well-suited for DIY or small-scale residential projects, it is made from fine aggregates and acrylic polymers suspended in a water-based solution, offering reliable adhesion and moderate moisture resistance.
Its flexibility allows it to absorb slight substrate movement, making it a practical choice for backsplashes, vertical surfaces, and areas that experience temperature changes. Additionally, it is compatible with a wide range of tile materials and requires no mixing, which ensures a consistent texture and uniform color.
That said, it’s not suitable for submerged or high-moisture environments, where more robust options like epoxy or urethane are better suited. Regular sealing is also recommended to help preserve its appearance and functional integrity over time.

Factors Influencing Your Grout Selection
Choosing the right grout isn’t just about picking a color, it’s about making informed decisions that match your tile layout, environment, and long-term goals. From the width of your joints to how much wear your space will see, several key factors can influence which grout will serve you best.
Grout Line Width and Tile Spacing
To start, one of the first decisions in grout selection is determining the appropriate type for your tile spacing. Sanded grout, reinforced with fine aggregates, is recommended for joints 1/8 inch and wider due to its strength and ability to resist shrinkage. By contrast, unsanded grout, with its smooth texture, is better suited for joints under 1/8 inch and for delicate surfaces that may scratch, such as glass or polished stone.
In typical subway tile layouts with 1/16 to 1/8 inch spacing, unsanded grout is often the preferred choice. However, for uneven, hand-crafted, or rectified tiles where spacing may vary, a more forgiving grout formulation may help prevent cracking or separation.
Environmental Conditions and Usage
Beyond joint width, the physical environment significantly influences grout selection. In wet or humid areas like showers, patios, or steam rooms, epoxy or polymer-modified grouts provide excellent water resistance and help prevent mold or efflorescence. Similarly, active zones, including entryways and commercial kitchens, require grouts with enhanced abrasion resistance, making epoxy or even furan grout more suitable.
On the other hand, for dry, low-use residential spaces, traditional cementitious or acrylic latex grout may suffice, especially when sealed properly. In regions with temperature swings, choosing a flexible grout such as polymer-modified or urethane-based varieties helps accommodate movement without compromising the installation.
Aesthetic Preferences
In addition to performance, grout significantly shapes the visual outcome of any tile installation. Contrasting grout creates strong definition and a bold, modern appearance, while tone-on-tone choices produce a more subtle, seamless finish, ideal for clean, classic designs. Surface sheen also affects the final look: cementitious grouts typically cure to a matte finish, whereas epoxy and urethane grouts may offer a light sheen or reflective quality, enhancing depth and contrast.
This visual strategy becomes especially important with materials like our Harley 3x12 Polished Porcelain Tile in Greige, featured in the photo above, where a carefully chosen grout color enhances the tile’s refined, spa-like appeal without competing with its elegant surface.
To further support the design process, Edward Martin offers an Augmented Reality (AR) Visualization Tool. After browsing our tile collection, simply tap “View in Your Space” to use your mobile device and preview how your selected tile will look in real time. Once you’ve found a combination that fits your space, you can easily order tile samples delivered right to your door for a closer evaluation.
Budgetary Constraints and Long-Term Costs
Finally, budget can have a meaningful impact on your grout decision. While grout is a relatively small portion of a tile project’s overall cost, its maintenance and longevity can significantly influence long-term value. Cementitious grouts are budget-friendly up front but often require sealing and periodic upkeep. In contrast, epoxy and polymer-modified grouts, though more expensive initially, deliver greater durability and require less maintenance, potentially reducing future repair costs.
Project scale should also be factored in. In smaller, detail-driven spaces, investing in premium grout may yield noticeable aesthetic and functional benefits. For larger or cost-conscious installations, polymer-modified cement grout often offers the best balance between affordability and performance.

Best Practices for Grout Application with Subway Tile
Getting grout right is just as important as choosing the right type, because even the best product can fall short if not applied correctly. From preparation to final sealing, every step directly affects how your subway tile installation performs and appears over time. When in doubt, it’s always best to hire a professional to ensure proper technique and lasting results.
Thorough Tile Preparation and Cleaning
To begin, confirm that the adhesive or thinset has fully cured, typically after 24 hours. Next, clean all tile surfaces and joints with a non-abrasive sponge or microfiber cloth to remove any dust, debris, or residual mortar that could interfere with grout adhesion or cause uneven curing.
In some cases, particularly with porous or glossy tiles like Edward Martin’s Catalina 2x16 Matte Porcelain Tile in Cotto, applying a grout release agent can be a smart precaution. This is especially helpful for textured or matte surfaces that tend to retain grout haze.
Precise Mixing and Consistency
Once the surface is ready, proper mixing is the next essential step. For cementitious grouts, follow the manufacturer's water-to-powder ratio precisely. Mix slowly to avoid air bubbles, then allow the grout to slake (rest) for several minutes before remixing. The goal is a peanut butter-like consistency, smooth, workable, and able to hold its shape.
For epoxy or premixed grouts, thorough blending is equally important. Use a low-speed paddle to mix the full batch and apply it within the manufacturer’s recommended working time. Since these products cure quickly, timing and efficiency are key.
Proper Application and Filling Techniques
Moving into the application phase, use a rubber float held at a 45-degree angle to press grout diagonally into the joints. Work in small, manageable sections (around 3'x3') to maintain control and consistency. Be sure to fill joints completely, especially with subway tile’s rectangular format, which can trap air more easily than square tile layouts. For vertical installations such as backsplashes or shower walls, start from the bottom and work upward to prevent sagging. Apply lighter pressure to avoid displacing smaller or freshly set tiles.
Effective Cleaning and Excess Removal
After application, timely cleaning is essential. Begin wiping once the grout has begun to firm, typically 10 to 20 minutes in. Use a damp (not wet) sponge, wiping diagonally across the tile surface and rinsing frequently to avoid redistributing residue.
For epoxy grout specifically, follow the manufacturer's cleaning protocol within the allotted time frame to prevent haze. Once initial cleanup is complete, finish with a dry microfiber cloth to buff away any remaining film and inspect the joints for voids or low spots.
Curing and Sealing
Finally, proper curing solidifies the grout’s strength and stability. Allow grout to cure for 24 to 72 hours, depending on the product and ambient conditions, before exposing it to moisture or footfall. Early exposure can compromise adhesion or cause surface issues like efflorescence.
Cementitious and acrylic latex grouts typically require sealing after curing. Apply a penetrating sealer along grout lines and buff off any residue. This step is especially important in large-format or linear installations, such as with Edward Martin’s Shea 3x12 Matte Porcelain Tile in Stone, where extended grout runs are more susceptible to staining.
By contrast, epoxy and urethane grouts are inherently non-porous and don’t require sealing. Still, diligent post-installation cleaning ensures they retain their aesthetic and functional integrity over time.
Choosing Grout with Confidence
With all that said, grout may be subtle, but its impact on both performance and design is anything but minor. The right choice enhances structural integrity, resists wear, and completes the visual language of your tile installation. From joint size and tile type to environmental demands, each decision shapes the final result.
At Edward Martin, we believe well-informed choices lead to lasting craftsmanship. Whether you're perfecting a classic subway layout or experimenting with bold materials, we’re here to guide you toward a grout solution that brings it all together, cleanly, confidently, and beautifully.
