Subway tiles have remained a staple in interior design since the early 1900s, valued for their clean lines, timeless appeal, and remarkable versatility. Originally popularized in metropolitan subway stations for their durability and easy maintenance, these rectangular ceramic tiles have since evolved into a defining feature in both classic and contemporary interiors. Today, subway tile fireplace surrounds are especially sought after for their ability to introduce texture, dimension, and architectural character without overwhelming a space.
Beyond aesthetics, subway tiles are also highly practical for fireplace applications. Their heat-resistant properties, low-maintenance surface, and wide range of finishes make them an ideal material for creating a fireplace surround that balances performance with style. Whether you're drawn to a sleek modern fireplace, a rustic living room aesthetic, or a more transitional design, subway tiles offer endless layout possibilities—from traditional brick patterns to vertical stacks and intricate herringbone installations.
In this guide, we’ll explore the benefits of subway tiles for fireplaces, inspiring fireplace tile ideas, installation considerations, and maintenance techniques to help you create a refined, long-lasting focal point. We’ll also walk through a practical DIY subway tile fireplace surround process to help you confidently plan your renovation project from start to finish.

Vertical gray subway tiles surrounding a modern linear fireplace highlight the heat resistance, durability, and contemporary versatility that make subway tiles ideal for fireplace surround designs
What Are the Benefits of Subway Tiles for Fireplaces?
Subway tiles remain one of the most popular fireplace surround materials because they combine durability, heat resistance, and timeless design versatility. Commonly crafted from ceramic or porcelain, these tiles are engineered to withstand fluctuating temperatures without cracking, warping, or fading, making them especially suitable for both gas and wood-burning fireplaces. Their dense composition also allows them to maintain structural integrity even under prolonged radiant heat exposure.
In addition to performance, subway tiles bring a refined architectural quality to fireplace designs. Their elongated rectangular profile naturally creates visual movement, helping fireplace surrounds feel cleaner, taller, or more expansive depending on the installation pattern. Horizontal straight-set layouts often emphasize width and simplicity, while vertical stack or herringbone patterns introduce a more contemporary and design-forward appearance. This flexibility also allows subway tile fireplaces to adapt seamlessly across modern, farmhouse, Scandinavian, industrial, and transitional interiors.
Compared to mosaic tile fireplace surrounds, subway tiles typically offer a more streamlined and low-maintenance surface. Mosaic tiles can create intricate visual detail, but the increased number of grout joints often requires more frequent cleaning and upkeep. Subway tiles, by contrast, feature fewer grout lines and larger surface coverage, making them easier to maintain while still delivering texture and dimension.
Another major advantage is the extensive range of finishes, colors, and materials available. Glossy ceramic subway tiles can help reflect natural light and brighten smaller living rooms, while matte porcelain finishes introduce a softer, more organic look. Handmade subway tiles with uneven edges or artisanal glazing can also add subtle variation and depth, giving fireplaces a more custom, elevated appearance. From classic white subway tile fireplaces to dramatic charcoal, deep green, or textured neutral palettes, homeowners can tailor the design to complement nearly any interior style.
Functionally, subway tiles are also easy to clean and maintain. Their non-porous surfaces resist soot buildup, smoke residue, and staining, making routine maintenance simple with mild soap and water. This practical advantage, paired with their enduring visual appeal, makes subway tiles one of the most reliable and stylish choices for fireplace renovations.

A white herringbone subway tile fireplace surround demonstrates how installation patterns and layout direction can add texture, movement, and timeless elegance to modern fireplace designs
Expert Tips and Inspiration
Designing a subway tile fireplace surround involves more than simply selecting a tile color or layout. Proportion, material finish, grout contrast, and installation pattern all contribute to the overall visual impact of the fireplace within a room. Because fireplaces naturally serve as architectural focal points, thoughtful design decisions can significantly influence how balanced and cohesive the surrounding space feels.
Consulting a tile professional or interior designer can help refine your approach, especially when evaluating layout orientation, tile scale, and finish compatibility. For example, glossy subway tiles can enhance light reflection in smaller or darker rooms, while matte or textured finishes often create a softer, more grounded appearance suited to organic modern or rustic interiors. Designers can also help determine whether your fireplace would benefit from a full-height surround, a minimalist border installation, or a floor-to-ceiling statement wall.
Layout selection is equally important. For example, traditional running bond patterns create a timeless, familiar look, while stacked vertical layouts introduce clean contemporary lines that visually elongate the fireplace. Herringbone subway tile patterns, meanwhile, add movement and sophistication through directional geometry and layered texture. Even grout color plays a significant role—high-contrast grout emphasizes the tile pattern itself, while color-matched grout creates a more seamless and monolithic appearance.
Beyond aesthetics, professionals can also provide guidance on heat-resistant setting materials, substrate preparation, grout selection, expansion spacing, and edge trim solutions. These technical details are essential for ensuring long-term durability, particularly around high-temperature fireplace openings where improper installation can eventually lead to cracking or tile failure.
Inspiring Examples
Here are several subway tile fireplace ideas that showcase how different layouts, finishes, and materials can dramatically transform the atmosphere of a living space while complementing a wide range of interior styles.
Modern Elegance
A black subway tile fireplace paired with minimalist décor creates a striking contemporary focal point with strong architectural presence. Glossy finishes can further amplify depth by reflecting ambient light, helping darker tile colors feel sophisticated rather than visually heavy. One design that captures this refined aesthetic is our Jaden 2.5x16 Glossy Ceramic Tile in Ink, which features an elongated format, rich dark coloring, and handcrafted-inspired variation that adds dimension to sleek modern interiors.
Rustic Charm
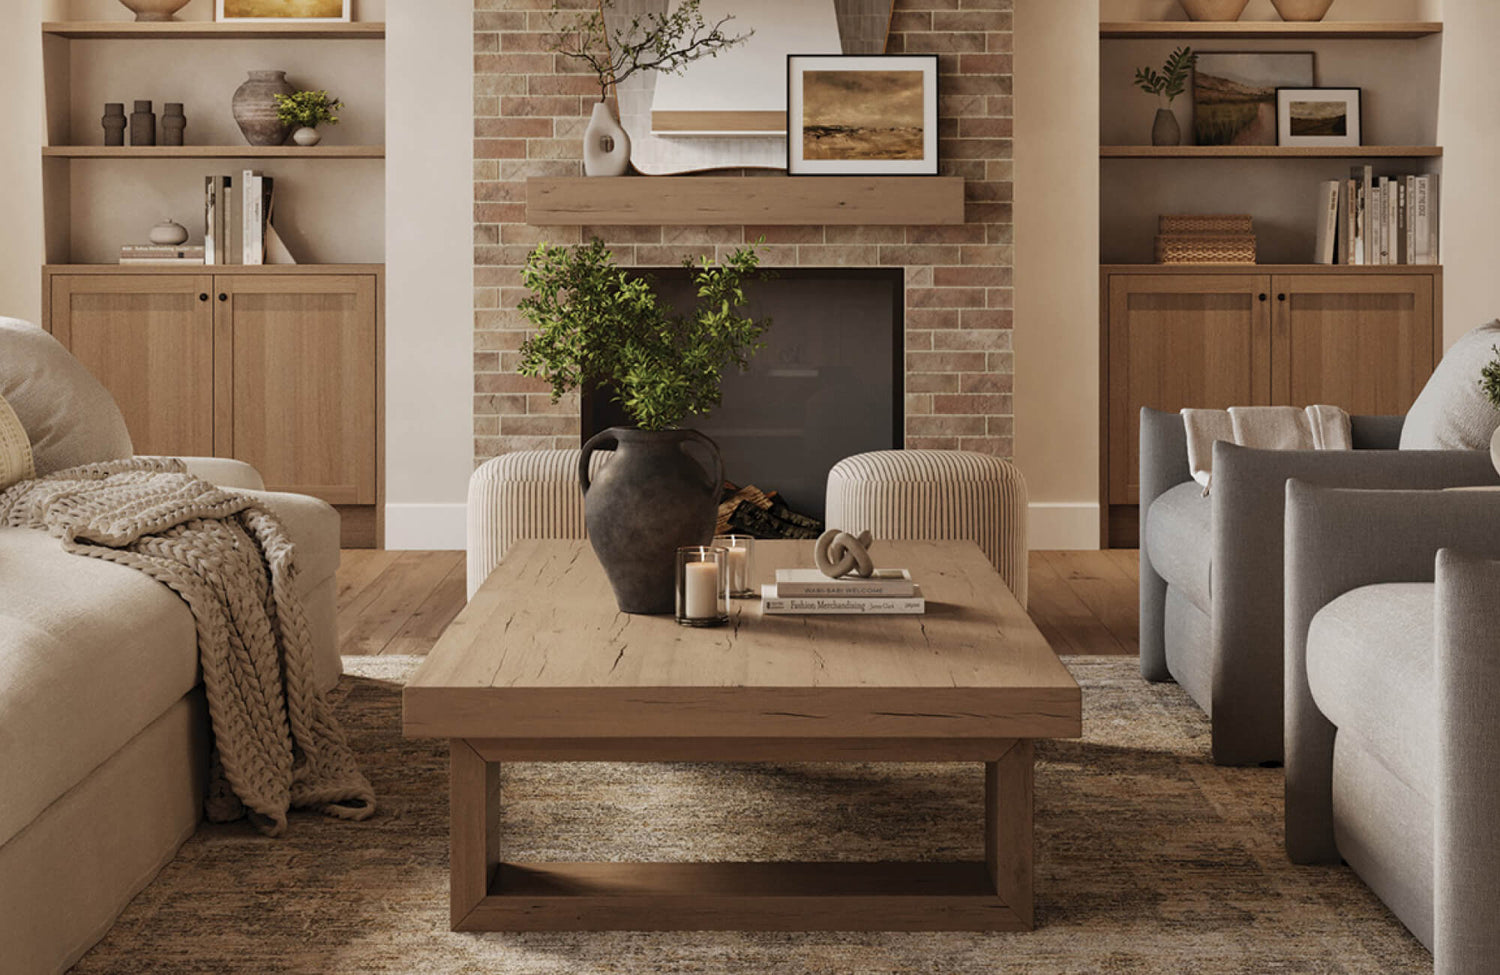
Pairing subway tiles with reclaimed wood mantels, exposed beams, or natural stone accents creates warmth and texture within farmhouse and rustic-inspired spaces. Matte ceramic subway tiles in soft neutral tones can help balance the organic character of weathered wood while maintaining a clean and timeless appearance. Layering these materials together creates visual contrast that feels inviting, relaxed, and grounded.
Bold Colors
Colored subway tile fireplaces are becoming increasingly popular for homeowners seeking a more personalized and dramatic statement. Deep green, navy blue, charcoal, and warm terracotta-inspired tones can instantly transform a neutral fireplace into a visually striking focal point.
Edward Martin’s Harper 3x12 Glossy Ceramic Tile in Vermilion captures this bold design direction beautifully, featuring a rich red-orange hue and reflective glossy finish that introduces warmth, depth, and contemporary character to living spaces. Its elongated format also enhances visual movement, making it an excellent choice for statement fireplace surrounds that balance vibrant color with refined architectural appeal.
Textured Appeal
Textured subway tiles like Remi 2x17 Glossy Ceramic Tile in Rust Deco can add subtle movement and dimensionality that flat surfaces often lack. Handmade ceramic tiles, chiseled edges, matte glazes, and lightly undulated surfaces interact differently with light throughout the day, creating a more layered and organic appearance. These textures work especially well in modern organic, Mediterranean, and transitional interiors where visual softness and tactile detail are prioritized.
Mixed Patterns
Combining subway tiles with larger-format tiles or integrating multiple layout orientations can create a more custom fireplace surround design. For instance, a classic horizontal subway tile field paired with a vertical stacked border or herringbone inset can introduce contrast without overwhelming the space. Mixing tile sizes and installation patterns also helps create visual hierarchy, allowing the fireplace to feel more intentionally designed and architecturally integrated.
Now that you’ve explored several subway tile fireplace ideas, the next step is understanding how to bring your own design vision to life through careful planning, material preparation, and proper installation techniques.

A white subway tile fireplace surround with subtle textured detailing illustrates how DIY subway tile installations can create a clean, timeless focal point with added warmth and dimension
Quick Guide to DIY Subway Tile Fireplace Surrounds
Installing a DIY subway tile fireplace surround can be a rewarding way to refresh your living space while adding long-term value and visual impact to your home. However, successful tile installation requires more than aesthetic planning alone. Proper surface preparation, heat-resistant materials, accurate tile spacing, and precise cutting techniques all play an essential role in achieving a professional-looking finish that performs well over time.
Before beginning your fireplace renovation project, it’s important to verify that the surrounding surface is structurally sound, clean, and suitable for tile adhesion. Depending on the condition of your existing fireplace surround, additional preparation such as sanding, leveling, sealing, or installing cement backer board may be necessary. While many homeowners complete subway tile fireplace projects independently, consulting a professional is always recommended when working around high-temperature surfaces or uneven substrates.
Tools and Materials Needed
Using the proper tile installation tools and high-quality materials can significantly improve both the appearance and longevity of your fireplace surround. Investing in durable setting materials and precision tools also helps minimize installation issues such as uneven spacing, weak adhesion, or cracked grout lines.
Tile Adhesive
Selecting a high-temperature thin-set mortar or heat-resistant tile adhesive is essential for fireplace applications. These adhesives are specifically formulated to maintain strong bonding performance even when exposed to repeated temperature fluctuations. Always follow the manufacturer's curing and mixing instructions carefully to ensure proper adhesion and long-term durability.
Tile Cutter
A wet tile saw or professional-grade manual tile cutter allows for cleaner, more precise cuts around fireplace edges, corners, and trim details. Wet saws are particularly beneficial when cutting porcelain subway tiles, as their dense composition can be difficult to score cleanly with basic hand tools. Precision cutting helps create tighter joints and a more polished finished appearance.
Trowel
A notched trowel ensures even thin-set distribution across the installation surface, helping create consistent tile adhesion while minimizing air pockets beneath the tile. Matching the notch size to the tile dimensions is especially important for achieving proper mortar coverage and preventing uneven installation.
Grout
To complete your installation, use a grout designed for high-heat areas to ensure long-term durability and crack resistance. Choosing a darker grout can help conceal any dirt or stains that may accumulate over time.
Plan Your Design
Careful planning is one of the most important steps in any subway tile fireplace renovation. Begin by measuring the fireplace surround accurately, accounting for trim edges, mantels, hearth extensions, and outlet placements if applicable. These measurements will help determine tile quantity, layout symmetry, and cut placement before installation begins.
Next, decide which subway tile pattern best complements your interior style. Traditional brick layouts offer timeless appeal, while stacked vertical patterns create a more contemporary architectural effect. Herringbone subway tile fireplaces can introduce movement and texture, particularly in minimalist spaces where subtle visual detail becomes more impactful.
It’s also helpful to dry-lay several rows of tile before installation to preview grout spacing, pattern alignment, and cut distribution. This process helps minimize awkward slivers near edges and ensures the overall design feels balanced and intentional.
If you're unsure about your choices, consider requesting free tile samples from Edward Martin to see how they fit into your space.
Prepare the Surface
A properly prepared surface creates the foundation for a durable and professional tile installation. Remove any loose paint, debris, dust, grease, or deteriorating material from the fireplace surround before applying adhesive. Uneven surfaces may require patching or sanding to create a flatter substrate for improved tile adhesion.
For brick fireplaces, applying a bonding primer or installing cement backer board may help create a smoother installation surface while improving mortar performance. If the fireplace has existing tile, verify that the original installation is secure and level before tiling over it.
Protect surrounding floors, mantels, and furniture with drop cloths or plastic sheeting during preparation and installation to minimize dust and adhesive splatter.
Cut Tiles
Once the layout has been finalized, begin cutting subway tiles according to your measurements and edge requirements. Accurate tile cutting becomes especially important around firebox openings, mantel legs, and outside corners where inconsistencies are more noticeable.
When possible, position cut tiles along less visible outer edges to maintain a cleaner and more symmetrical focal area. Using a tile file or rubbing stone after cutting can also help smooth sharp edges for a more finished appearance. Ordering extra subway tiles beforehand is highly recommended to account for breakage, pattern adjustments, or future repairs.
Lay the Tiles
Begin tile installation from the most visually prominent area of the fireplace surround, typically the centerline or top section, depending on the layout orientation. Working outward from this focal point helps maintain symmetry and balanced tile alignment throughout the installation.
Apply adhesive in manageable sections using a notched trowel, then press each subway tile firmly into place while maintaining consistent spacing with tile spacers. Frequently check alignment with a level to ensure rows remain straight and evenly positioned. Even minor inconsistencies can become highly visible once grout is applied, particularly with elongated subway tile formats.
Allow adequate curing time according to the adhesive manufacturer's recommendations before moving on to the grouting stage.
Grouting
Once the tile adhesive has fully cured, apply grout evenly across the joints using a rubber grout float. Work diagonally across the tile surface to help force grout fully into the joints while minimizing air gaps. Cleaning excess grout promptly with a damp sponge also helps reduce haze buildup on the tile surface.
Choosing the right grout color significantly affects the final design aesthetic. White grout paired with white subway tiles creates a classic and airy appearance, while darker grout introduces stronger visual contrast and emphasizes the tile pattern. After curing, applying a grout sealer can further improve stain resistance and simplify long-term maintenance.
With careful preparation, precise installation, and quality materials, a subway tile fireplace surround can become a long-lasting architectural feature that enhances both the functionality and visual character of your living space.

A classic beige subway tile fireplace surround showcases how routine cleaning and proper grout care help preserve the warmth, texture, and timeless appeal of tiled fireplace designs
Maintenance and Care
Proper maintenance is essential for preserving the appearance, durability, and finish quality of a subway tile fireplace surround. Fortunately, ceramic and porcelain subway tiles are relatively low-maintenance due to their dense, non-porous surfaces, which resist staining, moisture absorption, and soot buildup more effectively than many natural materials.
Routine cleaning typically involves wiping the tile surface with a soft microfiber cloth, warm water, and a mild pH-neutral cleaner to remove dust, smoke residue, or surface debris. Glossy subway tiles may require more frequent wiping to maintain their reflective appearance, while matte finishes can help conceal fingerprints and minor smudges more effectively.
Avoid using abrasive scrub pads, acidic cleaners, bleach, or harsh chemical solutions, as these products can gradually damage grout joints, dull glazed finishes, or weaken protective sealants. For stubborn soot stains or discoloration, following manufacturer-approved cleaning recommendations is the safest approach for protecting both the tile and grout over time.
In addition to regular tile cleaning, maintaining grout lines is equally important for preserving the overall appearance and longevity of your fireplace surround.
Tips for Maintaining Grout Lines
Because grout is naturally more porous than tile, it is often more vulnerable to staining, moisture penetration, and discoloration. Proper grout maintenance helps preserve the clean appearance of subway tile fireplace surrounds while extending the lifespan of the installation.
Seal the Grout
Applying a penetrating grout sealer creates a protective barrier that helps resist stains, soot absorption, and moisture infiltration. Most grout sealers should be reapplied periodically, depending on fireplace usage, humidity exposure, and manufacturer recommendations.
Regular Cleaning
Gently cleaning grout lines with a soft-bristle brush and a mild baking soda solution can help remove surface buildup without damaging the grout structure. Consistent maintenance also prevents deep-set staining that becomes more difficult to remove over time.
Prompt Cleanup
Cleaning spills, ash residue, or smoke buildup promptly helps minimize long-term discoloration and preserves the crisp appearance of grout joints. Keeping a microfiber cloth nearby for routine wipe-downs can make regular maintenance easier and more effective.
Following these best practices will help to preserve the appearance and integrity of your subway tile fireplace, making sure that it remains a stunning focal point in your home. If you want to see your design layout beforehand or how subway tiles would look in your fireplace, try out our augmented reality (AR) tool—it's a great way to visualize your ideas before making a final decision. Remember, a little care goes a long way toward maintaining the refined look of your space!
Achieve a Lasting Look with Subway Tiles
Transforming your fireplace with subway tiles is one of the most effective ways to introduce timeless style, architectural texture, and long-lasting durability into your home. From classic white ceramic subway tiles to bold contemporary layouts and textured artisanal finishes, subway tiles offer exceptional flexibility across nearly every interior design style.
Beyond their visual appeal, subway tile fireplace surrounds are valued for their heat resistance, low-maintenance surface, and enduring performance in high-use living spaces. Whether you choose a traditional running bond layout, a dramatic herringbone installation, or a sleek stacked pattern, thoughtful material selection and proper installation can elevate your fireplace into a refined focal point that feels both functional and sophisticated.
By following the design inspiration, installation techniques, and maintenance recommendations outlined in this guide, you can create a fireplace surround that remains visually striking for years to come. Whether completed as a DIY renovation or with professional assistance, a well-designed subway tile fireplace offers a timeless balance of practicality, craftsmanship, and elevated interior style.