Are you thinking about installing marble look tiles? Whether transforming a bathroom, updating a kitchen, or elevating a hallway, these tiles offer timeless appeal with a modern edge if laid correctly. The truth is, even the most stunning tile can lose its charm with poor installation.
In this article, we’ll walk you through the key steps to achieving a clean, high-end finish with marble look tiles. We'll cover everything from choosing the proper layout and prepping your surface to cutting, spacing, and grouting with care. Let’s get started and create a space that truly stands out.

Choosing the Right Marble Look Tiles
Laying marble look tiles starts with choosing a style that suits your space, meets your needs, and captures your design vision. From dimensions to veining patterns, your selection will influence the practicality and aesthetic of your finished project.
Understand Tile Types
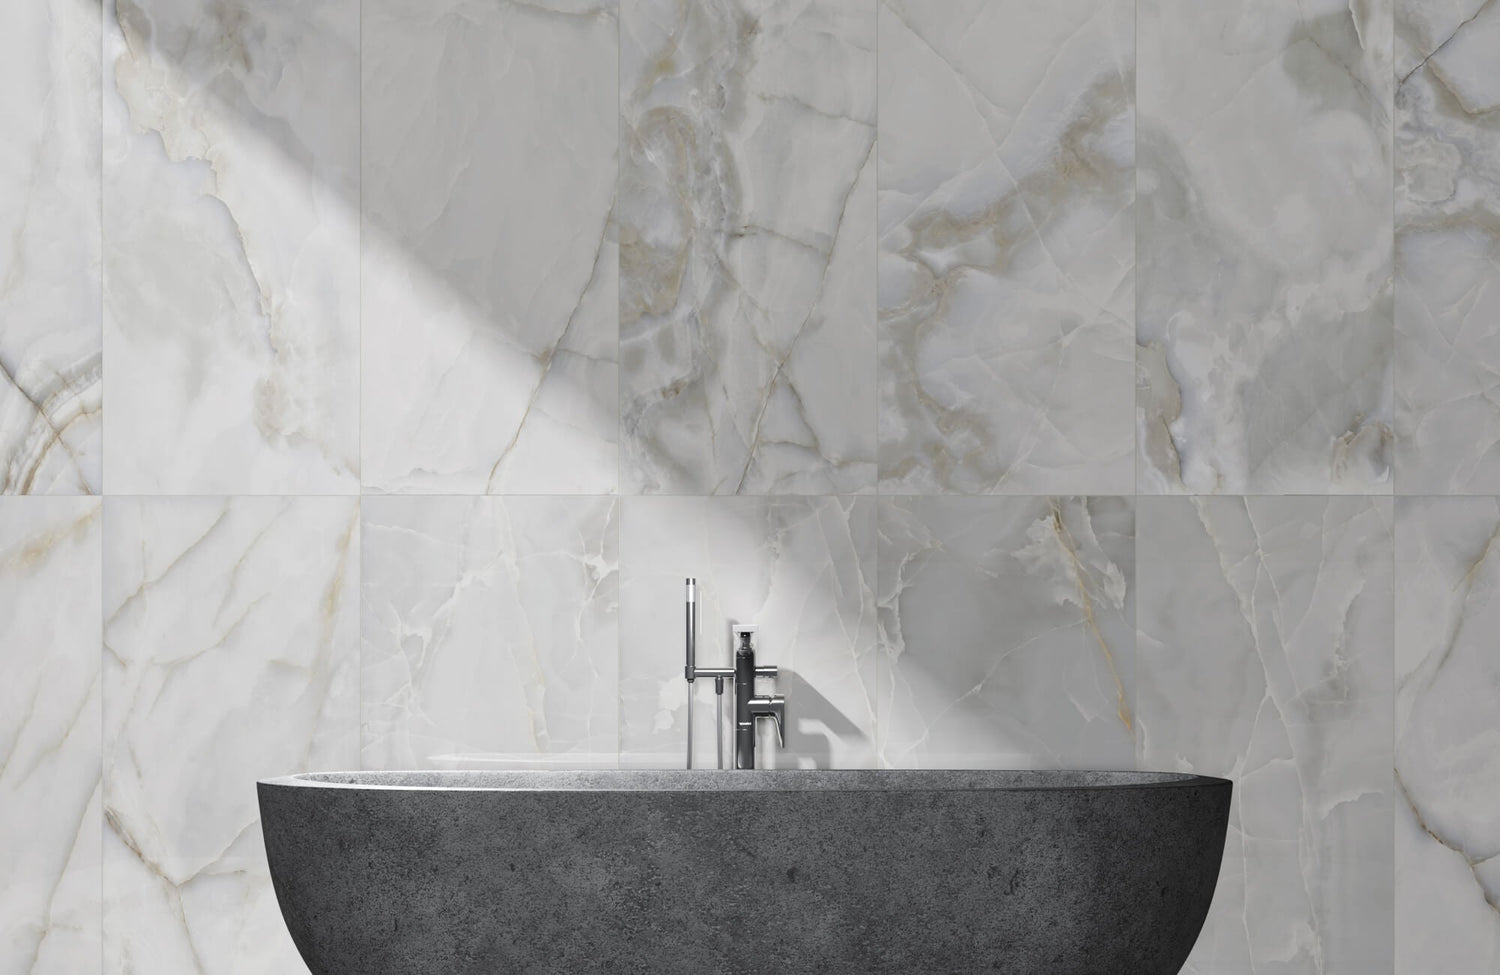
Starting with the material is essential, as it directly influences both performance and visual impact. With this, porcelain marble look tiles are the most versatile option because of their dense, low-porosity composition, which makes them ideal for moisture-prone areas like showers, kitchens, and outdoor patios. A perfect example is the Aniston 24x48 Matte Porcelain Tile in Calacatta Quarzite, as shown in the image above. It captures the luxurious veining of marble with the durability and low-maintenance benefits of porcelain, making it an excellent choice for both floors and walls in any space.
On the other hand, if you’re working with a dry area or focusing purely on aesthetics, ceramic marble look tiles like the Julianna 4x12 Glossy Ceramic Tile in Carrara might be a better choice. They’re easier to cut, more budget-friendly, and ideal for spaces like accent walls or backsplashes. Choosing the right material for your project ensures a beautiful, long-lasting result.
Match Size to Room Scale
The dimensions of your tile do more than just fill the space; they can also shape how your room feels. Large format marble look tiles, such as 24x48 or 12x24 inches, are ideal for open floor plans or modern, minimal interiors. With fewer grout lines, they can create a clean, uninterrupted look that visually expands the room and enhances that luxurious, seamless effect.
On the other hand, smaller formats like 6x6, 8x8, or mosaics are great for compact areas such as powder rooms, laundry spaces, or shower floors. These sizes offer more flexibility around tight corners and fixtures, making installation easier while allowing for creative patterns. In general, selecting a tile size that fits the scale of your space, rather than fighting against it, can elevate both flow and style.
Finish and Veining Matters
One of the standout features of marble-looking tiles is their veining, and knowing how to work with it can make all the difference in your design. Bold, directional veining can create a dramatic, eye-catching effect and works beautifully when you want the tile to take center stage. In contrast, soft, diffused veining can offer a more understated look, ideal for pairing with patterned rugs, detailed cabinetry, or statement countertops without overwhelming the space.
In addition, finishing plays a practical and aesthetic role when paired with veining. Glossy tiles reflect light beautifully, adding depth and dimension, which makes them perfect for formal areas or feature walls where you want a bit of shine. Matte finishes, on the other hand, offer a more grounded, contemporary feel and are often a safer option for floors in bathrooms and other high-moisture areas. When you consider finishing and veining together, you can enhance natural light for an airy feel or introduce contrast that adds balance and warmth to your design.

Planning the Layout with Visual Impact in Mind
Before you begin, it’s important to visualize how your marble look tiles will come together in the space. A well-planned layout not only enhances the design but also makes the installation smoother and more precise.
This is where an Augmented Reality (AR) tool can make all the difference. It lets you preview tile sizes, patterns, and orientations in your actual room, helping you compare options and avoid second-guessing once the installation begins.
Dry Lay Before You Commit
Before mixing any mortar, we recommend doing a dry run. Laying out a few rows in advance gives you a clear sense of how the pattern will flow across the space. It’s a simple step that helps avoid awkward tile slivers at the edges or veining that feels disjointed once everything is in place.
Dry laying also allows you to choose the best starting point. Depending on the room’s layout and what draws the eye, like a tub, vanity, or fireplace, you may want to center the pattern around a specific feature. Doing this extra step upfront can also ensure that the final result feels cohesive, balanced, and thoughtfully designed from every angle.
Consider Direction and Pattern
As you finalize your layout, it’s important to consider the direction and pattern of your tiles as these subtle decisions can have a big impact on how the space looks and feels. For instance, laying marble look tiles vertically can make a room appear taller, adding a sense of height and openness. A diagonal layout, on the other hand, introduces movement and a refined touch of elegance.
If you’re aiming for a clean, timeless look, a straight lay pattern is a classic choice. Alternatively, staggered or herringbone layouts can add visual texture and character, making the design feel more dynamic and personalized.
Additionally, when working with marble look tiles that feature directional veining, tile orientation becomes even more important. A consistent direction creates a sense of flow, enhancing visual continuity throughout the space. In contrast, alternating directions can create bold, high-contrast intersections that draw the eye. Ultimately, your layout should guide attention toward the elements you want to emphasize, whether it’s a focal point or the room’s natural architecture.
Account for Focal Points
Every room has a natural focal point, whether it’s a statement bathtub, a fireplace, or a pair of wide French doors. Aligning your tile layout with that feature helps guide the eye and emphasizes what matters most in the space.
Consider how veining direction and tile cuts can support that focus. For instance, in a long hallway, running the marble look tiles and veining lengthwise toward the end of the corridor creates a sense of direction and flow. This strategic alignment can also bring the whole room together, making it feel cohesive and intentionally designed.

Preparing the Surface for Installation
Once you’ve mapped out your layout and confirmed the visual direction of your design, it’s time to prepare the surface to support that plan. Proper preparation is the foundation of a long-lasting installation; every layer beneath the tile contributes to how well it performs and looks over time.
For the best results, especially with marble look tiles, consider working with a professional installer. Their expertise can ensure your surface is level, secure, and ready to handle both the weight and precision of your design.
Evaluate the Substrate
Before laying any tile, it’s essential to understand the condition of the surface beneath. Whether you’re installing over concrete, cement board, or plywood, start by checking for cracks, warping, or signs of moisture damage. Even minor imperfections can also lead to uneven tile placement or grout lines that fail over time.
Additionally, it’s important to consider how the subfloor handles movement and moisture. For instance, if you’re tiling over a wooden subfloor, adding a backer board or a waterproofing layer may be necessary to create a solid, long-lasting base. Taking the time to assess and prepare the surface properly can also help prevent shifting tiles, premature wear, and avoid repairs later on.
Level and Clean Thoroughly
Once you’ve confirmed that your base is in good shape, the next step is to level it out. Uneven surfaces can cause lippage, where tile edges don’t sit flush, which is especially noticeable with polished marble look finishes. To prevent this, it’s a good idea to use a self-leveling compound to smooth out any dips or high spots.
After leveling, giving the surface a proper clean is just as important. Dust, grease, or leftover construction debris can all interfere with how well the mortar sticks. Depending on the condition of the surface, you might need to vacuum, mop, or use a degreasing cleaner. It might feel like a small detail, but a clean surface can also make a big difference in ensuring a strong, lasting bond.
Use an Appropriate Underlayment
One step that’s easy to overlook but makes a big difference is choosing the right underlayment. In wet zones, a waterproof membrane prevents moisture from seeping through and compromising both tile and grout. In areas with potential structural movement, such as upper floors, using an uncoupling membrane also helps absorb stress and minimizes the risk of cracking.
The underlayment you choose should match the substrate and the space’s purpose. A cement backer board is ideal for walls and dry areas, while a peel-and-stick membrane may be more suitable for a quick but waterproof installation like the laundry room. By matching the underlayment to your conditions, you're not just securing tiles, you’re also building a foundation that lasts.

Tools and Materials You’ll Need
Once your surface is prepped and your layout is finalized, the next step is gathering the right tools and materials to ensure a smooth installation. Being well-equipped from the beginning not only keeps the process efficient but also helps avoid unnecessary delays or costly mistakes along the way.
Essential Installation Tools
To get started, you’ll need a tile cutter or wet saw, a notched trowel sized to your tile, a rubber mallet, spacers, and a dependable level. Each serves a specific purpose; tile cutters provide clean, accurate edges, while spacers can help maintain uniform lines that are ready for grout.
In addition to your cutting and leveling tools, make sure you have a reliable mixing paddle and a couple of sturdy buckets ready. Well-mixed mortar is easier to apply and ensures stronger adhesion, especially crucial for large format marble look tiles that require full, even coverage for a secure, lasting installation.
Choose the Right Adhesive
Not all mortars are created equal, and when it comes to marble look tiles, especially in lighter shades, your choice of adhesive impacts more than just strength. A white thin-set mortar is typically recommended, as darker mortars can sometimes show through thinner or semi-translucent porcelain or ceramic tiles, affecting the final appearance.
To ensure the best results, always refer to the tile manufacturer’s guidelines for adhesive compatibility. For large format tiles, a medium-bed mortar may be necessary to provide added support and prevent sagging, particularly when tiling walls and backsplashes.
Grout and Sealing Supplies
When it’s time to grout, consider the width of your joints and the surface finish. For polished marble look tiles, unsanded grout is ideal since it won’t scratch the surface. However, if you’re working with wider joints, sanded grout provides better strength and long-term stability.
Even though marble look tiles aren’t natural stone, sealants can still be helpful, especially if you’re using light-colored grout that’s prone to staining. Sealing can also help protect against discoloration and make ongoing maintenance easier. Be sure to have the right cleanup tools on hand too, like grout floats, sponges, and microfiber cloths, to keep the finish smooth and polished as you work.

Step-by-Step Installation Techniques
Now that you’ve prepped, planned, and equipped yourself, it’s time to bring it all together. We’ll guide you through each step of the tile-laying process to help you achieve a polished, professional-looking result.
Apply the Mortar Evenly
When it comes to applying mortar, it is recommended to start small. Work in a manageable section and use the notched side of your trowel, holding it at a consistent angle to create clean, even ridges. These ridges also help the tile bond properly by ensuring full contact with the surface, which is especially important for large format marble look tiles that are more prone to cracking if unsupported.
Be careful not to spread too wide an area at once, as mortar can dry faster than expected. Pressing tiles into mortar that’s already starting to set can also weaken the bond and cause long-term issues. To avoid this, mix only as much mortar as you can use at a steady pace, and prepare a fresh batch as needed to keep your installation smooth and consistent.
Maintain Consistent Spacing
As you lay each tile, be sure to use spacers between the edges to keep joints straight and evenly spaced. Even small shifts in placement can disrupt the alignment, especially with marble look tiles that feature directional veining or bold patterns.
To keep everything level and aligned, check your progress every few tiles with a level. Press each tile firmly into the mortar, and use a rubber mallet for gentle adjustments if needed. This small step can also make a big difference in achieving a clean, uniform finish that flows smoothly across the entire surface.
Cut Tiles Cleanly
Precise cutting is essential, especially when tile edges fall outside standard dimensions. A wet saw is the preferred tool for achieving smooth, chip-free cuts, particularly with dense, brittle porcelain marble look tiles. Careful measurement and dry-fitting of each piece before installation help ensure a proper fit without applying excess pressure or force.
Safety should never be an afterthought. Tile cutting can produce sharp shards and fine dust, so wearing protective eyewear and gloves is important to stay safe while working.
Let It Cure Before Grouting
Once the tile is set, it’s essential to let the mortar cure fully before grouting. It is recommended to wait 24 to 48 hours, depending on the room’s humidity and the product instructions. Walking on uncured tile or starting the next step too early can cause misalignment and break the bond you've worked hard to achieve.
In the meantime, make the most of the pause. Use this downtime to clean your tools, double-check your layout, and get your grout and sealing materials ready so you're fully prepared for the final phase.
Grout Application
When it comes to grouting, taking your time leads to better results. Start by using a rubber grout float held at a 45-degree angle to press the grout firmly into the joints, ensuring even coverage. Try to avoid dragging the grout across the entire tile surface, especially if you’re working with glossy or smooth finishes, as this can reduce the risk of haze or leftover residue.
As you go, wipe off any excess grout with a damp sponge before it begins to dry, rinsing frequently to prevent streaks. While it might be tempting to grout the whole area at once, working in small sections also gives you more control and helps maintain clean, consistent grout lines from start to finish.
Seal for Added Protection
Sealing may be necessary for some marble look tiles, depending on the material’s porosity and finish. Unglazed ceramic tiles typically require sealing to protect against moisture and staining. However, porcelain tiles like the Giada 12x24 Matte Porcelain Tile in Calacatta Gold are non-porous and generally don’t need sealing, making them a lower-maintenance option.
For sealing unglazed tiles, make sure the grout has been fully cured, usually about 72 hours before sealing. Use a small applicator bottle or foam brush for precise application, and follow the product’s recommended dwell time before wiping away any excess. This extra step can also add a lasting layer of protection and make ongoing maintenance much easier.
Final Cleaning and Polishing
After sealing, take a moment to do a thorough final inspection. Check for any lingering grout haze, smudges, or streaks that may have dried during the process. Gently buff the entire surface with a microfiber cloth to bring out the tile’s natural sheen and remove any remaining residue.
This is also a good time to touch up uneven grout lines or fill in low spots that may have settled as the grout is cured. A clean, polished finish enhances the marble look and highlights every detail, bringing your project to a refined, professional result.
Finishing Your Marble Look Tile Project Right
After planning the layout, prepping the surface, and following each installation step with care, you're now at the final stage of completing your marble look tile project. Every choice you've made, from material and pattern to cutting and sealing, comes together here to deliver a surface that feels both timeless and tailored to your space.
If you’re ready to begin your tile project, we’re here to help. Contact us today for expert guidance, design support, or help to place your order! We’re just a message away and ready to make your tile layout journey as smooth and successful as possible.


