


Updating a kitchen backsplash is one of those projects that can instantly refresh the entire room, but figuring out the cost isn’t always straightforward. Prices vary depending on the type of tile you choose, the size of the area, and whether you hire a professional or tackle it yourself. From affordable ceramic and porcelain to premium glass or natural stone, each option comes with different price points and installation needs. In this guide, we’ll break down the average costs, hidden factors, and smart ways to save so you can plan a backsplash that fits both your style and budget.

Breaking Down Average Costs
Installing a backsplash can vary widely in price, and much of that depends on the type of tile, the complexity of the layout, and the labor involved. Looking at average costs gives homeowners a realistic starting point, helping them set expectations and budget with confidence before moving forward.
National and Local Averages
On average, backsplash installations range from $10 to $40 per square foot when combining tile and installation. For most kitchens, this means a total project cost between $800 and $1,500, though larger or more detailed spaces can push it higher. Regional differences also play a big role, as urban areas typically carry higher labor costs compared to suburban or rural markets. Tile availability and local supply pricing also influence where your project lands on the spectrum.
Beyond the numbers, project size and scope directly impact cost. A small accent backsplash behind a stove will naturally be less expensive than a full-wall installation that spans countertops and cabinets. Design choices such as adding borders, inlays, or complex cuts can raise both labor time and material usage. Taking the time to define exactly how much area needs coverage makes it easier to budget accurately.
Labor vs. Materials
For many homeowners, the biggest surprise is how much of the backsplash budget goes toward installation rather than the tile itself. Typically, materials account for 30–40% of the total cost, while labor covers 60–70%. Simple subway tiles or large-format porcelain tiles often take less time to install, keeping labor costs lower. In contrast, intricate mosaics or patterns require additional cutting and precision, which adds hours and expenses.
The type of tile also influences the split. Affordable ceramic tiles may keep material costs down, but they can still require significant labor to install if the design is detailed. On the other hand, investing in premium porcelain or glass tiles may increase material expenses, yet the straightforward layout could help balance overall cost. Understanding how labor and materials interact allows homeowners to adjust their priorities without sacrificing quality.
DIY vs. Professional Install
Choosing to DIY a backsplash can reduce expenses considerably, since labor often represents the largest portion of the budget. With careful planning, you can purchase tiles, adhesive, grout, and tools at a fraction of the price of professional services. DIY works best for straightforward layouts and small areas, where precision is easier to manage. For many, it’s also a satisfying way to personalize a kitchen while keeping costs in check.
However, DIY comes with risks that may outweigh the savings. Crooked lines, poor spacing, or improper sealing can undermine the look and shorten the lifespan of the backsplash. Mistakes often require rework, which can end up costing more than hiring a professional in the first place. Experienced installers bring both speed and accuracy, ensuring the final result looks polished and lasts for years. Deciding between DIY and professional work depends on your confidence, tools, and the complexity of the design.

Tile Material Choices and Their Price Impact
The material you choose for your backsplash often becomes the biggest driver of overall cost. From budget-friendly ceramic to high-end natural stone, each option brings its own balance of price, durability, and upkeep. Knowing where each type fits on the spectrum makes it easier to plan a backsplash that feels both stylish and practical.
Ceramic and Porcelain Tiles
Ceramic and porcelain are among the most budget-friendly and practical backsplash choices. They typically range from $2 to $10 per square foot, making them accessible for most kitchens. Their durability ensures they hold up well against heat, moisture, and splatters. With endless shapes, colors, and finishes, they provide versatility without stretching your budget.
While porcelain tends to be slightly more expensive than ceramic, it also delivers superior density and water resistance. This makes it a better fit for kitchens that see heavy cooking or frequent cleaning. Ceramic, however, offers plenty of style at a lower cost, which appeals to budget-conscious homeowners. Both materials balance affordability with reliable performance.
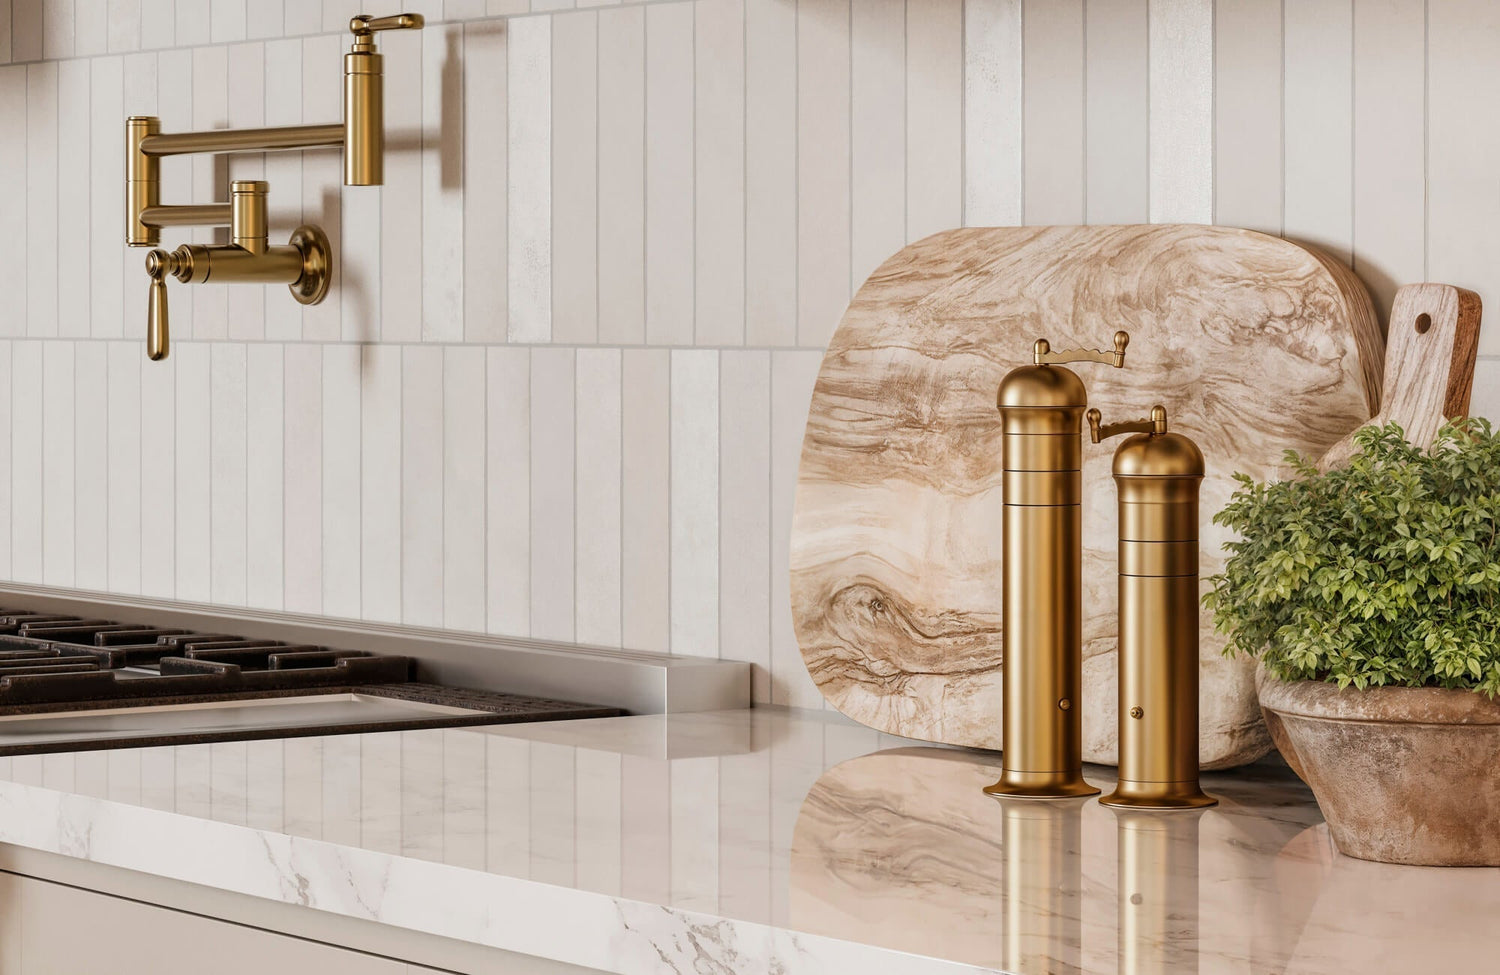
A great example is our Mikayla 2.5x5 Glossy Ceramic Tile in Olive, as seen above. Its rich green hue and glossy glaze capture a rustic, handcrafted beauty while reflecting light for a soft, inviting sheen. The slim subway format adds a contemporary twist, making it versatile for both classic and modern kitchens. This blend of artisanal character and fresh color brings warmth and personality to a backsplash without stretching the budget.
Glass and Mosaic Tiles
Glass and mosaic tiles fall into a higher price tier, usually between $10 and $30 per square foot. Their vibrant colors and reflective surfaces make them a striking focal point in modern kitchens. Mosaics often feature small, detailed patterns that add texture and interest. These designs instantly elevate the backsplash while also boosting material and labor costs.
Because mosaics require more intricate installation, professional labor costs are usually higher than with simpler tiles. Glass tiles also demand careful handling to avoid cracking during cutting. The extra effort can push overall expenses beyond what many homeowners expect. Still, for those prioritizing visual impact, glass and mosaic tiles are worth the investment.
Natural Stone Tiles
Natural stone options such as marble, slate, or travertine offer timeless appeal but come with premium pricing. Costs typically start around $15 per square foot and can climb much higher depending on rarity and finish. Their unique veining and organic textures make them ideal for high-end or classic kitchen designs. However, the beauty comes with added responsibilities in care and sealing.
Stone backsplashes often require routine sealing to prevent staining and etching. This maintenance adds to the long-term cost of ownership compared to ceramic or porcelain. Professional installation is also recommended since stone can be heavy and difficult to cut. Homeowners should weigh the visual elegance against the added expense and upkeep.
Specialty Finishes
Specialty finishes include metallic tiles, handmade ceramics, or designer collections that sit at the top end of the price scale. These options can range from $30 to $50 per square foot or even more for custom orders. They bring one-of-a-kind artistry and texture that instantly set a kitchen apart. For homeowners seeking a truly unique backsplash, specialty finishes provide unmatched style.
The premium price often reflects not just the material but the craftsmanship involved. Handmade tiles, for instance, may show slight variations that add to their charm. Metallic or patterned finishes can also require special adhesives or grouts, increasing installation costs. While these tiles are not budget-friendly, they deliver an elevated look that feels custom and distinctive.

Design Complexity and Extra Features
Not all backsplash installations are the same, and the level of design complexity can significantly influence cost. As mentioned earlier, even small changes in layout, pattern, or required adjustments can add hours of labor and increase material waste, raising the final bill.
Straight vs. Diagonal Layouts
A straight layout, where tiles are aligned in simple horizontal rows, is the most affordable and efficient option. It requires less measuring, cutting, and alignment, which reduces labor time and installation costs. Diagonal layouts, however, involve more precision to ensure tiles meet evenly at edges and corners. This increases cutting waste and slows down the process. For homeowners, the result is a more dynamic look but at a higher price point compared to straightforward layouts.
Diagonal layouts can also require more tiles overall, especially if the installer needs to trim multiple edges to keep symmetry intact. This means you may end up purchasing extra boxes of tile to account for cuts and misalignments. While the final result is often visually striking, the added expense can surprise homeowners. Choosing between straight and diagonal setups often comes down to balancing budget with design ambition.
Borders, Insets, and Patterns
Adding custom details like borders, insets, or intricate patterns brings character but also raises installation complexity. Borders often require additional planning to align evenly with the rest of the layout, while insets may use higher-end tiles that increase material costs. Patterns such as herringbone or chevron also demand precise cutting, which slows down labor considerably. These elements transform a simple backsplash into a statement feature, but they come with a noticeable price tag.
The benefit is that these details make your backsplash one-of-a-kind and add personality to the space. For example, a bold mosaic inset can highlight a stove area while a border frames the backsplash for a polished finish. Homeowners often find the added investment worthwhile when they want their kitchen to stand out. Still, it’s important to plan carefully, as labor hours for detailed layouts can quickly rival or exceed the cost of materials themselves.
Electrical Outlets and Cutouts
Electrical outlets and cutouts for fixtures are common obstacles in backsplash installation that add extra labor. Each outlet requires precise measuring and careful cutting to fit tiles around it without leaving gaps. Mistakes in this step can lead to broken tiles, wasted material, or uneven lines that disrupt the final look. Installers often charge more when multiple cutouts are involved since they slow down the process. For kitchens with many outlets, this can noticeably increase the labor bill.
Planning for these adjustments early helps keep costs under control. Some homeowners choose oversized outlet covers or strategic placements to simplify tile cutting. Others may work with an installer to pre-map areas where cutouts are most complex. These strategies can reduce wasted tile and minimize additional costs. While outlets and cutouts are unavoidable in most kitchens, the right preparation ensures they don’t derail the project budget.

Other Cost Considerations
Even after you’ve chosen the tile and design, there are hidden costs that can affect your backsplash budget. These extra factors don’t always show up in initial quotes, but can quickly add up if you’re not prepared.
Demolition and Preparation
Before a new backsplash goes in, the old one often needs to come out, and that can mean added labor. Removing existing tile, adhesive, or damaged drywall takes time and may require additional tools or disposal. If walls are uneven, they’ll need to be patched and leveled to ensure a smooth installation surface. This preparation is essential for a flawless finish, but it can raise the total cost more than many homeowners expect. Factoring in demolition and prep early helps avoid surprise charges once work begins.
In some cases, preparation might also uncover hidden issues like water damage or mold behind the old backsplash. Addressing these problems adds to the cost but ensures the new installation lasts. Skipping prep or trying to tile over flawed surfaces can lead to uneven lines, loose tiles, or premature failure. While the upfront cost may feel frustrating, it ultimately saves money by preventing future repairs. Proper preparation sets the foundation for both beauty and durability.
Grout and Sealing
Grout is more than just filler between tiles—it directly impacts the final look and performance of the backsplash. The type of grout you choose, whether sanded, unsanded, or epoxy, comes with different price points and levels of durability. Sealing natural stone tiles or grout lines also adds to costs but helps protect against stains and moisture. These finishing touches often get overlooked in budgeting, yet they are essential for long-term upkeep. Without them, even the most beautiful backsplash can wear down quickly.
Maintenance is another factor many homeowners forget to include. Some grout types need resealing every few years to maintain their resistance to water and discoloration. These periodic costs are small compared to full replacement but still matter in long-term planning. Choosing higher-quality grout or investing in proper sealing at installation can save money and effort down the line. This makes grout and sealing one of the smartest “hidden” costs to prioritize.
Cleanup and Waste Disposal
Cleanup may not be the first thing you think about when planning a backsplash, but it’s a real part of the budget. Tile cutting leaves behind dust and scraps, while old materials from demolition need proper disposal. Many installers include cleanup in their service fees, but some charge extra depending on project size and waste volume. If disposal isn’t accounted for, you may end up handling it yourself, which can be time-consuming and inconvenient. Being clear on who handles cleanup avoids surprise expenses.
Proper cleanup also ensures the kitchen is functional right after installation. Leftover grout haze, sharp tile edges, or piles of debris can make the space unsafe or unusable until addressed. Professional disposal and finishing help deliver a polished result that feels complete. It’s a smaller cost compared to labor or materials, but skipping it can create unnecessary stress. Including cleanup and disposal in your budget makes the entire installation process smoother from start to finish.

How to Save on Backsplash Installation
Backsplash installation doesn’t have to break the bank. With a few strategic choices, homeowners can achieve a stylish, durable design without overspending. Here are practical tips that balance impact with cost.
Choose Standard Layouts Over Complex Patterns
Keeping the layout simple is one of the easiest ways to cut costs. While intricate patterns look beautiful, they quickly drive up installation expenses. Sticking with straightforward layouts keeps the budget manageable while still delivering a polished look.
Opt for Smaller Coverage Areas
You don’t always need to tile an entire wall to make a statement. Focusing on high-impact areas, like behind the stove or sink, saves both material and labor costs. These spots still create a focal point while leaving the rest of the wall painted or finished more affordably. This selective approach works especially well in smaller kitchens where every dollar counts. By scaling down the coverage area, you can achieve style without overspending.
Use Larger Tiles to Reduce Labor
Larger tiles cover more wall space with fewer pieces, which naturally reduces cutting and installation time. This efficiency translates to lower labor costs and less waste overall. Bigger tiles also create a clean, modern look that can make a kitchen feel more spacious. Many homeowners find that the simplicity of larger tiles complements both traditional and contemporary designs. Choosing larger formats is a cost-friendly way to balance design and practicality.
DIY the Prep Work
Taking on some of the preparation yourself can make a noticeable difference in the budget. Removing the old backsplash, scraping off adhesive, or cleaning the walls are tasks that don’t always require professional help. Even handling grout sealing after installation can cut down on labor hours. These small efforts save money while still leaving the more technical work to experienced installers. By splitting responsibilities, you reduce costs without compromising quality.
Repurpose Leftover Tiles
Another budget-friendly option is reusing materials from past projects or buying clearance tile batches. Leftover tiles can be mixed into creative patterns, borders, or small accent areas that add character to the backsplash. Many suppliers also sell end-of-lot tiles at discounted prices, which helps stretch your budget further. Even if the colors or textures vary slightly, they often blend into rustic or eclectic designs beautifully. Repurposing not only saves money but also adds a unique, personalized touch to the kitchen.
Use Our AR Tool to Plan Before Buying
Our augmented reality (AR) tool makes it simple to preview backsplash designs in your own kitchen before making a purchase. By visualizing layouts and finishes directly on your walls, you can avoid costly mistakes and choose tiles that truly match your space. This interactive feature also lets you experiment with bold colors, patterns, and textures without the risk of overbuying. It’s a practical way to narrow down choices while giving you confidence that your design vision will translate beautifully in real life.
Making the Most of Your Backsplash Budget
Installing a kitchen tile backsplash can be as budget-friendly or as premium as you make it, with costs shaped by tile choice, layout, and labor. From ceramic and porcelain to glass or natural stone, every material offers different levels of style and durability. Factoring in design complexity, prep work, and hidden costs ensures you set a realistic budget and avoid surprises along the way. With the right planning, a backsplash not only protects your walls but also adds lasting value to your kitchen.
If you’re ready to balance cost with design impact, consider scheduling a design consultation with Edward Martin. Our team can help you explore tile options, plan layouts, and create a backsplash that looks polished, performs well, and fits your budget.