


Bringing the timeless beauty of marble into your space doesn't have to mean installing expensive stone. With the right approach, you can replicate the elegant look of marble on your floors using accessible and budget-friendly techniques. Whether you’re designing a high-end interior or giving your home a refined upgrade, creating a marble effect on your floor is a transformation that’s well within reach. From painting and acid staining to epoxy applications and marble look tiles, there are multiple methods to achieve the style you’re after, each offering its own distinct appeal.
In this guide, we’ll walk you through the most effective ways to recreate the marble look, step by step. Whether you're a DIY enthusiast or planning to hire a pro, you’ll discover everything you need to bring a sense of luxury and depth to your floors.

Understanding Marble and Its Characteristics
Before you begin, it helps to know what makes real marble so captivating. Natural marble is revered for its intricate veining, soft glow, and one-of-a-kind appearance. These features come from mineral impurities, such as iron oxide and graphite, that become embedded in limestone as it transforms under heat and pressure. The result is a striking visual texture that feels both organic and luxurious. Colors in marble range from pure whites and creams to bold blacks, greens, and golds, depending on the minerals present. Many types of marble also display a subtle translucency, which allows light to gently penetrate the surface, creating a soft internal glow.
Beyond its aesthetic appeal, marble has long been associated with architecture, art, and timeless design. From the palaces of ancient Rome to modern luxury interiors, it represents sophistication and permanence. By understanding the characteristics that make marble so desirable, such as its cool, smooth texture and naturally varied appearance, you’ll be better equipped to capture that same essence through alternative materials and techniques. Even though the final result may not be genuine stone, it can evoke the same emotional and visual response when executed with care and creativity.
If you want your faux marble floor to look realistic, take time to study samples of real marble. Look at the flow of veins, the depth of the tones, and how colors blend into one another. These natural patterns will become your guide as you replicate them using paint, stain, or epoxy. Understanding marble’s visual nuances allows you to move beyond imitation and achieve a finish that truly honors the essence of the material.

Preparing the Floor Surface
Every great finish begins with thoughtful preparation. If you want your marble effect to look seamless and last for years, the surface beneath it must be clean, level, and smooth.
Start by giving your floor a thorough cleaning. Sweep away loose dirt and debris, then use a degreasing solution to remove oils, wax, or residue from previous coatings. Rinse the floor well and let it dry completely before moving on. Even trace amounts of grease or dust can interfere with adhesion, so attention to detail here makes a noticeable difference.
Once the surface is clean, examine it for flaws. Cracks, chips, and uneven areas can interfere with the final look, so use a concrete patch or filler to address imperfections. For larger surface issues, applying a self-leveling underlayment can help you create a solid, uniform base. It’s also a good idea to check that the surface slopes are minimal, especially in older homes where uneven settling may have occurred. A level floor ensures consistency in the marble effect and prevents pooling when working with liquid materials like epoxy or glaze.
After repairs are complete, lightly sand or grind the floor. This helps create a surface texture that promotes better adhesion for whatever finish you plan to apply—paint, stain, or epoxy. Don’t rush this step; the subtle abrasions give coatings something to “grip,” improving both longevity and appearance.
Finish by vacuuming away all dust and wiping the floor down with a damp cloth. At this stage, you’re ready to begin the transformation. Taking your time during preparation not only enhances the look of the final result but also increases its durability and ability to withstand daily use.

Marble Effect Techniques
With your floor prepped and ready, it's time to choose a technique. Each method, whether it involves paint, stain, or epoxy, offers a different take on the marble aesthetic. The right one for you depends on the look you’re going for, your budget, and how much time and effort you’re willing to invest.
Paint and Glaze Technique
If you’re looking for a customizable and budget-friendly approach, the paint and glaze method is a great place to start. This technique uses layering and translucent veining to mimic the look of marble with artistic flair.
Begin by choosing your colors. You’ll need a light base shade, like white, cream, or soft gray, and two or three darker colors for the veins. Think of tones like charcoal, espresso, or even deep taupe. Once your palette is set, apply two or three thin coats of your base color. Allow each layer to dry completely before adding the next. The goal is to create a clean, even foundation.
Next, prepare your glaze. Mix your veining colors with a clear glaze to give them a soft, semi-transparent quality. Using a feather, brush, or sponge, apply the glaze in flowing, irregular lines that imitate natural marble veins. Change the angle and pressure as you work to avoid patterns that feel too uniform. You can use a dry brush to soften harsh edges or blend colors where needed.
To build depth, layer additional glazes in subtle tones. A little misting or dabbing can go a long way in adding nuance. Once you’re satisfied with the result, seal everything with a high-quality polyurethane or acrylic sealer. This topcoat adds a gentle sheen and protects your design from wear.
Acid Staining
For concrete floors, acid staining offers a distinctive way to achieve a marble-like effect that’s both earthy and elegant. This process relies on a chemical reaction between the stain and the minerals in concrete, creating a variegated, stone-like surface that’s truly unique.
Start by preparing your surface as outlined earlier. Once it’s ready, apply a base stain using a sprayer or sponge. After that, you can introduce complementary colors to form organic veining. You might use a fine brush, eyedropper, or sponge to create flowing lines and soft color shifts.
Timing is key with acid stains. The longer the stain remains active, the deeper and richer the colors become. To maintain lighter tones, neutralize the stain sooner. Always do a small test area first so you can adjust your technique based on how the floor responds.
When the staining is complete, use a neutralizing solution, typically a mixture of water and baking soda or ammonia, to stop the chemical reaction. After thoroughly rinsing and drying the floor, seal it with a protective coating. This will enhance the finish and preserve the color.
Epoxy Coatings
If you’re aiming for a sleek, high-gloss look with a dramatic edge, epoxy coatings are worth considering. This method offers exceptional durability and depth, making it popular in modern homes, commercial showrooms, and busy areas.
To get started, select a two-part epoxy kit designed for decorative floors. Look for one that supports the use of metallic pigments or marble additives. Prepare your floor with care—cleaning, repairing, and possibly grinding it to ensure the epoxy bonds well.
Mix the epoxy according to the manufacturer’s instructions, then add your pigments. Once the mixture is ready, pour it onto the floor in manageable sections. Use brushes, trowels, or even a heat gun to move and manipulate the colors into vein-like swirls. You can drag a feather through the wet epoxy to create marble-style lines that feel natural and organic.
Allow the epoxy to cure completely—this usually takes 48 to 72 hours. During that time, keep the space clean and undisturbed. Some systems may also call for a UV-resistant topcoat, especially in areas with lots of natural light.
Once cured, your epoxy floor will be shiny, strong, and easy to maintain. A regular cleaning routine using gentle, pH-neutral cleaners will help keep it looking pristine.

Marble Look Tiles
If you're seeking a marble aesthetic with maximum convenience and durability, marble look tiles are an ideal solution. These tiles, typically made of porcelain or ceramic, are engineered to replicate the natural veining and coloration of authentic marble. Thanks to advanced digital printing technologies, today’s marble look tiles are virtually indistinguishable from the real thing, at a fraction of the cost and effort.
Benefits of Marble Look Tiles
One of the greatest advantages of marble look tiles is their resilience. Unlike natural marble, which is porous and prone to scratching or staining, porcelain tiles are non-porous, water-resistant, and extremely durable. This makes them a perfect fit for moisture-prone spaces like bathrooms, kitchens, and entryways.
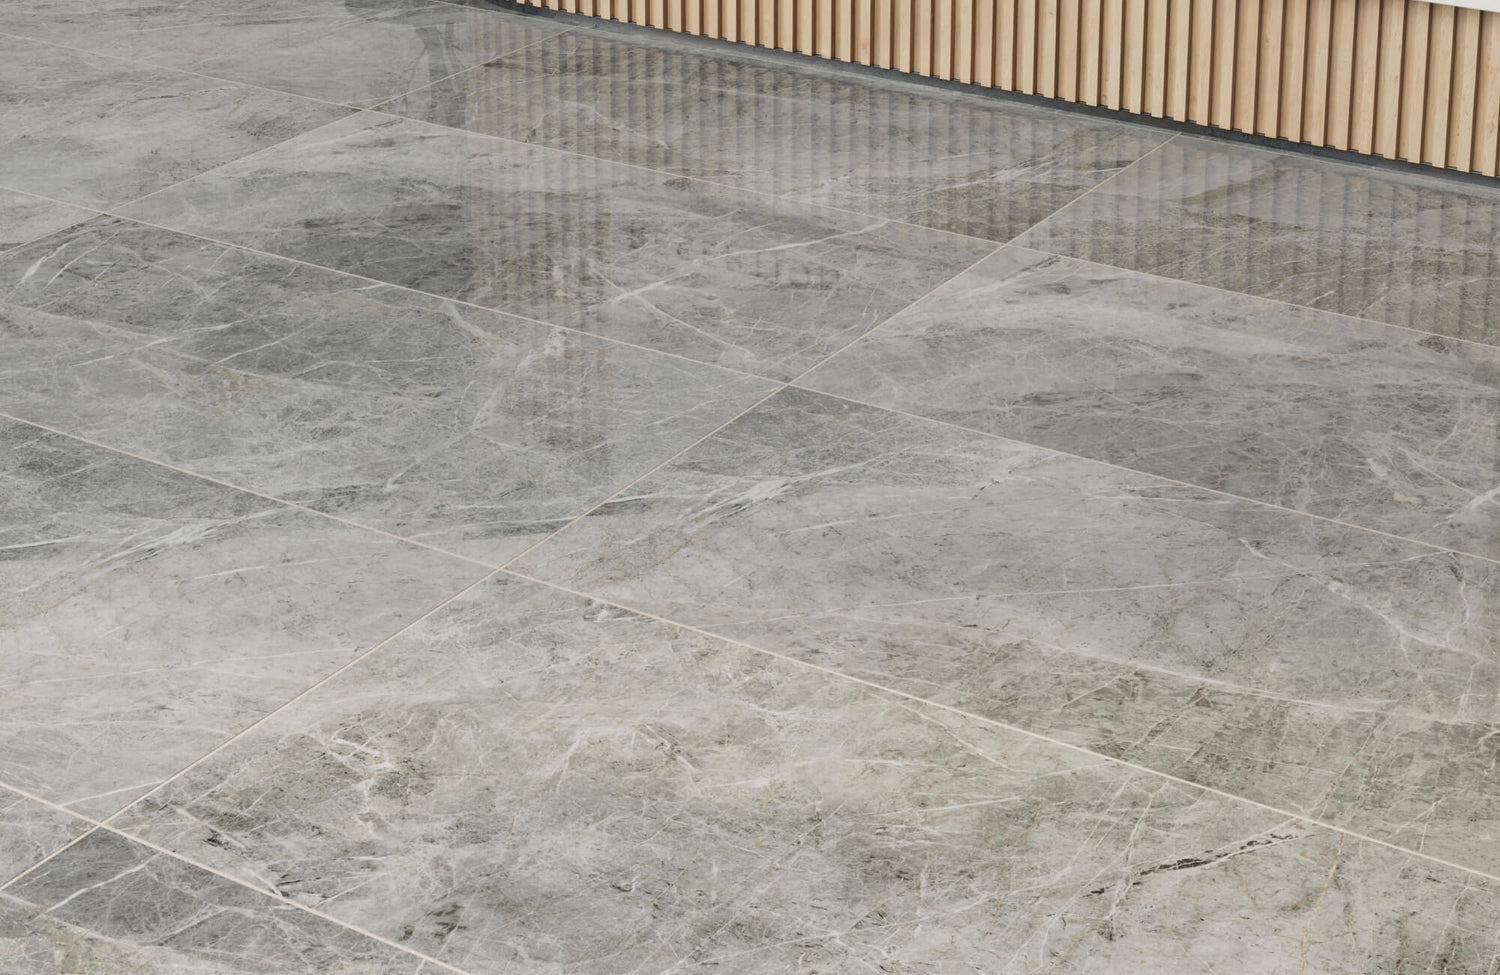
They also eliminate many of the maintenance challenges associated with real marble. There’s no need for sealing, polishing, or special cleaners. Basic sweeping and mopping are enough to keep them looking pristine. Additionally, the initial cost and installation of porcelain tiles are often significantly lower than those of marble slabs. A striking example of both beauty and performance, as shown in the photo above, is Edward Martin’s Aniston 24x48 Matte Porcelain Tile in Calacatta Viola. This tile blends bold veining with soft matte texture, delivering a dramatic marble-inspired design that remains easy to care for and resilient in everyday settings.
Tile Types and Finishes
Marble look tiles are available in a wide variety of finishes and formats. Glossy polished tiles offer a glamorous, high-end feel, while matte or honed finishes provide a more understated elegance. Each finish affects not only the visual texture of your space but also its functionality. Polished tiles can reflect light and open up a room, whereas matte finishes may offer better slip resistance, especially important in wet areas.
In terms of size, large-format tiles such as 24"x48" create a modern, seamless look with fewer grout lines, giving the illusion of a continuous marble slab. They’re particularly effective in expansive areas like open-concept living rooms or large bathrooms. The Aniston 24x48 Matte Porcelain Tile in Calacatta Quartzite is a perfect example of this format in action—it delivers a bold marble aesthetic with elegant veining and soft matte texture that enhances both visual impact and usability.
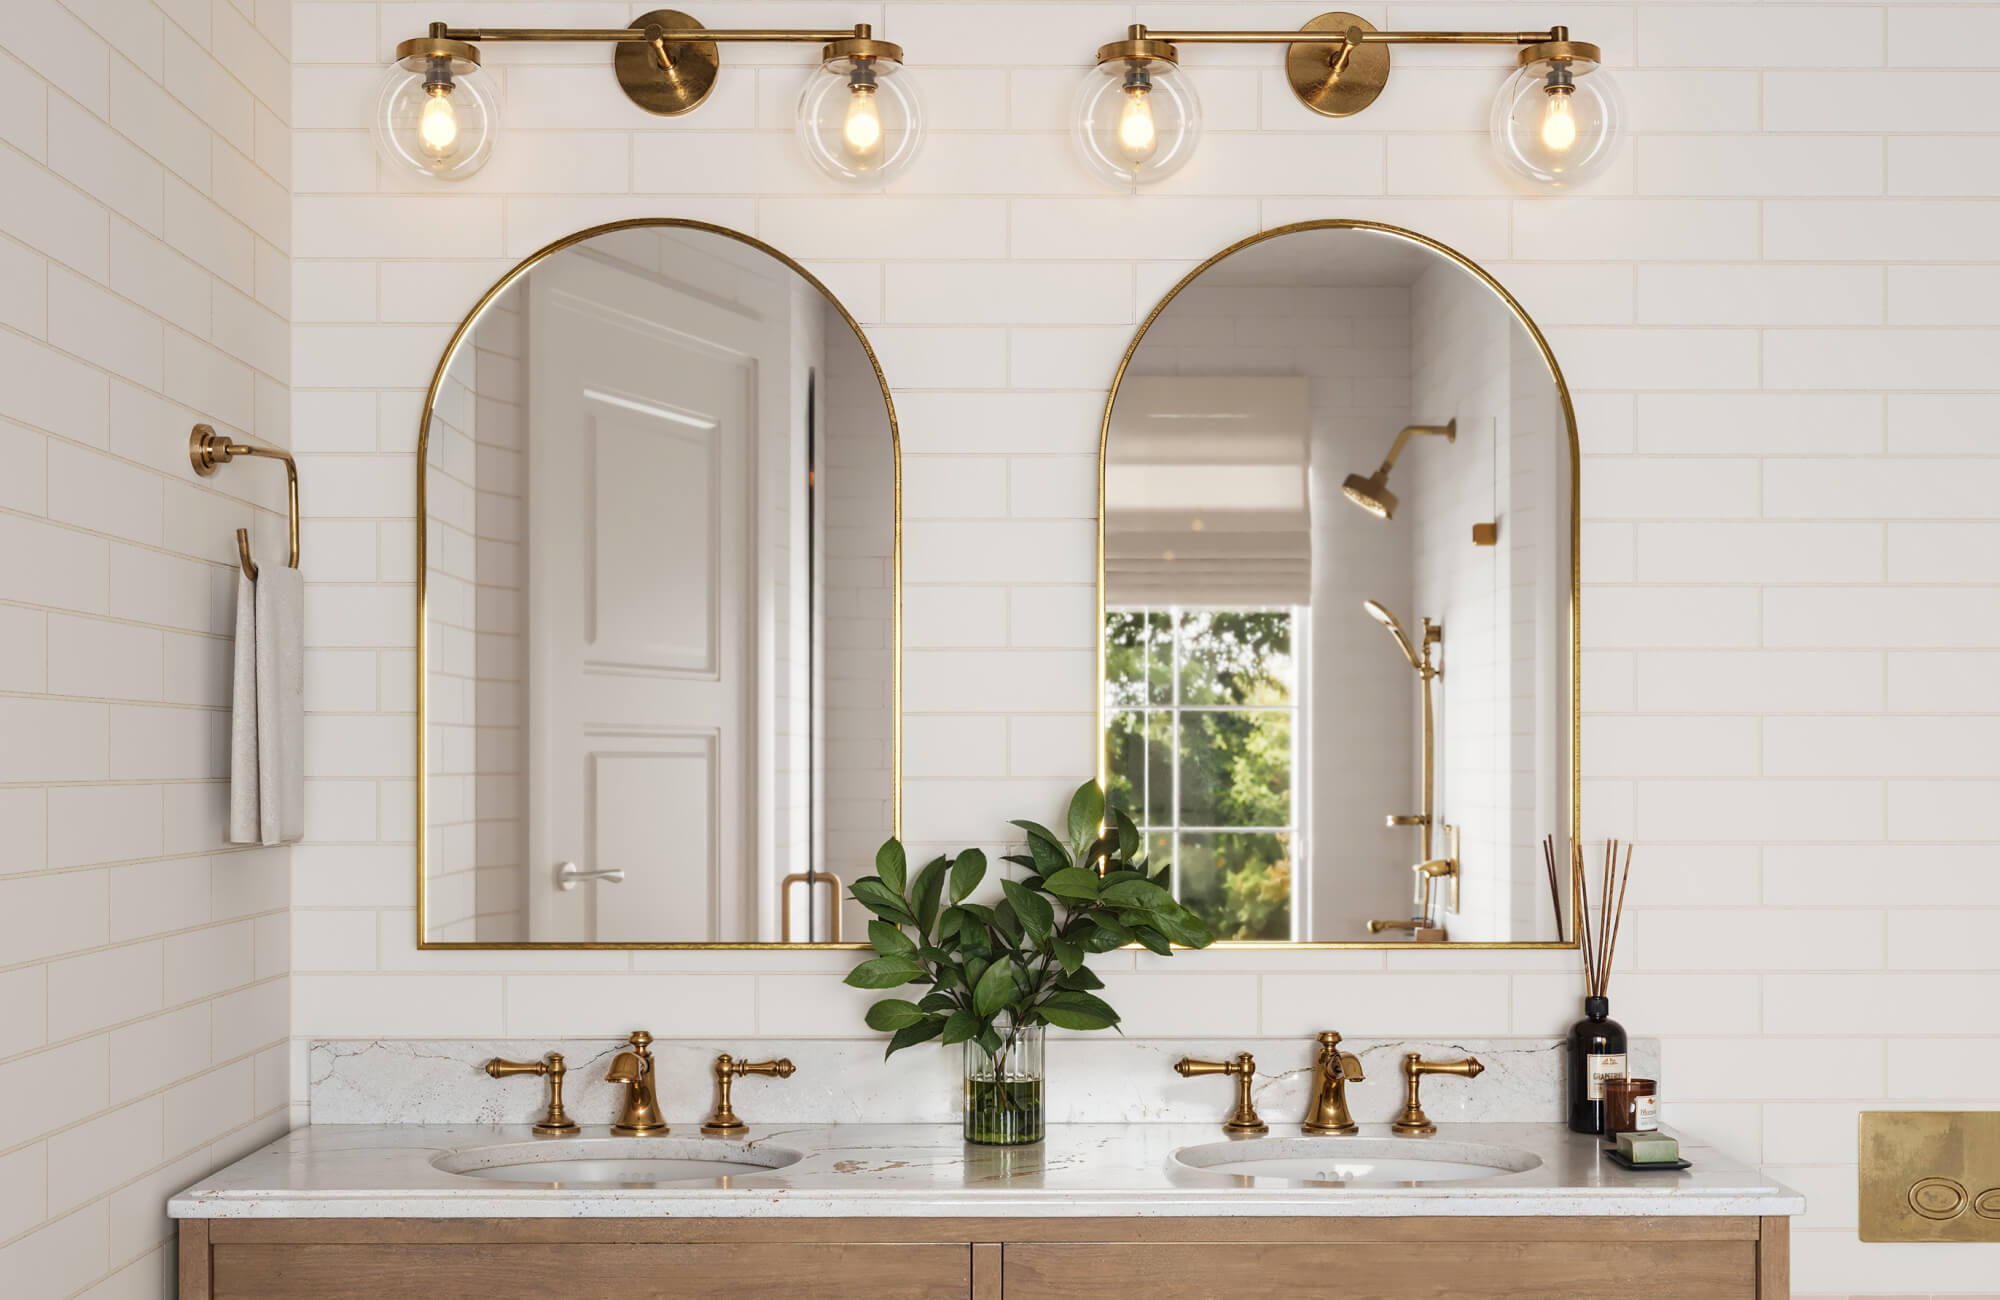
Smaller tiles allow for more intricate layouts and are suitable for compact spaces or decorative accents. In showers, backsplashes, or detailed flooring insets, they offer excellent versatility. The Aniston 2x2 Matte Porcelain Mosaic Tile in Calacatta Top is a standout in this category, combining a classic mosaic style with the soft veining of Calacatta marble, ideal for adding texture and contrast to smaller surfaces while maintaining a cohesive look.
Installation Considerations
Installing marble look tiles follows the same basic process as other ceramic or porcelain tile projects. Start by ensuring the subfloor is dry, clean, level, and structurally sound. If necessary, use a cement backer board for added support. Apply tile adhesive according to the manufacturer’s directions, then carefully lay the tiles with spacers for even grout lines.
Once the adhesive has cured, apply a color-matched grout to enhance the realism of the marble design. Using a grout color that closely resembles the tile’s veining helps create a cohesive and authentic look. After the grout sets, wipe down the tiles and allow everything to dry completely before use.
While experienced DIYers can sometimes handle tile installation themselves, professional installation is often the best choice, especially when working with large-format tiles or intricate layouts. A skilled installer ensures precise alignment, clean grout lines, and proper substrate preparation, all of which contribute to the longevity and visual impact of the finished floor.
Long-Term Maintenance
Marble look tiles are extremely low-maintenance. Regular sweeping or vacuuming and occasional mopping with a mild detergent are usually all that’s required. Unlike real marble, these tiles don’t etch or discolor from acidic substances, and they resist most household stains. For grout lines, occasional scrubbing with a grout-safe cleaner can prevent buildup and maintain a fresh appearance.
To keep your floors looking their best for years to come, it’s always advisable to follow the manufacturer’s maintenance guidelines. These instructions are tailored to the specific materials and finishes used, helping you avoid products or methods that could dull or damage the surface. Adhering to these recommendations not only preserves the appearance of the tile but also helps maintain any applicable warranties.

Additional Tips and Considerations
As you plan your project, remember that creating a marble effect is as much an art as it is a process. Don’t be afraid to experiment. Try layering techniques, blending colors, or combining methods to achieve a custom result. For example, you might use an acid stain for the base and add epoxy veining on top for added dimension.
If you’re unsure about your freehand skills, marble veining stencils or templates can help guide your design. You’ll still get a handcrafted look, but with a bit more control.
It’s also important to match your technique to your lifestyle and the room’s needs. Glossy epoxy finishes look stunning in kitchens and showrooms, but they might be too slick for some living areas. Matte or satin finishes often offer a more natural feel for bedrooms or lounges.
Budgeting is another key factor. Painted floors are typically the most affordable, with low material and tool costs. Acid staining and epoxy sit in the mid-range, while high-end porcelain tiles can be the most expensive, especially when factoring in installation labor. Whichever method you choose, account for preparation, materials, time, and sealing in your overall plan.
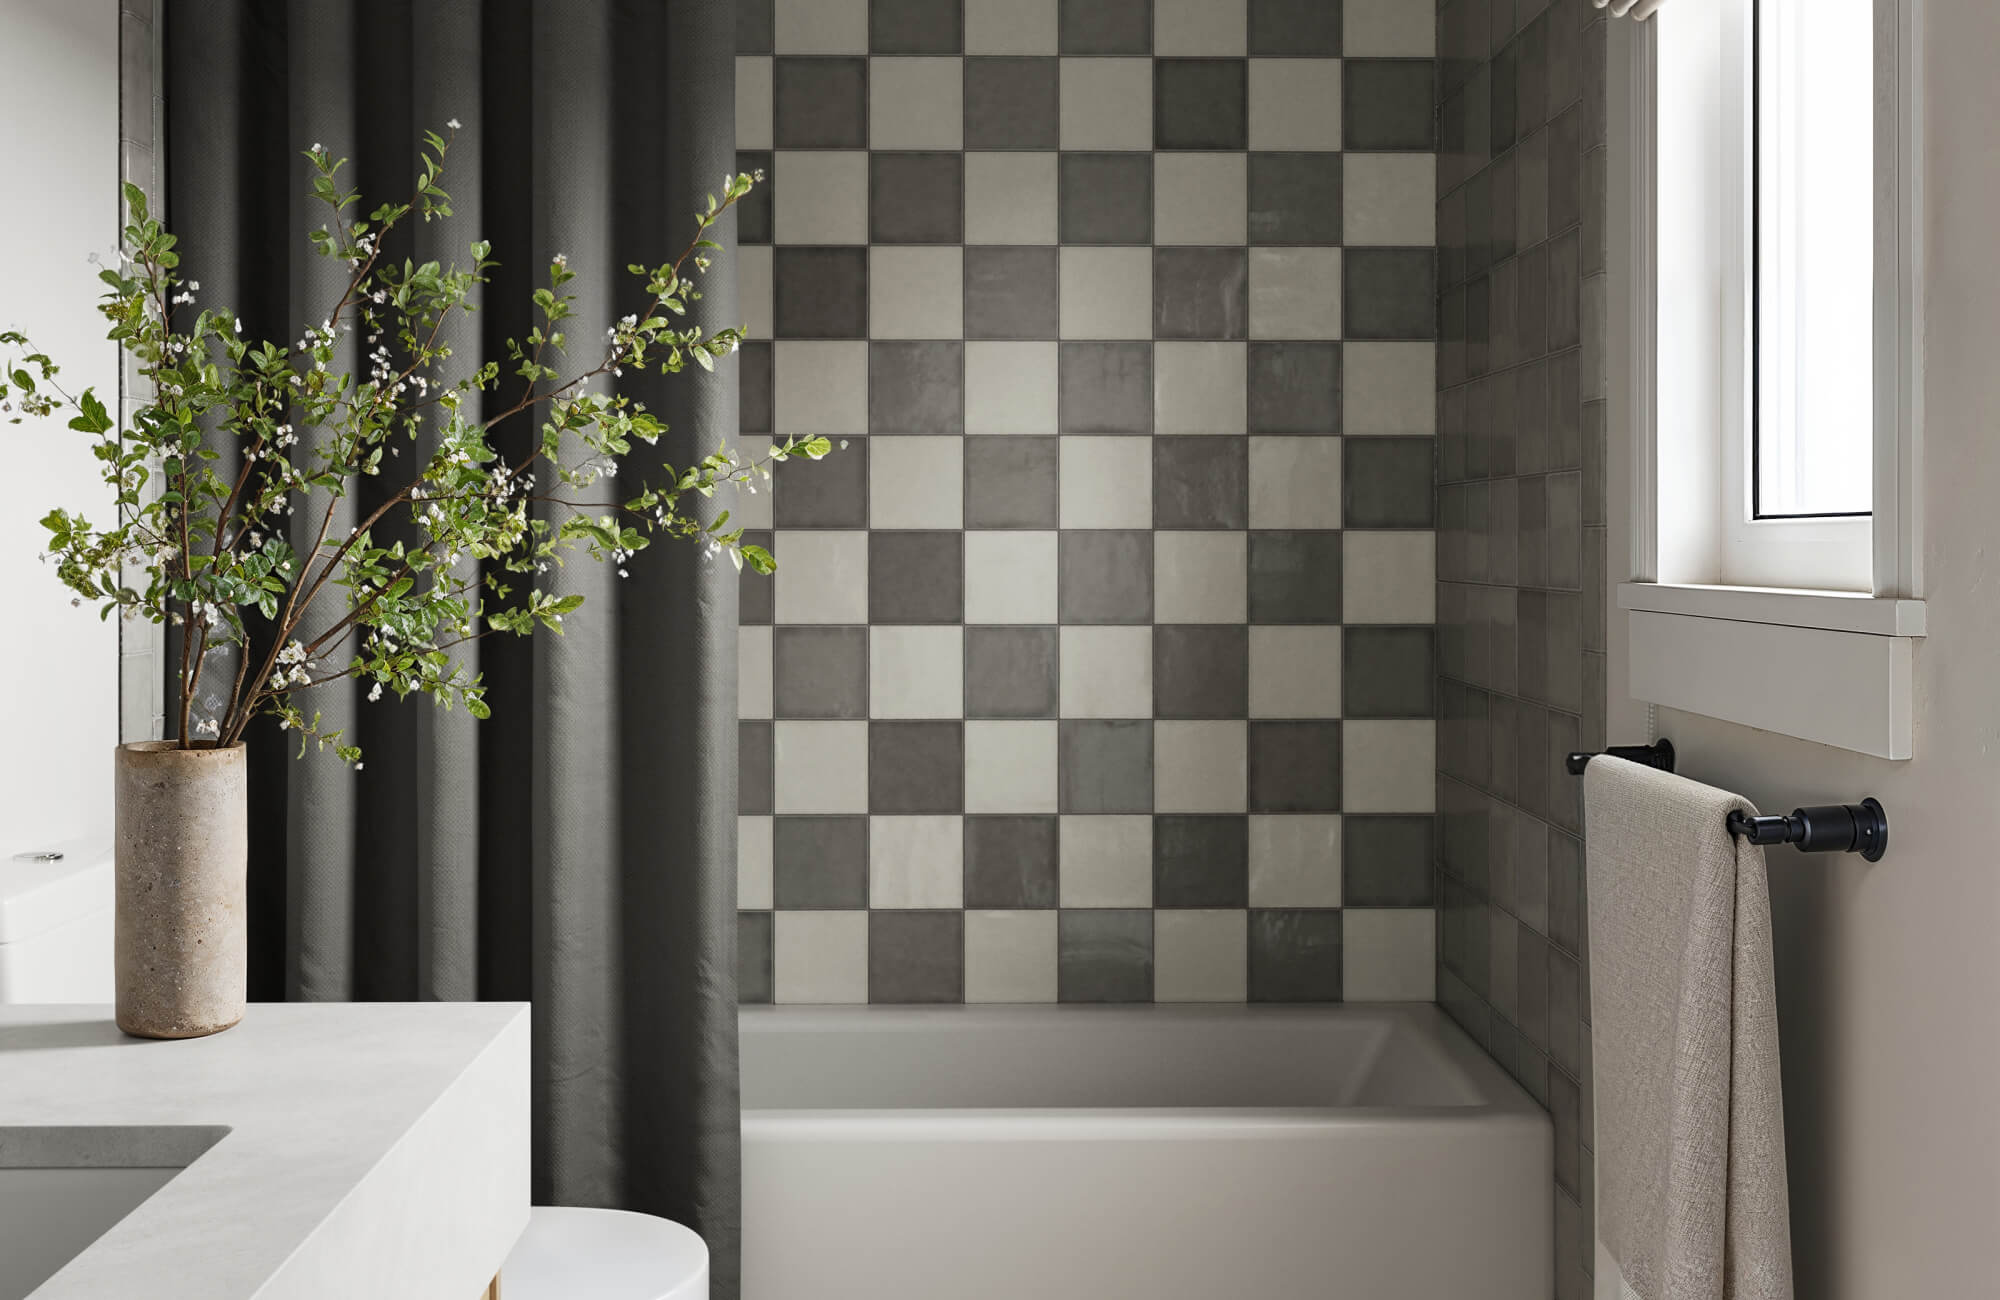
Finally, don’t overlook the stylistic role your marble effect will play in the broader design of the space. Consider the mood you want to create. Classic white marble with soft gray veining evokes elegance and calm, while bold patterns in darker tones can add a sense of drama and modern flair. Your choice of veining intensity, tile format, and finish should harmonize with your furnishings, lighting, and architectural details. For example, the Leona 12x12 Checkerboard Matte Porcelain Tile in Marfil and Amani Bronze, as displayed in the picture above, adds a vintage-inspired, high-contrast design that can serve as a centerpiece or stylistic accent in both traditional and contemporary interiors. A well-coordinated marble look not only elevates the floor itself but also helps unify the entire design of the room.
To help visualize how different marble-effect tiles will look in your own space, Edward Martin offers an augmented reality (AR) tool that lets you preview tiles in real-time using your phone or tablet. This can be especially helpful when comparing finishes, formats, and veining styles before making a final decision.
Complete Your Marble Effect with Confidence
Adding a marble effect to your floor is more than just a cosmetic upgrade—it’s a creative endeavor that brings texture, elegance, and character to your space. Whether you prefer the flexibility of painting, the depth of acid staining, the modern appeal of epoxy, or the convenience of marble look tiles, there’s a method suited to your taste and budget. By preparing the surface carefully, choosing the right technique, and working with intention, you can achieve a result that rivals natural stone in beauty and durability. Whether you're aiming for a bold statement or a subtle luxury touch, your new marble-inspired floor will be a feature to admire for years to come.
If you’re still narrowing down your choices, you can request samples from Edward Martin to see and feel the quality of different marble look tiles in person. Sampling can give you added confidence in your selection before committing to a full project.