


Cleaning and sealing a natural stone backsplash may sound complicated at first, but once you understand how stone behaves, the process becomes much easier to manage. Because materials like marble, travertine, slate, and limestone are naturally porous, they need a little extra care to stay protected from stains, oils, and daily kitchen messes. In this guide, we’ll walk through simple cleaning tips, sealing basics, and smart tile alternatives so you can keep your kitchen looking its best.

Why Cleaning and Sealing Matter
Natural stone backsplashes are durable, but they still need the right care to stay looking their best. Without proper cleaning and sealing, stains, moisture, and everyday buildup can settle into the surface more easily.
Why Natural Stone Is Prone to Stains and Damage
Natural stone is porous, which means it absorbs liquids, oils, and splashes more easily than sealed or manufactured materials. When moisture seeps into these pores, it can leave marks, discoloration, or residue that is difficult to remove once it settles. Everyday kitchen elements like sauces, grease, or acidic ingredients can also react with the stone’s minerals, causing subtle etching over time. Even routine tasks like cooking or wiping surfaces can introduce grime that sinks deeper if left unprotected. These vulnerabilities make consistent cleaning an essential part of keeping the stone in good shape.
How Sealing Extends the Life and Appearance of Stone
A quality sealant helps shield the stone by filling in its natural pores, making it harder for liquids or stains to penetrate the surface. This protective layer slows down absorption, giving you more time to wipe up spills before they leave marks. Sealing also helps maintain the stone’s original color and finish, preventing dulling or uneven dark spots caused by moisture. When applied regularly, it supports the stone’s long-term durability and keeps the backsplash looking consistent across the entire surface. With the right sealant routine, the stone stays easier to clean and more resistant to daily wear.
Common Issues Caused by Improper Care
Skipping cleaning or sealing can lead to a range of problems that become harder to fix as time goes on. Stains may set permanently, especially from oils or dark-colored ingredients commonly used in kitchen prep. Excess moisture can create cloudy patches or weakened spots that affect the stone’s finish. Over time, lack of maintenance may cause uneven texture, etching, or dull areas that disrupt the overall look of the backsplash. Proper care helps you avoid these issues and preserve the stone’s natural beauty.

Identifying Your Stone Type
Knowing exactly what kind of stone you have makes cleaning and sealing much easier, because each one responds differently to moisture, stains, and daily wear. Even the finish can change how the surface behaves, so recognizing these details helps you choose the safest products and routines.
Differences Between Marble, Travertine, Slate, and Limestone
Marble is usually the most recognizable because of its smooth feel and distinct veining, but it’s also the most sensitive to acids and staining. Travertine, on the other hand, has small natural pits or holes that give it texture, and those openings can trap residue if the stone isn’t sealed well. Slate tends to feel more rugged and layered, with a slightly chalky surface that naturally resists some moisture but still benefits from protection. Limestone has a softer, matte look with subtle patterning, and it absorbs liquids quickly because of its finer pores. Understanding these basic traits gives you a good starting point for matching your stone to the right care approach.
Each of these stones also handles wear differently, which is why knowing the type matters so much. Marble can etch easily from acidic splashes, while travertine’s porous texture makes consistent sealing especially important. Slate can flake slightly over time if it’s not maintained, and limestone may darken unevenly if spills sit too long. When you’re aware of these tendencies, you can plan a cleaning routine that prevents long-term issues instead of reacting to them later.
How Honed vs. Polished Finishes Impact Maintenance
A polished finish has a shiny surface that naturally repels some moisture, but it can show etching or dull spots more quickly if exposed to acidic ingredients. Honed finishes have a matte look that hides small marks better, although they usually absorb liquids faster because the surface is more open. This difference affects how often you may need to seal the stone, since polished surfaces can sometimes go longer between treatments. The finish also influences how the stone feels under daily cleaning, with polished stone wiping down more smoothly while honed surfaces may need a bit more attention.
Understanding your finish helps you avoid surprises with stains or subtle surface changes. Polished stone looks luxurious but requires careful handling to maintain its shine. Honed stone feels more forgiving in busy kitchens, but it relies heavily on a good seal to stay protected. Both finishes can last beautifully when cared for properly, so the goal is simply to choose products and habits that fit the finish you have.

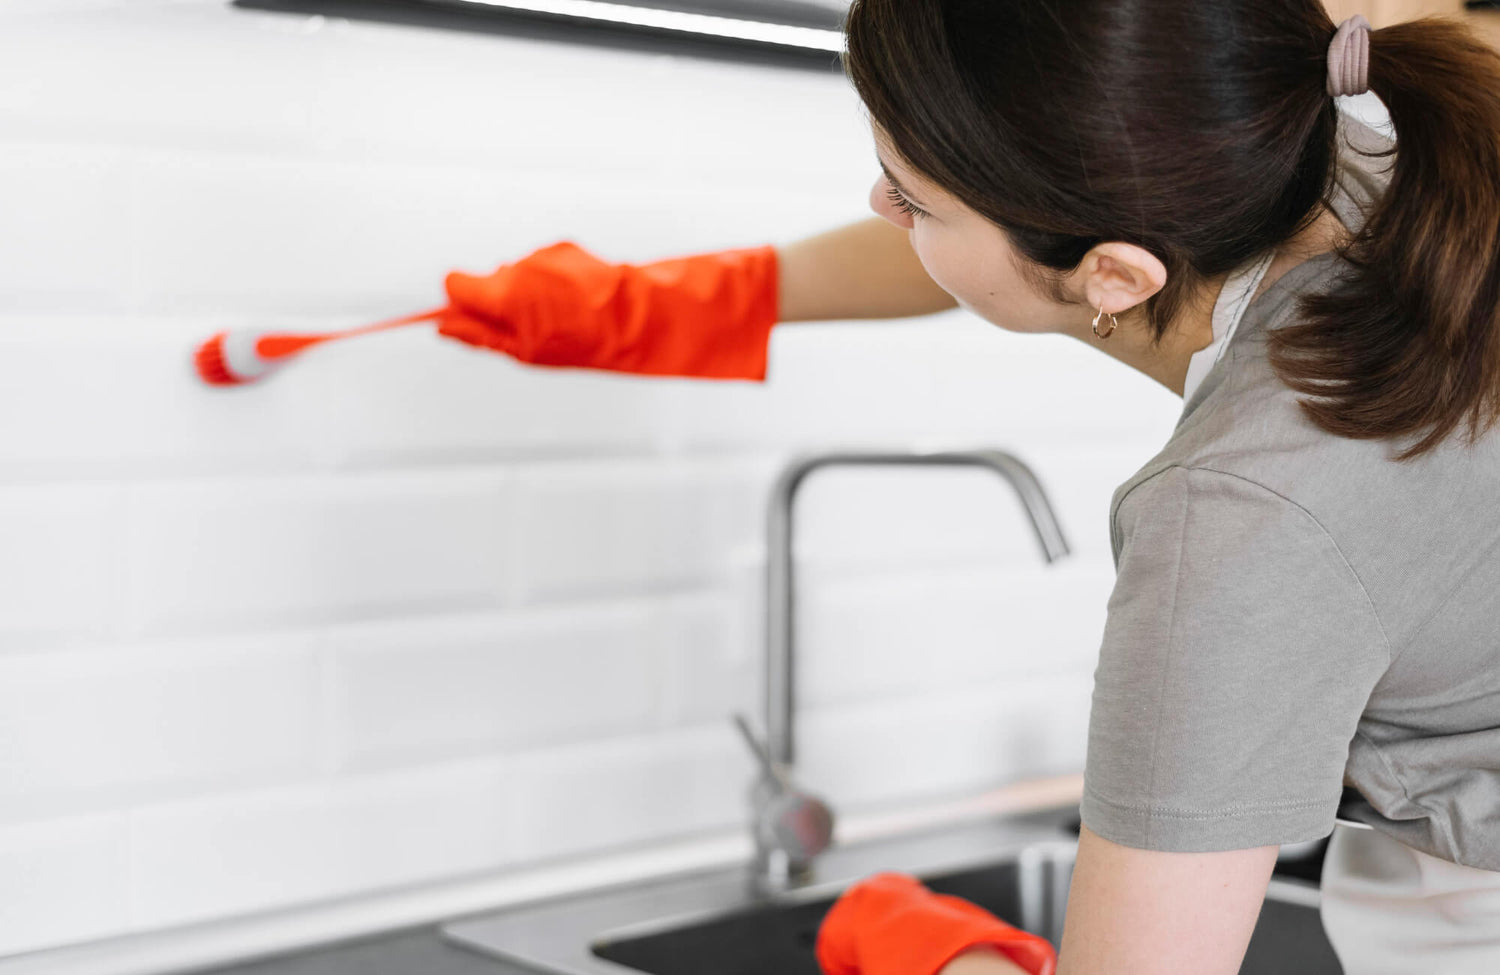
Everyday Cleaning Basics
Keeping natural stone clean doesn’t have to be complicated, as long as you stick to gentle, stone-safe habits. Below, we’ll walk through the basics, so your backsplash stays fresh, smooth, and well-protected with very little effort.
Safe Cleaners and Why pH Matters
A pH-neutral cleaner is one of the safest ways to clean natural stone because it removes everyday grease and residue without reacting with the material itself. Stone surfaces can be sensitive to anything too acidic or alkaline, and a neutral formula helps maintain both the seal and the finish. Using the right cleaner also keeps the surface looking consistent, preventing dull spots or uneven etching over time. When your routine centers around pH-neutral products, your stone stays cleaner and healthier with much less stress.
A neutral cleaner also makes daily upkeep easier since it doesn’t leave behind sticky film or streaks. This means you can wipe down the backsplash more quickly, especially after cooking. Over time, that gentle consistency helps preserve the stone’s natural color and texture. It’s a simple habit that pays off in long-term durability.
What to Avoid: Acidic or Abrasive Products
Acidic cleaners like vinegar, lemon-based sprays, or strong degreasers can break down the sealant and cause permanent etching on stone surfaces. Abrasive powders or rough scrubbing pads can also create micro-scratches that collect residue and dull the finish. Even products labeled as “multipurpose” may contain hidden acids or brighteners that aren’t safe for stone.
Avoiding these harsh cleaners prevents avoidable discoloration and surface damage. Once scratches or etching set in, repairing them often requires professional resurfacing. Protecting the surface early by skipping these products helps the stone keep its smooth, clean look for years. It’s one of the easiest ways to maintain a stable, long-lasting finish.
Safe Tools and Textures for Stone
Soft microfiber cloths and non-scratch sponges are the best tools for everyday stone cleaning because they lift dirt without harming the seal or finish. These tools glide over the surface gently, making them ideal for quick daily wipe-downs after cooking. Soft textures also prevent the buildup of tiny scratches that can trap oils or moisture. Using the right tools keeps the stone smooth and easy to clean over time.
You don’t need anything heavy-duty for most situations. A simple cloth and warm water will often handle light residue, while a soft sponge helps loosen grease without scraping. Keeping a few gentle tools on hand makes regular upkeep easy and prevents unnecessary wear on the backsplash.
Daily vs. Weekly Cleaning Habits
A quick daily wipe-down removes splatters and oils before they have time to settle into the stone or wear down the seal. This small routine keeps the surface clearer and reduces the need for more intensive cleaning later. Weekly cleaning gives you a chance to reach any missed spots and refresh the stone with a gentle, consistent routine. These two habits work together to maintain both cleanliness and long-term durability.
This simple rhythm also helps you notice early signs of issues like darkening, dull spots, or areas where the seal may be wearing thin. Catching these changes early keeps your stone looking its best and prevents bigger problems from developing. With consistent, low-effort care, your backsplash stays fresh and well-protected without feeling like a chore.

Handling Stains and Etching
Natural stone backsplashes are beautiful, but kitchen messes can leave stains or dull spots if they aren’t addressed properly. Knowing the right way to clean grease, lift deeper stains, and prevent etching makes maintenance much easier and keeps the surface looking consistent.
Cleaning Oil, Grease, and Cooking Residue
Grease and cooking splatters are some of the most common culprits behind darkened or sticky areas on natural stone. A pH-neutral cleaner is the safest way to lift these residues without harming the seal or the surface. When you wipe away grease regularly, it prevents buildup that can seep deeper into porous stone. Warm water can help loosen thicker splatters, making cleanup smoother and preventing long-term discoloration. Keeping a gentle routine goes a long way toward maintaining a cleaner, more uniform backsplash.
Basics of Using a Poultice
A poultice is a simple, surface-safe way to draw out stains that have settled below the stone’s top layer. It works by slowly pulling oils, pigments, or moisture up to the surface so they can be removed without scrubbing. Most poultices are applied as a paste, then covered and left to dry so they can absorb the stain fully. The key is patience rather than pressure, since rushing the process can lead to uneven results. When used correctly, a poultice helps refresh targeted spots without disturbing the rest of the backsplash.
Preventing and Minimizing Etch Marks
Etching happens when acidic ingredients like lemon juice or vinegar come into contact with the stone, leaving a dull or slightly rough patch behind. While etching can’t always be reversed at home, you can prevent new marks by wiping spills quickly and keeping your seal maintained. Using trivets or backsplash guards near high-use cooking zones can also help reduce accidental splashes. Certain finishes, like honed stone, tend to disguise etching better than polished surfaces, which show dull spots more easily. With a few mindful habits, you can keep etching to a minimum and protect the stone’s natural beauty.

When to Seal a Natural Stone Backsplash?
Sealing a natural stone backsplash helps protect it from stains, oils, and moisture that naturally build up in a kitchen. The right type of sealer and a consistent resealing routine make a noticeable difference in how well the stone ages over time. While most homeowners can handle basic upkeep, more advanced sealing concerns or damaged areas are best evaluated by a professional to avoid unintentionally harming the stone.
Penetrating vs. Topical Sealers
Penetrating sealers absorb into the stone to create an invisible barrier that protects from within, which is why they’re the most common choice for backsplashes. They don’t change the look or texture of the stone, making them ideal for homeowners who want protection without a noticeable finish. Topical sealers, on the other hand, sit on the surface and add a slight sheen, but they tend to wear faster in kitchen environments. Because topical coatings can trap moisture or discolor over time, they’re usually better suited for decorative areas rather than active cooking zones. Understanding how each one behaves helps you choose a sealer that supports both the stone’s appearance and long-term performance.
How Often Backsplashes Need Resealing
Most natural stone backsplashes need resealing every one to two years, depending on the type of stone and how often the kitchen is used. Lighter stones or honed finishes may need slightly more frequent sealing because they absorb more easily. Cooking habits also play a role, especially if you regularly deal with steam, splatters, or oil-heavy meals. The key is consistency rather than applying too much product at once, since over-sealing can create buildup on the surface. A simple schedule keeps the stone protected without letting wear go unnoticed.
Signs Your Backsplash Needs a New Seal
One easy way to check the condition of your seal is to do a quick water test: if droplets absorb quickly or darken the stone, it’s time to reseal. You might also notice areas near the stove or sink becoming more dull or slightly darker than the rest of the backsplash. These subtle changes often signal that oils or moisture are starting to penetrate the surface. Stains that wipe away less easily or spots that appear uneven in texture are additional early warnings. Paying attention to these signs helps you refresh the seal before any long-term damage occurs.
Extra Sealing Needs Near Stoves and Sinks
Areas around stoves and sinks take the most abuse, so they often need more frequent sealing than the rest of the backsplash. Heat, steam, and constant splatter can weaken the protective barrier faster, especially in busy kitchens. Even with high-quality sealers, these zones may benefit from spot-sealing between full resealing cycles. This targeted approach keeps the stone evenly protected without requiring you to reseal the entire wall each time. By giving extra attention to these high-wear areas, your backsplash stays cleaner, stronger, and more resistant to everyday messes.

How to Seal a Natural Stone Backsplash Step by Step
Sealing your natural stone backsplash doesn’t need to feel overwhelming when you understand the order of each step. A simple, consistent process helps the sealer bond properly, protects the stone from stains, and keeps the surface looking even over time. Below are the essential steps most homeowners can confidently follow without getting into professional-level techniques.
Step 1: Clean the Surface Thoroughly
Start by removing grease, splatters, and surface dust using a pH-neutral stone cleaner. A clean surface ensures the sealer can absorb evenly rather than trapping residue underneath. Make sure to dry the backsplash fully, as moisture can prevent the sealer from penetrating the stone. This step sets the foundation for a smooth, consistent finish. When the stone is clean and dry, you’re ready to move on.
Step 2: Test the Stone’s Absorption Rate
Before sealing the entire backsplash, perform a quick absorption test to see how quickly the stone darkens when exposed to water. This helps you understand how porous the stone is and how many coats of sealer it might need. If the stone absorbs water immediately, it will likely need more frequent resealing. When the stone stays dark for a long time, it often means deeper pores that need extra attention. This simple test prevents under- or over-sealing later.
Step 3: Apply the Sealer Evenly
Use a soft cloth or applicator pad to apply a thin, even layer of penetrating sealer across the stone. Work in small sections so you can control coverage and avoid streaks. Most sealers should sit on the surface for a few minutes to properly soak in, but the exact timing depends on the product. Once the sealer has absorbed, wipe away any excess to prevent hazing. This ensures a clean finish that won’t leave residue once it dries.
Step 4: Let the Sealer Cure Properly
After application, allow the backsplash to dry completely according to the sealer’s recommended curing time. During this period, avoid cooking splatters, steam, or wiping the surface so the sealer can bond fully. Proper curing ensures long-lasting protection instead of a patchy or uneven barrier. Once the curing window ends, the stone should feel smooth and evenly protected. At this point, the backsplash is ready for regular use again.
Step 5: Perform a Quick Water Test After Curing
To confirm the sealer bonded correctly, place a few drops of water on the stone and see whether they bead. If the water sits on the surface, the seal is doing its job. If it absorbs quickly, you may need a second coat or additional spot-sealing in busy areas. This final check ensures the backsplash is fully protected before you return to normal cooking routines. It’s a simple step that adds confidence to the entire process. If water absorption remains inconsistent after resealing, a stone-care specialist can troubleshoot deeper issues.

Alternatives to Natural Stone
If you love the look of a beautiful backsplash but want something easier to care for, there are plenty of materials that offer style without the maintenance natural stone requires. These options handle moisture, heat, and daily kitchen messes with far less effort, making them great for busy households. Below, we’ll look at several choices that deliver durability and design flexibility while keeping upkeep simple.
Porcelain Tile
Porcelain tile is one of the strongest contenders for a low-maintenance backsplash because it resists stains, moisture, and kitchen heat with ease. Its dense composition keeps it from absorbing oils or discoloration, even in high-use cooking zones. Porcelain also comes in countless finishes, including stone-look styles that mimic marble or travertine without the upkeep, such as our Aniston 2x2 Matte Porcelain Hexagon Mosaic Tile in Calacatta Antico. It stays smooth and easy to wipe clean, which simplifies daily care. For homeowners who want the look of stone without its vulnerabilities, porcelain offers the best of both worlds.
Ceramic Tile
Ceramic tile is a classic choice thanks to its wide range of colors, shapes, and finishes that suit almost any kitchen style. Its glazed surface makes cleaning incredibly simple, allowing spills and splatters to wipe away without effort. Ceramic is also lightweight and easy to maintain, which makes it appealing for wall applications and decorative layouts. The variety of patterns and textures means you can create anything from a traditional to a modern look. If you want versatility and minimal upkeep, ceramic tile delivers consistent, reliable performance.
A great example of this is our Mikayla 5x5 Glossy Ceramic Tile in Espresso, shown above. Its rich brown shade and handcrafted character bring warmth and depth to the backsplash, while the translucent glaze gently reflects light for a soft, elevated finish. This combination makes it an easy standout for kitchens that want a refined yet artisanal touch.
Glass Tile
Glass tile creates a bright, reflective backsplash that instantly makes a kitchen feel more open and modern. Its smooth surface doesn’t absorb stains, oils, or dyes, so even colorful splashes clean off easily. Because light moves across glass so naturally, it adds dimension and a crisp, polished quality to the room. It’s especially helpful in compact kitchens where brightness matters. The main drawback is that fingerprints, water spots, and streaks show more easily, so it may require quick touch-ups to stay pristine.
Metal Panels
Metal backsplash panels offer a sleek, industrial-inspired look that pairs well with modern or minimalist kitchens. Stainless steel and brushed aluminum handles heat, moisture, and splatter with ease, which makes them great behind cooking zones. Their non-porous surface wipes clean quickly, even after heavy meal prep. Metal also ages uniformly, giving the kitchen a polished consistency over time. The tradeoff is that metal can show scratches or smudges more easily, which may bother homeowners who prefer a flawless, low-maintenance finish.
Engineered Quartz
Engineered quartz is a standout option for homeowners who love the look of stone but want something more resistant to stains and etching. Because it’s non-porous, it won’t absorb oils, sauces, or colored liquids, making cleanup simple and predictable. It also keeps a smooth, even finish longer than most natural stones, even in busy kitchens. With a wide selection of solid, veined, and marble-inspired patterns, it works beautifully in many design styles. The only limitation is that quartz isn’t ideal directly behind high-heat cooking zones, as prolonged heat may cause slight discoloration over time.
Acrylic / Solid-Surface Panels
Acrylic and solid-surface panels offer a seamless aesthetic that feels contemporary and incredibly easy to maintain. Their smooth, grout-free design prevents grime from settling in joints, making them a strong fit for families who cook often. These materials also resist stains and moisture, so daily cleanup stays quick and predictable. With a range of subtle and bold colors, they can be tailored to almost any kitchen style. The main drawback is that acrylic can scratch more easily than tile, so it may require gentle cleaning tools to keep the surface looking fresh.
Keeping Your Stone Backsplash Looking Its Best
A natural stone backsplash stays beautiful the longest when you combine gentle daily cleaning with a consistent sealing routine. Once you understand your stone type, the right tools, and when to reseal, the process becomes far less intimidating and far more manageable. These habits protect the color, texture, and overall finish of the stone so it ages evenly without developing dull or uneven patches. If you prefer a similar look with far less upkeep, porcelain or ceramic tile offers an easy-care alternative that still delivers style and durability.
If you’re planning a kitchen update or want expert guidance on choosing the best materials, layouts, or long-term care strategies, our design team can walk you through every detail. A personalized design consultation gives you clarity and confidence before making big decisions. Book a personalized design consultation today to create a kitchen that feels cohesive, long-lasting, and beautifully tailored to your home.
