


Subway tile is one of the most enduring staples in interior design—charming in its simplicity yet incredibly versatile in its application. Originally created to line the walls of New York City’s first subway stations, this rectangular tile has moved far beyond its transit roots to become a go-to material in kitchens, bathrooms, and beyond.
From classic 3x6 ceramic to elongated formats, matte finishes, and vibrant colors, subway tile continues to evolve while retaining its timeless appeal. In this guide, we’ll explore what defines subway tile, how it came to be, and why it remains a popular design choice for both traditional and modern spaces.

History of Subway Tile
Subway tile, with its clean lines and enduring appeal, has transcended its utilitarian origins to grace kitchens, bathrooms, and more. But where did this iconic design element begin? Below, we delve into the fascinating history of subway tile, from its surprising subterranean beginnings to its status as a versatile design staple that continues to grace modern homes.
Origins in New York City
The story of subway tile begins in the bustling metropolis of New York City in the early 1900s. As the city embarked on a monumental project—the construction of its first underground rapid transit system—architects faced a unique challenge: designing stations that were not only functional but also aesthetically pleasing.
The subterranean environment presented several obstacles. Limited lighting, constant flow of passengers, and potential for grime accumulation necessitated a material that could withstand heavy use and be easily cleaned. Architects George C. Heins and Christopher Grant La Farge, tasked with the design of the initial stations, opted for a simple yet effective solution. Subway tiles refer to glazed ceramic tiles that typically measure 3" x 6". They are crafted from readily available clay and fired at high temperatures, resulting in a durable, non-porous surface. The glazed finish also offered a brilliant white sheen, reflecting precious light and creating a sense of spaciousness in the dimly lit stations.
Evolution beyond Subways
The success of subway tiles in the New York City subway system didn't go unnoticed. Architects and designers soon recognized the versatility and practicality of this material. The inherent benefits: durability, low maintenance, and a clean aesthetic, made subway tiles well-suited for a wide range of applications beyond the subterranean world.
Early on, these tiles were adopted in public spaces like schools, hospitals, and commercial buildings where sanitation and resilience were essential. Their ability to blend seamlessly with a range of architectural styles, from the ornate detailing of Beaux-Arts to the sleek lines of Art Deco, further cemented their versatility.
As the 20th century progressed, the popularity of subway tiles continued to rise. The burgeoning American middle class, with its growing emphasis on cleanliness and functionality, embraced them for kitchens and bathrooms, particularly in the post-war period when home design prioritized hygiene and a streamlined aesthetic.
The enduring appeal of subway tiles lies not only in their practicality but also in their timeless design. Unlike trendy materials that fade in popularity, subway tiles have transcended fleeting trends. Their simple elegance continues to resonate with homeowners and designers alike, ensuring their presence in modern architecture and interior design.

Characteristics of Subway Tile
Subway tile’s appeal goes well beyond its common use in kitchens and bathrooms. This simple rectangular tile offers a variety of features that contribute to its lasting popularity. Explore what makes subway tile a design staple, from its classic shape and versatile finishes to its timeless aesthetic potential.
Shape and Size
The defining characteristic of subway tile is its rectangular shape. While the most iconic size is undoubtedly the 3" x 6" format, this classic has spawned a variety of options to cater to different design preferences and spatial constraints. For smaller areas or a more contemporary feel, 2" x 4" tiles offer a compact option. Conversely, larger spaces can benefit from the elongated elegance of 4" x 8" or 6" x 12" tiles. These larger formats create a more streamlined look with fewer grout lines, ideal for achieving a modern aesthetic.
The traditional installation pattern for subway tile is the "running bond", where tiles are laid horizontally with a 50% offset. This means the vertical joint of each tile lines up with the center of the tile directly below it, creating a staggered appearance. While the running bond offers a classic and timeless look, it's not the only option. For a touch of variety, consider the "stack bond" pattern, where the vertical joints align throughout the installation. For a more dynamic visual effect, the "herringbone" pattern arranges tiles in a zig-zag formation, creating a sense of movement and adding a touch of sophistication.
Material
Traditionally, subway tiles were crafted from ceramic, a readily available and affordable clay-based material. The glazed surface offers a non-porous and easy-to-clean finish, ideal for maintaining a hygienic environment.
Modern advancements in tile technology have introduced a wider range of material options for subway tiles. Porcelain, a denser and more water-resistant cousin of ceramic, provides a durable option, especially for areas prone to moisture, like shower enclosures. For a touch of elegance and light-reflecting brilliance, glass tiles create a unique aesthetic and add a touch of luxury. For those seeking a truly opulent look, natural stone options like marble and granite offer timeless beauty and a luxurious feel.
Finish
The finish of subway tile plays a significant role in its overall aesthetic and functionality. The classic choice is a glossy finish, which reflects light beautifully, contributing to a brighter and more spacious feel. This finish also offers a clean and polished look, ideal for traditional and timeless design styles. For a more contemporary and subdued appearance, matte finishes provide a softer and more textured look. While not as reflective as their glossy counterparts, matte finishes can add depth and visual interest to a space.

Applications of Subway Tile
Subway tile's versatility extends far beyond its namesake origin. Its timeless design and practical qualities make it a popular choice for a wide range of applications in homes and commercial spaces.
Kitchens
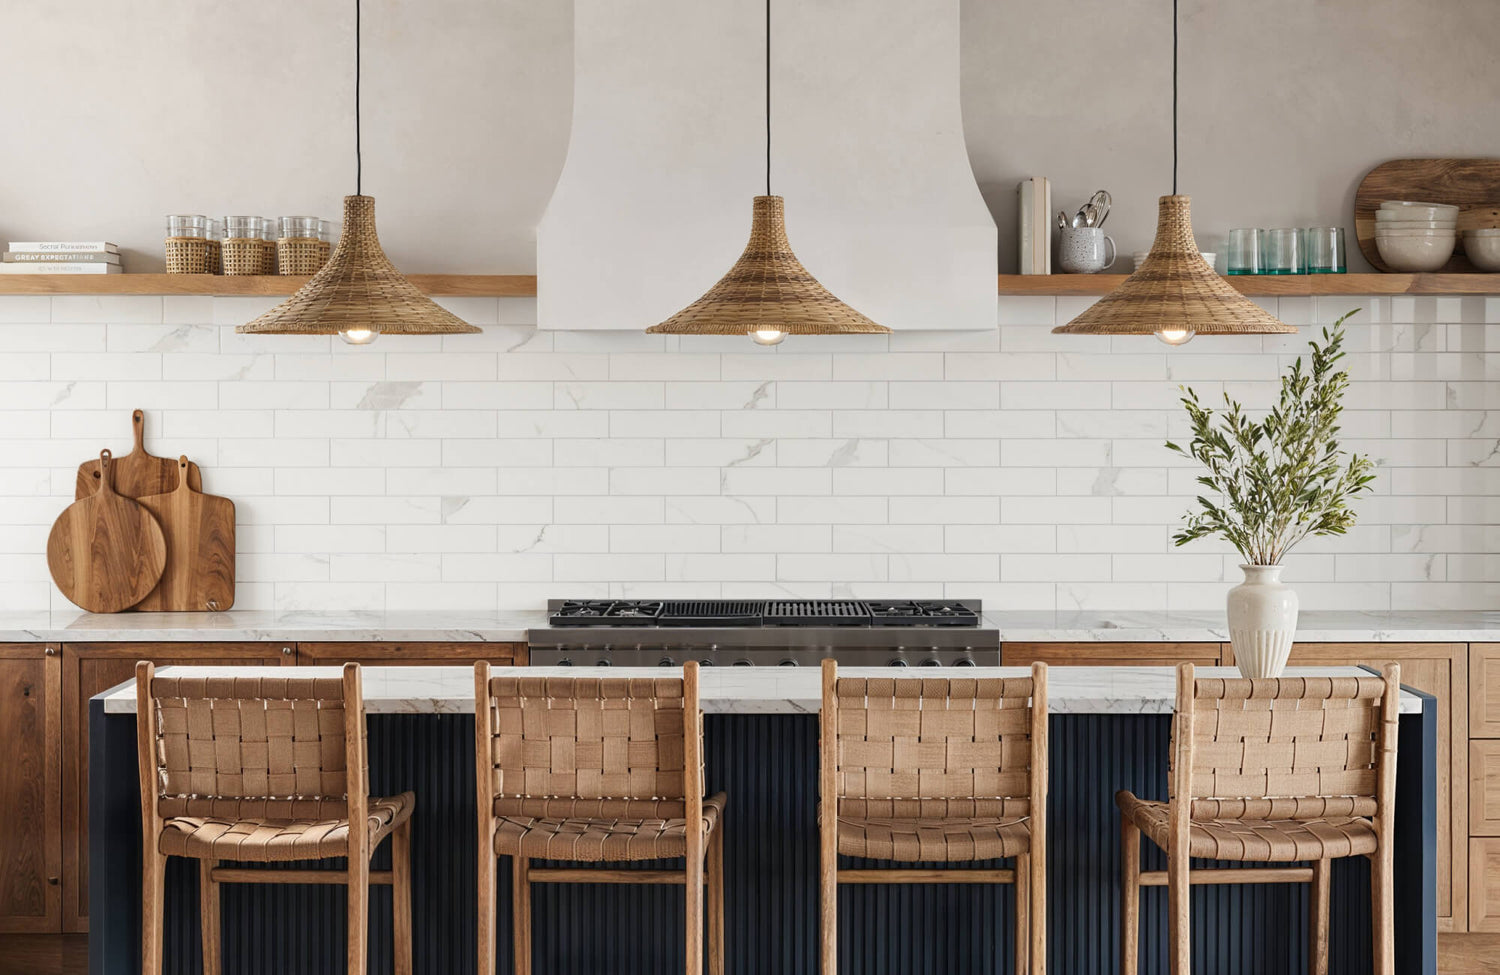
The kitchen is arguably the most popular domain for subway tile. The classic application is the backsplash, the vertical surface behind the countertop that protects walls from splashes, splatters, and heat. Subway tile excels in this role due to its ease of cleaning and grease resistance. The smooth, non-porous surface allows for quick wipe-downs, making post-cooking cleanup a breeze. Furthermore, the variety of colors and finishes available in subway tile allows for seamless integration with various kitchen styles. For a classic and timeless look, white subway tile with a glossy finish remains a popular choice.
However, homeowners seeking a bolder statement can opt for colored tiles in shades like blue, green, or gray to create a focal point. A great example is our Natasha 2x6 Matte Porcelain Tile in Denim, which offers a soft, moody blue tone perfect for adding depth without overwhelming the space. Subway tile's adaptability extends beyond backsplashes. In modern kitchens, these tiles can be used to create accent walls, adding a touch of texture and visual interest. On top of that, some daring homeowners explore using subway tile for countertops. While not as common as other materials, subway tile countertops offer a unique aesthetic and can be surprisingly durable.
Bathrooms
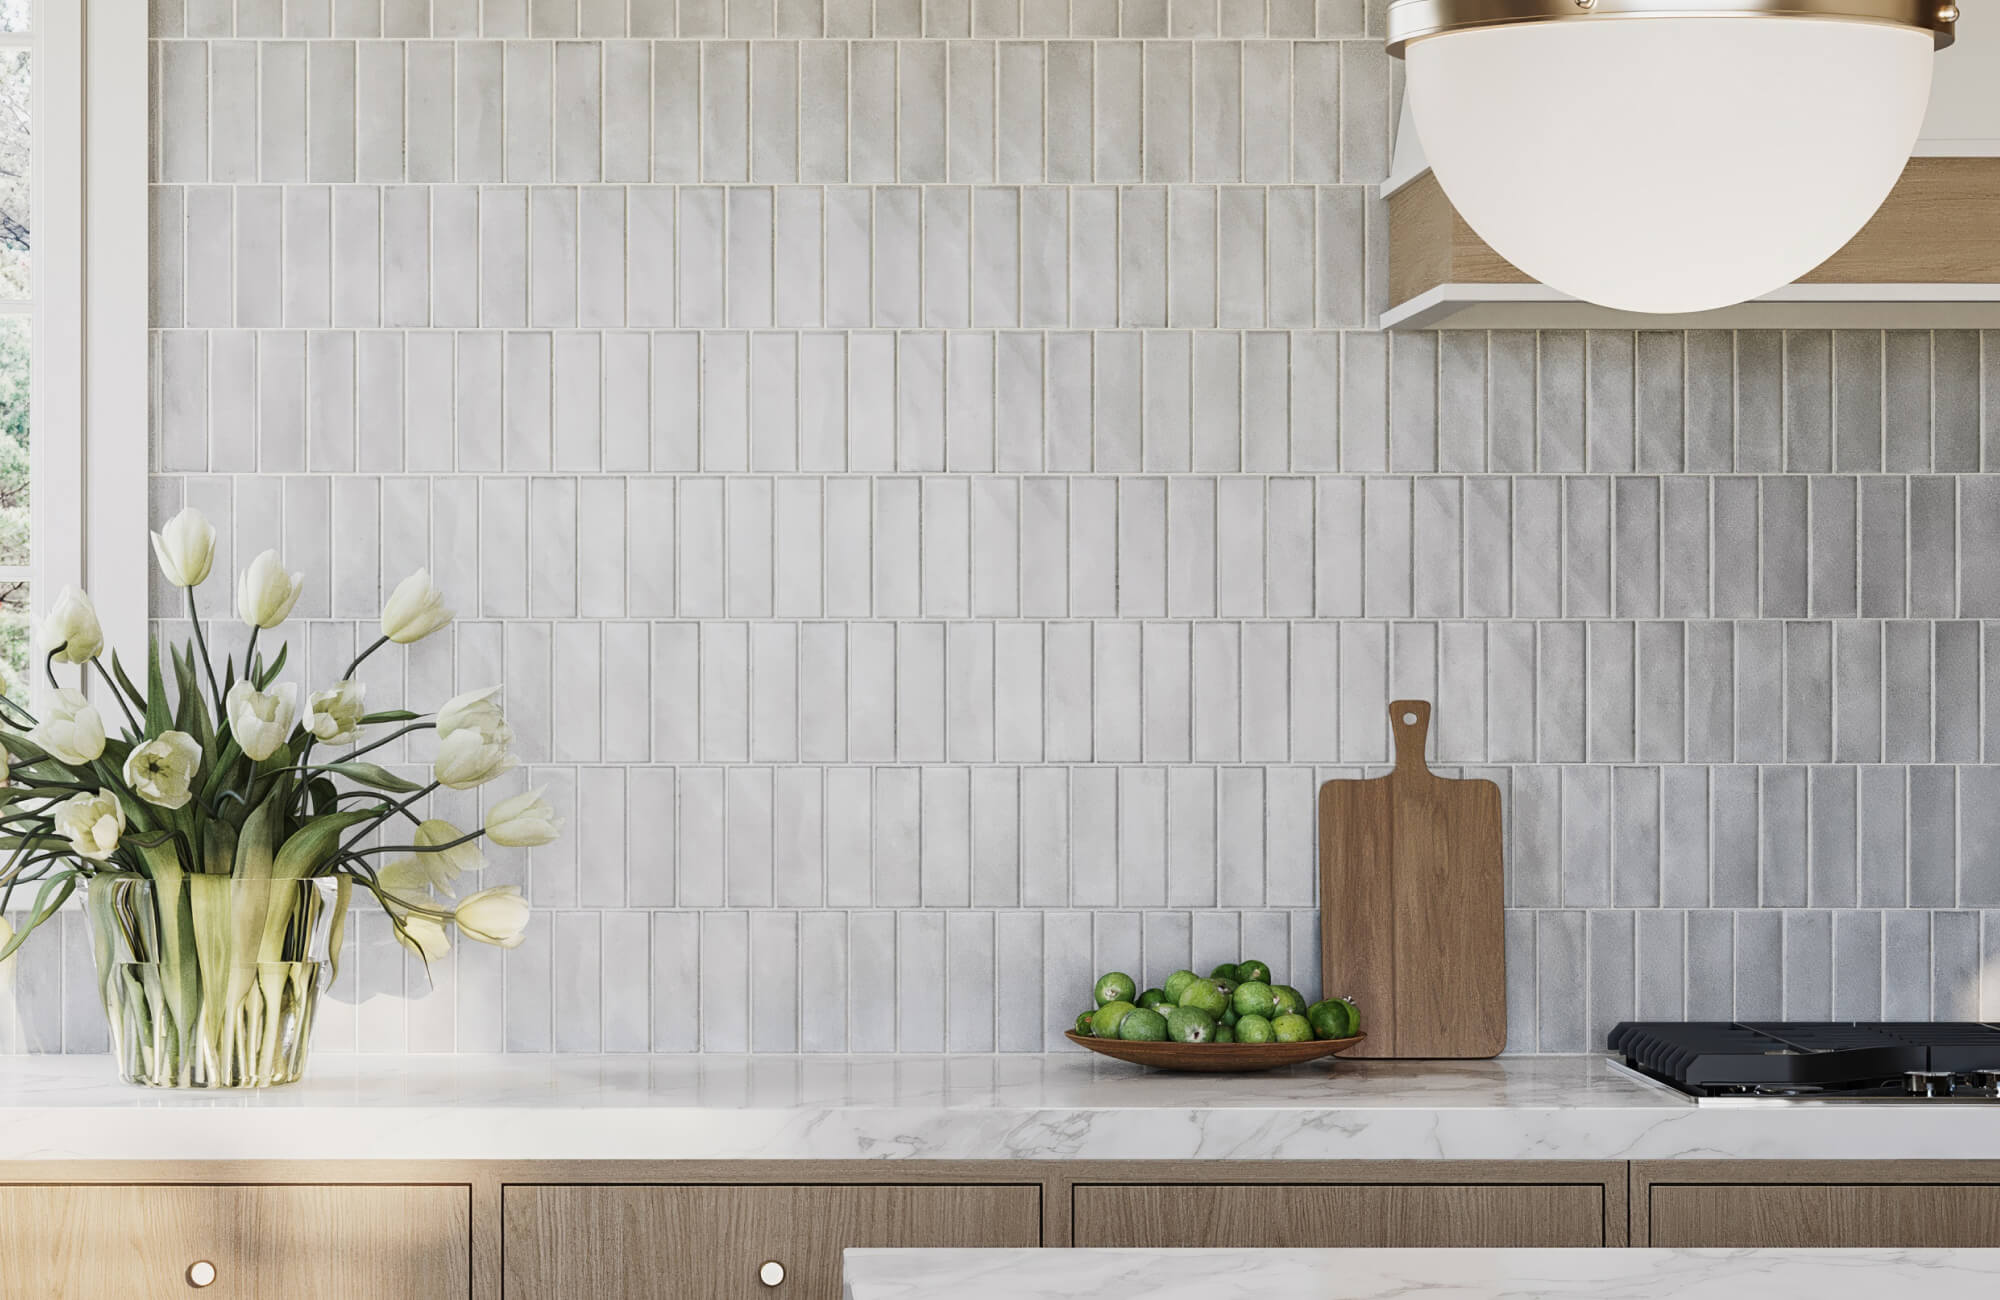
Bathrooms present another ideal environment for subway tile due to its inherent water resistance. The glazed surface effectively repels moisture, making it suitable for shower surrounds and wall applications. For example, a rich green tone like our Olivia 4x16 Glossy Ceramic Tile in Moss, shown in the photo above, adds color and shine to bathroom walls while maintaining the clean, reflective surface that helps brighten compact spaces. In bathrooms with limited natural light, a glossy finish enhances brightness and creates a sense of openness.
While not typically used for shower floors due to potential slipperiness, some manufacturers offer slip-resistant subway tiles specifically designed for this application. These tiles often incorporate textured surfaces or etched patterns to provide additional traction underfoot. Our Natasha 2x6 Matte Porcelain Tile in Bone is one such option, combining a warm, neutral tone with a matte finish ideal for shower floors where safety and style are both priorities. For a touch of luxury, consider using glass subway tiles in the shower. These tiles not only add a unique aesthetic but also contribute to a more open and airy feel in the shower enclosure.
Laundry Rooms
Laundry rooms are often overlooked spaces, but subway tile can elevate their functionality and aesthetics. The durability and easy maintenance of subway tile make it a practical choice for laundry room walls. White subway tile, with its clean and bright appearance, creates a fresh and welcoming atmosphere in a space often associated with chores. For those seeking to add a touch of personality, consider incorporating patterned tiles alongside classic subway tiles. This design approach injects a dose of visual interest while maintaining the practicality of the material.
Entryways and Mudrooms
Entryways and mudrooms are busy areas that often bear the brunt of dirt, dust, and tracked-in debris. Subway tile's durability and easy-to-clean nature make it an excellent choice for these spaces. The smooth surface allows for quick sweeping or mopping, keeping the entryway looking neat and tidy. In addition to that, subway tile can add a touch of elegance to entryways, creating a welcoming first impression for guests. For a more visually interesting look, consider using a herringbone pattern when installing subway tile in these areas. The zig-zag formation adds a touch of sophistication and creates a sense of movement, drawing the eye into the home.

Variations of Subway Tile
Subway tile's adaptability extends far beyond its rectangular form. Modern advancements offer a plethora of variations in color, texture, and even grout, allowing homeowners and designers to personalize this classic material and create truly unique spaces.
Color
While the classic white subway tile remains a perennial favorite for its timeless elegance and ability to brighten up a space, the color palette for subway tiles has exploded in recent years. This vast array of choices empowers homeowners to express their personal style and create kitchens, bathrooms, and other spaces that reflect their individual taste.
Neutral Colors
For those seeking a versatile foundation, neutral colors like gray, beige, and black offer a sophisticated and timeless aesthetic. Light gray subway tiles create a clean and modern look, while darker shades add a touch of drama and can help ground a busy space. Beige subway tiles provide a warm and inviting atmosphere, particularly well-suited for traditional or rustic design styles. Black subway tiles make a bold statement and create a dramatic focal point. They pair beautifully with white fixtures and stainless steel appliances for a sleek and modern look.
Bold Colors
Don't be afraid to embrace color! Subway tile comes in a wide spectrum of vibrant hues, from cheerful yellows and blues to dramatic greens and reds. A splash of color can add personality and energy to a space. For a subtle approach, consider using colored subway tile for an accent band within a predominantly neutral backsplash. Alternatively, create a bold statement wall using colored subway tile. This daring design element can become the focal point of a room and is a great way to showcase your unique style.
Two-toned Kitchens
For a truly unique look, explore the option of a two-toned kitchen. This design approach involves using two different colors of subway tile, often in conjunction with contrasting grout. A popular combination is white subway tile paired with a darker shade on the bottom portion of the backsplash. For example, our Polly 3x10 Satin Ceramic Tile in White combined with our Polly 3x10 Satin Ceramic Tile in Beige, as seen above, creates a soft, balanced contrast that adds depth while maintaining a warm, cohesive feel. This layout introduces a visual separation between the countertop and upper cabinets and enhances the overall structure of the space. Alternatively, consider using a band of colored subway tile to accent a white backsplash. This injects a pop of personality without overwhelming the overall design.
Grout Color Considerations
The color of the grout plays a significant role in how the chosen subway tile color is perceived. Matching grout creates a seamless and classic appearance, allowing the beauty of the tile to take center stage. This approach is ideal for smaller spaces or when using bold-colored tiles. Contrasting grout, on the other hand, emphasizes the individual tiles and creates a bolder and more defined look. For example, dark grout with white subway tile creates a graphic and modern aesthetic. However, it's important to note that dark grout can be more prone to showing dirt and grime.
Texture
The traditional subway tile boasts a smooth, glossy finish. While this classic option remains popular for its light-reflecting properties and clean aesthetic, modern advancements have introduced a wider range of textures to this versatile material.
Matte Finish
For a more contemporary look, consider matte finish subway tiles. This finish provides a softer and more textured appearance, creating a subtle play of light and shadow. Matte subway tiles are a great choice for modern and minimalist design styles, and they can also help to hide minor imperfections in the tile surface.
Textured Subway Tiles
For those seeking a truly unique visual experience, explore the world of textured subway tiles. These tiles incorporate variations in surface texture, such as bevels, ripples, or uneven surfaces. The added texture adds visual interest and depth to the space. Beveled subway tiles, for example, create a subtle three-dimensional effect, while handcrafted subway tiles with uneven surfaces offer a rustic charm.
Metallic Accents and Patterns
A touch of luxury can be achieved with subway tiles featuring metallic accents or patterns. These tiles often incorporate metallic glazes or inlays in precious metals like gold, silver, or bronze. Metallic subway tiles add a touch of sophistication and glamor to a space, making them a great choice for high-end kitchens and bathrooms. Subway tiles with geometric patterns, such as chevrons or hexagons, can also add visual interest and create a unique focal point.
Grout
While often overlooked, the grout color plays a significant role in the overall finished look of your subway tile installation. Choosing the right grout color can elevate the design or, conversely, detract from it.
Matching vs. Contrasting Grout
As mentioned earlier, matching grout creates a seamless and classic appearance, allowing the focus to remain on the beauty of the tile itself. This approach works well for smaller spaces or when using bold-colored subway tiles. However, it's important to consider the shade of white used in the grout. An off-white grout can appear dingy next to bright white subway tiles, so opting for a grout that precisely matches the white of the tile is crucial for a truly seamless look.
Contrasting Grout for Definition
Contrasting grout offers a bolder and more defined look. This approach emphasizes the individual tiles and creates a graphic element within the design. For example, dark grout with white subway tile creates a high-contrast, modern aesthetic. Similarly, using a colored grout that complements the subway tile color can add a playful touch. However, there are some practical considerations when choosing contrasting grout. Dark grout, while visually striking, can be more prone to showing dirt and grime. Regular cleaning and maintenance are essential to maintain the intended aesthetic.
Sanded vs. Unsanded Grout
Beyond color, the type of grout also plays a role in the final look. Sanded grout contains fine particles of sand, which helps to create a textured finish that fills wider gaps between tiles (typically those larger than 1/8 inch). Unsanded grout, on the other hand, provides a smooth finish and is better suited for narrower grout lines (typically 1/8 inch or less) commonly found with subway tile installations. Unsanded grout is also easier to clean and maintain, making it a popular choice for kitchens and bathrooms.
Selecting the Right Grout Color
Ultimately, the best grout color for your subway tile project depends on several factors, including the overall design style, the color of the tiles themselves, the size of the grout lines, and personal preference. Consider creating a sample board to experiment with different grout colors alongside your chosen subway tile to visualize the final outcome before committing to a large-scale installation.

Choosing A Subway Tile
Subway tile's versatility can be both a blessing and a curse. With a multitude of colors, textures, finishes, and even grout options to consider, the selection process can feel overwhelming. However, by carefully considering several key factors and following some helpful tips, you can navigate the world of subway tile and choose the perfect option for your project.
Project Location and Functionality
The first step in choosing subway tile is to consider the location of your project. Kitchens and bathrooms are prime candidates for subway tile due to their water resistance and easy cleaning. However, the specific functionality of the space within these areas may influence your choice. For example, in a shower stall, you'll need to prioritize slip-resistant tiles and consider using a different material, like porcelain, for its superior water resistance compared to standard ceramic subway tile. In contrast, a kitchen backsplash offers more flexibility in terms of material selection, and you can focus on aesthetics and ease of cleaning.
Desired Aesthetic and Style
Subway tile can seamlessly integrate into various design styles, from classic and traditional to modern and minimalist. Think about the overall aesthetic you want to achieve in your space. For a timeless look, consider classic white subway tile with a glossy finish. For a more contemporary feel, explore matte finish subway tiles or experiment with bolder colors and unique patterns.
Color Scheme and Existing Design Elements
Subway tile should complement the existing color scheme in your space. Consider the colors of your cabinets, countertops, flooring, and fixtures. Will you be using neutral tones for a calming environment, or do you want to introduce a pop of color with your subway tile? Additionally, take stock of the existing design elements. Subway tile should integrate seamlessly with other materials and finishes in the space.
Maintenance Considerations
The maintenance requirements of your chosen subway tile should also be a factor. Glossy finishes are generally easier to clean as their smooth surface allows for quick wipe-downs. However, they may show fingerprints and water spots more readily. Matte finishes can hide minor imperfections but may require slightly more effort to keep clean. Consider your lifestyle and cleaning habits when making this decision.
Material Selection
Beyond aesthetics, consider the material of the subway tile. Ceramic is the most affordable option, but porcelain offers greater durability and water resistance, making it a better choice for areas with constant moisture exposure. For a luxurious touch, you can explore glass or natural stone subway tiles, but be aware that these options come with a higher price tag.
Size and Layout
Subway tile comes in various sizes, from the classic 3" x 6" format to larger options like 4" x 8" or 6" x 12". The size you choose will impact the overall look and feel of the space. Larger tiles create a more streamlined aesthetic with fewer grout lines, while smaller tiles can add a touch of detail and visual interest. Finally, consider the layout of your subway tile. The classic stack bond is a timeless option, but you can explore alternatives like brick bond or herringbone for a more unique look.
Selection Tips
Choosing the right subway tile involves more than just picking a color or finish. Here are some key tips to help guide your selection process with confidence.
Order Samples and Experiments
Don't rely solely on digital images or in-store displays. Order samples of the subway tile options you're considering. This allows you to see the true color, texture, and finish in the lighting conditions of your specific space. Experiment by laying out different samples in various patterns to visualize the final look.
Consider the Overall Impression
Think about the overall impression you want to create with your subway tile. Do you want a clean and classic look? Are you aiming for a bold statement? Understanding the desired aesthetic will guide your selection process and help you narrow down the choices.
Think About Grout Color
The color of the grout plays a significant role in the final look. Matching grout creates a seamless appearance, while contrasting grout emphasizes the individual tiles. Consider the impact of grout color on the overall design before making a final decision.
See it in Your Space with AR
If you're struggling to visualize how different subway tile options will look in your own space, consider using our innovative Augmented Reality (AR) tool. This handy feature allows you to upload a picture of your kitchen, bathroom, or any other area where you plan to install subway tile. Then, you can virtually experiment with various tile colors, textures, and layouts to see how they would look before making a final decision.
Seek Professional Guidance
If you feel overwhelmed by the selection process, don't hesitate to consult with a professional designer or contractor. These professionals can offer valuable insights and recommendations based on your specific project requirements and design style.

Installation of Subway Tile
While subway tile is a versatile and beautiful material, achieving a professional-looking finished product requires careful preparation and proper installation techniques. Below, we will provide a step-by-step overview of the subway tile installation process, focusing on the key stages of preparation, tiling, and grouting.
Preparation
Surface Cleaning and Leveling
Before laying down any tile, ensure the installation surface is clean, level, and free of debris. Patch any holes or cracks in the wall or backsplash area using a suitable patching compound. Uneven surfaces can lead to a crooked tile layout, so use a level to check for any irregularities. If necessary, use leveling shims or a thin layer of mortar to create a perfectly flat surface for optimal tile adhesion.
Layout Planning and Marking
Once the surface is prepped, it's crucial to plan the tile layout. For a seamless result, mark the layout of the tiles on the wall using a pencil or chalk line. This visual guide will ensure proper alignment and prevent any last-minute adjustments that could disrupt the overall design.
Gathering Tools
Having the necessary tools on hand will streamline the installation process. Essential tools include a tile cutter for making precise cuts around outlets, corners, and fixtures; a notched trowel for spreading the thin-set mortar; a level to ensure straight rows; spacers to maintain consistent spacing between tiles; and a bucket and sponges for mixing and cleaning grout.
Tiling Process
Applying Thin-Set Mortar
Thin-set mortar acts as the adhesive that bonds the subway tiles to the wall. Mix the thin-set mortar according to the manufacturer's instructions, ensuring a smooth and workable consistency. Using the notched trowel, spread the mortar onto the prepared surface in a small, manageable section. The size of the area will depend on your comfort level and tiling speed, but it's generally recommended to spread enough mortar for just a few rows of tiles at a time.
Laying the Tiles
Carefully place the subway tiles onto the mortared surface, gently pressing them down to ensure good adhesion. Use the spacers as guides to maintain consistent spacing between each tile. As you lay the tiles, frequently check for level and alignment using your level. Make any necessary adjustments before the mortar sets. A rubber mallet can be helpful for tapping the tiles into place and achieving a level surface.
Cutting Tiles for Corners and Fixtures
Subway tiles won't always perfectly fit around outlets, pipes, or corners. This is where your tile cutter comes into play. Use the tile cutter to make precise cuts for a clean and professional finish around these obstacles. When cutting tiles, always measure twice and cut once to avoid costly mistakes.
Grouting
Mixing and Applying Grout
Once the thin-set mortar has completely cured (refer to the manufacturer's recommended curing time), you can proceed with grouting. Mix the grout following the package instructions, achieving a consistency similar to peanut butter. Using a grout float, apply the grout diagonally across the tiles, filling the spaces between them completely. Avoid oversaturated grout lines, as this will be more difficult to clean.
Cleaning and Finishing Touches
After applying the grout, use a damp sponge, rinsed frequently, to remove excess grout from the tile surface. Wipe diagonally across the tiles to avoid pulling out the grout from the joints. Allow the grout to cure completely according to the manufacturer's recommendations. Once cured, buff any remaining grout haze on the tiles with a dry cloth. Finally, seal the grout using a high-quality grout sealer to protect it from moisture and stains.

Maintaining Subway Tiles
While subway tile offers undeniable aesthetic appeal, its popularity also stems from its relative ease of maintenance for ceramic and porcelain varieties. With a proper cleaning routine and occasional sealing, these tiles can stay looking fresh and beautiful for years to come. However, please note that these cleaning and maintenance steps are specifically for ceramic and porcelain subway tiles. Natural stone subway tiles may require different cleaning methods and sealers, it is best to consult the manufacturer's recommendations for those materials.
Regular Cleaning Routine
The key to maintaining the beauty of ceramic and porcelain subway tile lies in consistent cleaning. For routine cleaning, a mild detergent solution and a soft microfiber cloth are all you need. Mix a few drops of dish soap or a gentle all-purpose cleaner into a bucket of warm water. Dip your microfiber cloth into the solution, wring it out to remove excess moisture, and wipe down the tile surface. Avoid using harsh chemicals or abrasive cleaners, as these can damage the glazed surface of the tiles, making them more susceptible to dirt and grime buildup over time.
Tackling Tough Stains
For tougher stains or greasy messes, particularly in kitchens, consider using a natural cleaning solution like white vinegar diluted with water. Vinegar's mild acidity helps cut through grease and grime without harming the ceramic or porcelain tile surface. Alternatively, a store-bought grout cleaner specifically designed for subway tile can be effective for stubborn stains lodged within the grout lines. Always follow the manufacturer's instructions when using any cleaning product.
Sealing
While ceramic and porcelain subway tiles themselves are moisture resistant, the grout lines can be susceptible to staining and mold growth over time. To prevent this from happening, apply a penetrating sealer to the grout lines. These sealers create a water-repellent barrier that helps prevent moisture from seeping in and causing staining or mildew problems. Choose a high-quality, penetrating sealer specifically formulated for grout, following the application instructions on the product label.
Remember, the frequency of resealing will depend on several factors, including the type of sealer used, ventilation in the space, and overall usage. Generally, a high-quality penetrating sealer applied every 1-2 years is sufficient for most ceramic and porcelain subway tile installations. However, for areas with constant moisture exposure, like showers, more frequent resealing might be necessary.
Subway Tile’s Lasting Impact on Interior Design
Subway tile continues to stand the test of time for a reason. It’s clean, adaptable, and easy to work with, offering a balance of form and function that few materials can match. Whether you're drawn to the crisp lines of traditional layouts or want to experiment with color, texture, or modern patterns, subway tile gives you the freedom to create a space that feels both timeless and personal.
From kitchens and bathrooms to mudrooms and feature walls, this classic tile adapts beautifully to nearly any setting. With a little planning and the right materials, subway tile can become the subtle statement piece that pulls your entire design together.