


Retiling a bathroom isn't just a cosmetic upgrade; rather, it's an investment that can significantly enhance your home's value and functionality. However, handling the complexities of material costs, labor rates, and project scope can be daunting. From the initial step of selecting the right bathroom tiles to ensuring proper substrate preparation and waterproofing, each decision impacts the final price tag.
Moreover, the labor component of retiling varies significantly, influenced by regional demand and the tiler's expertise. To help you make informed decisions, you must consider the cost per square foot, which encompasses both materials and labor. By breaking down these factors, you can avoid construction errors and prevent budget overruns. In this article, we'll explore each of these factors in detail, providing a comprehensive guide to accurately estimate the cost of retiling your bathroom under a realistic budget and avoiding unexpected costs.

Understanding the Scope of Your Retiling Project
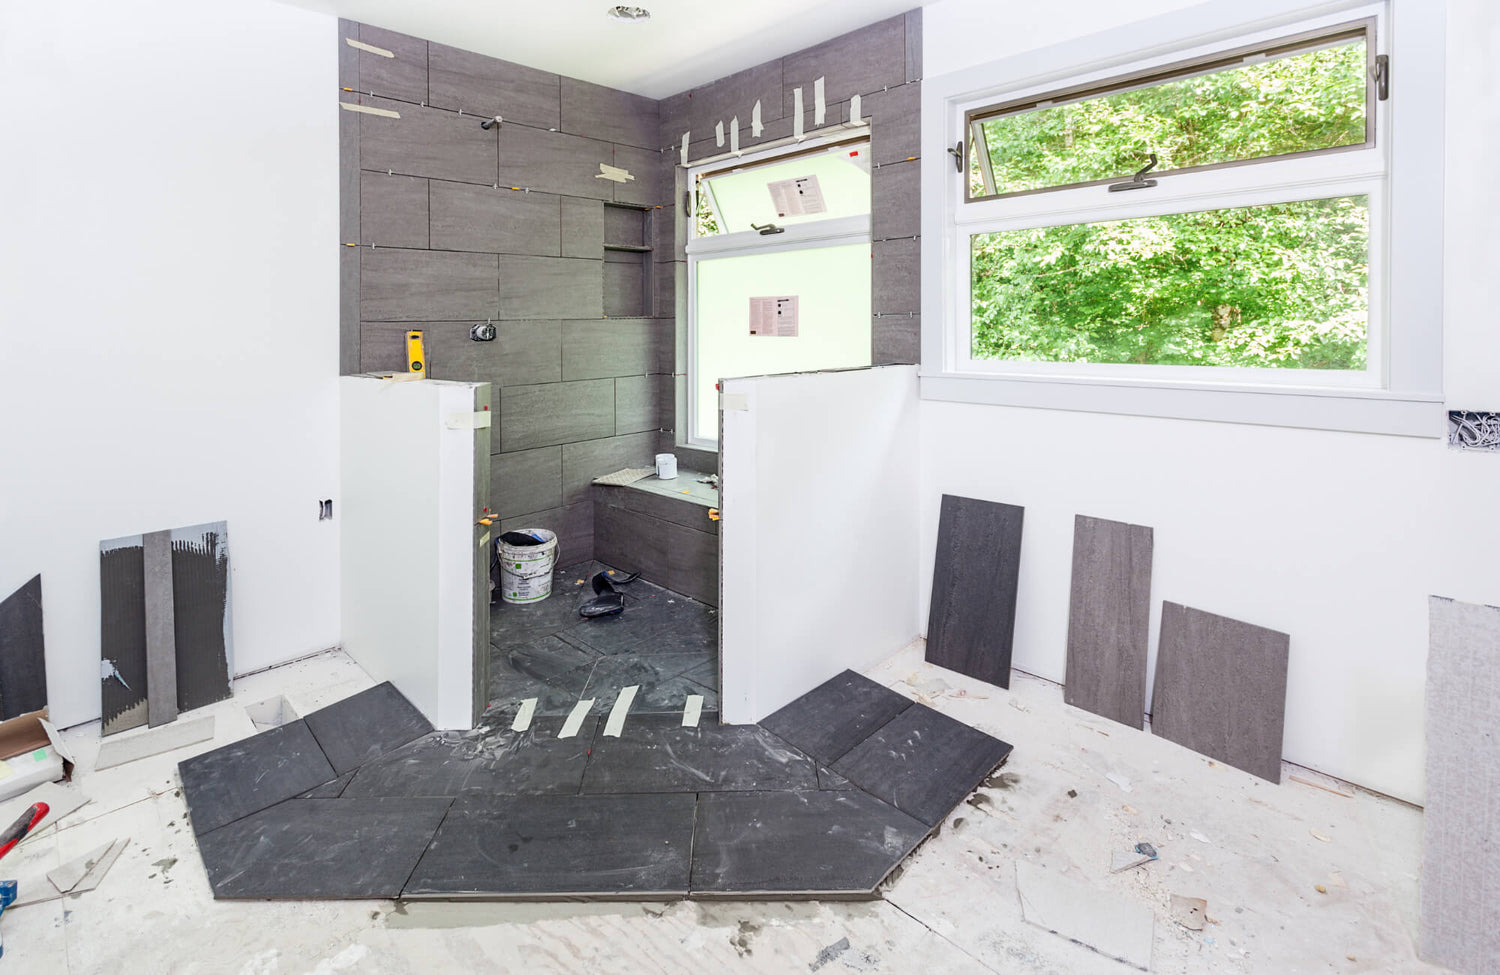
Retiling a bathroom demands careful planning that takes into account the space’s dimensions, design complexity, and structural considerations. Therefore, understanding these elements in advance ensures a smoother installation process and a more polished final result.
Bathroom Size and Layout Considerations
The size and configuration of your bathroom help determine the amount of tile needed, labor intensity, and overall project duration. In general, smaller bathrooms require fewer materials, however, intricate layouts or tight spaces can drive up labor costs due to the need for precise cuts and detailed installations. Conversely, larger bathrooms demand more tile, adhesive, and grout, which naturally leads to higher material expenses and extended labor time.
Beyond size alone, layout complexity also affects pricing. A straightforward square or rectangular bathroom allows for faster and more efficient installation, since it minimizes the need for intricate tile cuts. In contrast, irregular layouts with alcoves, built-in vanities, or curved walls necessitate custom tile cuts and additional labor, increasing overall costs. Additionally, different installation areas, such as shower walls, floors, or backsplashes, may require specific tile types and underlayment preparations to ensure durability and proper adhesion.
Complexity of Tile Pattern and Design
The chosen tile pattern and design intricacy significantly impact the scope of work, influencing material waste, installation time, and labor costs. For instance, standard layouts like the straight grid pattern or stacked bond are cost-effective and quick to install, as they require minimal tile cutting and alignment adjustments. However, intricate designs such as herringbone, chevron, versailles, or basketweave demand greater precision and expertise, resulting in higher labor costs and extended installation time.
In addition to pattern complexity, tile size also contributes to design complexity. For example, large format tiles (e.g., 24x48 inches or greater) create a modern, seamless appearance but they require careful subfloor leveling and lippage control to ensure proper adhesion. Conversely, mosaic tiles (e.g., 1x1 or 2x2 inches), which are commonly used for shower floors or accent walls, involve meticulous placement and additional grouting, thereby increasing labor intensity and installation time. Adding to this complexity, decorative tiles, such as patterned encaustic cement, intricate hand-painted ceramic, or embossed porcelain, introduce artistic flair but demand precise alignment to maintain symmetry. Moreover, custom elements like tile borders, medallions, or inlays further elevate aesthetics, yet they require detailed craftsmanship and precise material planning to achieve a cohesive and polished look.
Beyond pattern and tile size considerations, grout selection is an equally important factor in both aesthetics and maintenance. For example, contrasting grout colors emphasize intricate tile layouts but also require flawless alignment to maintain a polished look. Meanwhile, epoxy grout, known for its durability and stain resistance, offers a low-maintenance solution, yet it is more challenging to work with compared to traditional cement-based grout.

Breaking Down Material Costs for Bathroom Retiling
The cost of retiling a bathroom is heavily influenced by material choices, which extend far beyond just the tiles themselves. Therefore, understanding material costs helps you make informed decisions that balance aesthetics, durability, and budget.
Tile Selection and Price Ranges
Ceramic tiles, priced between $2 and $15 per square foot, offer a cost-effective solution for bathroom walls and backsplash. They come in a variety of finishes and styles and are easier to cut and install than denser materials, making them ideal for DIY projects. Additionally, their lightweight composition reduces installation strain, allowing for quicker application compared to heavier tile options.
In contrast, porcelain tiles, which range from $3 to $25 per square foot, provide great durability, low porosity, and water resistance, making them a preferred option for both floors and shower walls. Available in glazed, matte, and polished finishes, as well as wood look and stone look designs, porcelain tiles justify their higher price tag with exceptional longevity and minimal upkeep.
As shown in the photo above, Edward Martin’s Natasha 2x6 Matte Porcelain Tile in Ice exemplifies a premium yet versatile option for bathroom walls and showers. Its matte finish and cool-toned ice blue shade create a soothing, modern feel, while its porcelain composition enhances durability and water resistance. With a flexible 2x6 format, it suits various installation styles, making it both a stylish and practical option for any bathroom design.
For those wanting a more natural aesthetic, stone tiles, including marble, travertine, limestone, and slate, range from $10 to $50 per square foot. While visually striking, these materials are naturally porous, requiring sealing and regular upkeep to prevent moisture absorption and staining. Additionally, their installation can be more labor-intensive due to variations in thickness and texture, which may require specialized cutting and handling.
Another high-end choice is glass tile, priced between $7 and $30 per square foot. Commonly used for accent walls and backsplashes, glass tiles create a luminous, water-resistant surface. However, their delicate nature and intricate production process contribute to their premium pricing. At the highest end of the spectrum, handmade or custom tiles, such as zellige, encaustic cement, or custom-printed porcelain, range from $20 to $100 per square foot, offering one-of-a-kind designs that add character and artistic appeal to any space.
Grout, Mortar, and Other Necessary Supplies
One of the most fundamental elements of tile installation is thin-set mortar, a cement-based adhesive priced between $10 and $50 per bag. This component securely bonds tiles to the substrate, preventing movement and ensuring durability. While standard thin-set is suitable for most ceramic and porcelain tiles, polymer-modified variants offer enhanced flexibility, making them ideal for large-format or natural stone tiles that require stronger adhesion and added stability.
Equally important is grout, which plays a vital role in both durability and aesthetics. Costing $10 to $80 per bag or pre-mixed bucket, grout is available in sanded, unsanded, and epoxy formulations, each designed for specific applications. Sanded grout, for example, is ideal for joints wider than 1/8 inch, offering extra strength, while unsanded grout works best for narrow grout lines and delicate tiles, minimizing the risk of surface scratches.
For maximum stain resistance and durability in showers and wet areas, epoxy grout is a premium choice, particularly for showers and wet areas. However, it requires specialized installation techniques due to its fast-setting properties and challenging application process. To maintain precise tile spacing and alignment, tile spacers and leveling systems, priced at $10 to $40 per pack, are essential in preventing tile lippage, especially in large-format tile installations.
Finally, sealants and caulk, which range from $5 to $30 per tube, are necessary for expansion joints, corners, and transitions where tiles meet walls, countertops, or other materials. These finishing touches help prevent moisture penetration and ensure a long-lasting, flawless tile installation.
Waterproofing and Substrate Preparation Materials
One of the foundational elements of a moisture-resistant tile installation is cement backer board, which costs between $10 and $20 per sheet and serves as a stable, durable surface for tile adhesion. Unlike drywall or green board, which can deteriorate when exposed to moisture, cementitious backer boards provide great durability, making them the preferred choice for both walls and floors. Equally important is waterproofing, especially in shower areas, where prolonged exposure to water can lead to structural damage. Costing between $50 and $150 per roll or bucket, waterproofing membranes come in two primary forms: liquid-applied coatings and sheet membranes. Both options create a moisture barrier, effectively preventing leaks and extending the lifespan of the tile installation.
In addition to waterproofing, ensuring a level and stable foundation is important, particularly when working with uneven floors. To address this, self-leveling underlayment is often used. Priced between $30 and $50 per bag, this compound corrects irregularities, reducing the risk of tile displacement and cracking over time. Moreover, modern shower installations frequently incorporate advanced drainage systems, which range from $50 to $300 per unit. Whether opting for a linear or center drain, these systems require precise slope adjustments and seamless integration with waterproofing membranes to ensure efficient water management and prevent pooling or seepage issues.

Labor Costs and Professional Installation
The cost of labor for bathroom retiling is determined by several key factors, including whether you hire a professional or opt for a DIY approach, regional variations in labor rates, and the additional work required for demolition and preparation. By carefully evaluating these aspects, you can make informed decisions that balance cost-efficiency with high-quality results, ensuring a successful retiling project.
Hiring a Professional Tiler vs. DIY Installation
Hiring a professional tiler is a key factor in the overall cost of a bathroom retiling project, as labor expenses can vary widely based on project complexity and location. Professional tilers typically charge anywhere from $4 to $12 per square foot, with rates fluctuating based on tile complexity, surface preparation, and regional labor costs. For instance, retiling a standard 80-square-foot bathroom can cost between $320 and $960 in labor alone, while intricate tile patterns or large-format tiles may push costs even higher due to the increased precision and extended installation time required.
Hiring a professional also provides several key advantages, including ensuring proper tile alignment, secure adhesion, and long-term durability. This significantly reduces the risk of costly repairs caused by uneven tiles, improper grout application, or poor waterproofing. Moreover, professional tilers come equipped with specialized tools, such as tile cutters, wet saws, and leveling systems, which can be expensive for a one-time project. In addition to having the right equipment, an experienced tiler can efficiently face installation challenges, including angled walls, alcoves, and custom tile layouts, resulting in a polished and professional-looking finish.
On the other hand, DIY installation can provide significant labor cost savings but presents several challenges, especially for first-time tilers. While simple ceramic tile installation may be manageable with thorough research and preparation, more complex projects, such as laying large format tiles, creating intricate patterns, or properly waterproofing a shower area, require advanced skills and experience. Without proper technique, mistakes in mortar application, tile spacing, or subfloor leveling can lead to cracks, lippage, and water damage, ultimately negating any initial cost savings and potentially requiring professional intervention to correct errors.
For those considering a DIY approach, the estimated cost can range from $500 to $2,500, depending on the size of the bathroom and the type of materials used. Key expenses include:
| Item | Estimated Cost |
| Tiles (Ceramic) | $2–$15 per sq. ft. |
| Tiles (Porcelain) | $3–$25 per sq. ft. |
| Thin-set Mortar | $10–$50 per bag |
| Grout | $10–$80 per bag |
| Cement Backer Board | $10–$20 per sheet |
| Waterproofing Membrane | $50–$150 per roll |
| Tile Spacers & Leveling Systems | $10–$40 per pack |
| Tile Cutter or Wet Saw Rental | $30–$100 per day |
While DIY installation can eliminate labor costs, you should consider tool rentals, material waste, and additional time for learning and execution. For small projects, costs may range between $500–$1,000, while larger or more intricate installations could reach $2,000 or more.
Regional Variations in Labor Rates
Labor costs for tile installation can fluctuate based on geographic location, cost of living, and demand for skilled tradespeople. For instance, in areas with high living expenses, such as New York, California, and major metropolitan cities, professional tiling rates often range between $10 and $20 per square foot. This is largely due to increased overhead costs, competitive labor markets, and higher demand for experienced contractors. Conversely, in rural regions and smaller cities, labor tends to be more affordable, with rates typically falling between $4 and $8 per square foot due to lower operating expenses and a less saturated market.
Beyond location, contractor availability and specialization also determine regional labor rates. In areas where there is a shortage of skilled tile installers, homeowners may experience higher prices and longer wait times due to demand-driven pricing. Similarly, in cities with a high concentration of luxury home renovations, professional tilers often charge premium rates, especially for high-end materials such as natural stone, intricate mosaics, and custom tile work that require specialized expertise.
In addition to labor market dynamics, regional building codes and permit requirements can further influence installation costs. In some states, tasks such as waterproofing or substrate preparation must be completed by a licensed contractor, adding to the overall project expense. By understanding these regional factors, you can set realistic budget expectations and make more informed comparisons when evaluating installation quotes.
Additional Labor for Demolition and Preparation
Beyond tile installation, labor costs extend to essential tasks such as demolition, surface preparation, and waterproofing, all of which significantly contribute to the overall budget. For example, removing old tile can be labor-intensive, with costs typically ranging between $2 and $5 per square foot, depending on factors such as the existing material, adhesive strength, and substrate condition. In some cases, when tiles were installed with thick mortar beds or over outdated subflooring, demolition labor and disposal fees can further increase overall expenses.
Once demolition is complete, subfloor and wall preparation ensure a stable, moisture-resistant surface for new tile. Installing cement backer boards, waterproofing membranes, or self-leveling underlayment adds to labor and material costs but is essential for long-term durability. Additional expenses may arise if structural issues, such as rotted subfloors or water-damaged drywall, are uncovered, requiring repairs before tile installation can proceed.
For shower areas, in particular, professional tilers typically perform specialized waterproofing tasks to prevent future moisture-related issues. This may include applying liquid membranes such as RedGard or Hydro Ban or installing sheet membranes like Schluter Kerdi or Wedi systems, both of which require precise application to ensure a complete and effective moisture barrier. While these additional steps may increase labor costs, they are essential investments in the long-term durability and integrity of the bathroom renovation.

Estimating Total Project Costs and Budgeting
Estimating the total cost of a bathroom retiling project involves more than just calculating tile prices; it requires a comprehensive breakdown of all related expenses, including materials, labor, demolition, waterproofing, and finishing touches. To stay on track financially, creating a detailed budget with contingency planning allows you to account for unforeseen expenses, ensuring that you can invest in high-quality materials and professional installation without exceeding your financial limits.
Creating a Detailed Budget and Contingency Plan
After determining the estimated costs per square foot, the next step is to create a detailed budget that accounts for every aspect of the retiling process, including potential unexpected expenses. Without proper budgeting, unforeseen costs can quickly derail your financial plan, leading to delays or compromises in material quality.
One of the most important aspects of budgeting is setting aside a contingency fund to cover unexpected costs. Experts recommend reserving 10% to 20% of the total budget to handle unforeseen expenses, such as hidden water damage, structural repairs, or material shortages. For instance, if a bathroom retiling project is estimated at $5,000, a contingency fund of $500 to $1,000 provides financial flexibility to address any unexpected challenges without disrupting the project timeline.
To further illustrate these costs, the table below provides a detailed cost estimate for retiling a 100-square-foot bathroom. It outlines key expenses, including tile materials, labor, installation supplies, demolition, and waterproofing. By reviewing this breakdown, homeowners can gain a clearer understanding of the financial scope of their project, ensuring they budget effectively while also accounting for essential costs and a contingency fund.
| Expense Category | Estimated Cost ($) |
| Tile Material (Porcelain, $10 per sq. ft.) | 1,000 |
| Labor Cost ($8 per sq. ft.) | 800 |
| Thin-set Mortar (4 bags, $30 each) | 120 |
| Grout (2 bags, $40 each) | 80 |
| Waterproofing Membrane ($120 per roll) | 120 |
| Cement Backer Board (5 sheets, $15 each) | 75 |
| Self-Leveling Underlayment (2 bags, $40 each) | 80 |
| Tile Spacers & Leveling System ($30 per pack) | 30 |
| Demolition & Disposal ($3 per sq. ft.) | 300 |
| Miscellaneous/Sealants & Caulk | 50 |
| Contingency Fund (15% of total cost) | 387.75 |
| Total Estimated Cost | 3,042.75 |
Financing Options and Payment Schedules
If you’re looking to manage costs over time, exploring various financing options and payment schedules can make bathroom retiling more affordable and accessible. Rather than paying the full amount upfront, financing allows for greater flexibility, helping you distribute expenses more efficiently while still achieving a high-quality renovation.
One of the most popular financing methods is a home improvement loan, which is ideal for mid-to-large-scale renovations. These loans provide fixed interest rates and predictable monthly payments, making long-term budgeting more manageable. For those who have built significant home equity, a home equity loan or a home equity line of credit (HELOC) can be an attractive option, offering lower interest rates than personal loans. However, it’s important to note that these options require using the home as collateral, which adds an element of financial risk.
Alternatively, you can explore credit card financing, which provides immediate purchasing power for materials and labor. While this option offers convenience, it should be approached cautiously due to higher interest rates. To minimize costs, you can take advantage of 0% APR promotional offers, allowing them to finance tile purchases and installation over a short period without incurring interest.
Lastly, many professional tile contractors offer structured payment plans, allowing you to spread costs over multiple installments instead of making a large lump sum payment. Typically, contractors require an initial deposit of 10% to 30% of the total project cost, followed by progress payments during installation and a final payment upon completion. By choosing the right financing strategy, you can achieve your desired renovation without straining the budget.

Tips for Saving Money on Bathroom Retiling
Retiling a bathroom is a worthwhile investment, but costs can quickly add up depending on tile selection, labor, and installation complexity. However, by choosing cost-effective materials, optimizing tile layout, and strategically timing the project, you can significantly reduce expenses without compromising quality.
Choosing Cost-Effective Tile Materials
One of the most effective ways to reduce bathroom retiling costs is by selecting budget-friendly tile materials without compromising durability or aesthetics. Opting for ceramic tiles over porcelain or natural stone can significantly lower expenses, as ceramic tiles offer a wide variety of styles at a fraction of the price. While porcelain is denser and more moisture-resistant, mid-range ceramic tiles with a quality glaze provide similar visual appeal while remaining more affordable and easier to install.
For those looking to balance luxury with affordability, tiles like Edward Martin’s Lilah 6x6 Glossy Ceramic Tile in Marine, present an excellent option. This glazed ceramic tile mimics the look of handcrafted, artisan tiles, featuring rich blue hues and a glossy finish that elevates any bathroom design. Additionally, its 6x6 size ensures easy installation while minimizing waste, ultimately reducing both material and labor expenses.
If you love the look of natural stone but want to avoid the high cost and maintenance requirements, porcelain tiles with marble look designs serve as a practical alternative. These high-definition printed tiles replicate the elegance of natural stone while offering great durability and water resistance, all at a fraction of the cost. Edward Martin’s Aniston 24x48 Matte Porcelain Tile in Calacatta Viola (as shown in the picture above) is a cost-effective option that captures the bold veining and luxurious appeal of real marble. Its large format design reduces grout lines, creating a seamless, high-end appearance that is ideal for bathroom walls, floors, or shower enclosures.
For those who prefer the warmth of wood over stone, wood-look porcelain tiles offer another budget-friendly solution. They provide the character of hardwood flooring without concerns about moisture damage or refinishing costs, making them a practical yet stylish choice for bathroom floors. Another effective way to cut costs is by purchasing bulk or overstock tiles from suppliers, which can help reduce material expenses without sacrificing quality.
Many retailers offer discounts on discontinued or surplus tile stock, which can be an economical choice, especially for smaller bathrooms where large quantities aren’t necessary. Additionally, opting for standard tile sizes (such as 12x12 or 12x24 inches) rather than custom-cut or large format tiles can help reduce specialized labor costs, as larger or irregularly shaped tiles often require advanced cutting tools and professional expertise.
Optimizing Tile Layout to Reduce Waste
Tile waste significantly impacts overall project costs, making efficient layout planning essential for budget-conscious households. By carefully considering tile arrangement, you can minimize material waste and reduce unnecessary expenses. For instance, using rectangular tiles in a simple grid or staggered pattern helps limit offcuts, whereas more intricate layouts, such as herringbone, chevron, or Versailles patterns, require precise alignment and result in excess tile usage, which drives up both material and labor costs.
When planning tile layout, it’s beneficial to work with standard tile dimensions that align proportionally with the bathroom’s size and shape. While large format tiles may reduce the number of grout lines, they can increase material waste if they don’t fit the space efficiently. In contrast, using smaller tiles in mosaic sheets can help optimize material usage in curved or irregular areas while also enhancing visual depth and slip resistance, particularly in shower floors.
Beyond tile selection, careful planning of transition areas, such as where tiles meet walls, vanities, or shower niches, can help prevent unnecessary cuts and partial tiles. One effective technique is performing a dry layout test, where tiles are arranged before installation to visualize spacing and identify potential adjustments before committing to adhesive application. By following a precise tile layout plan, you can order only the necessary quantity, typically adding a 10% overage for breakage and miscuts, rather than over-purchasing materials unnecessarily.
To further simplify the tile selection and layout process, Edward Martin’s Augmented Reality (AR) Visualization Tool allows you to preview tile designs in your actual space before making a purchase. This interactive approach helps identify potential layout inefficiencies, transition concerns, and aesthetic compatibility, allowing for better planning and more confident decision-making even before installation begins.
Timing Your Project for Off-Season Discounts
Strategic timing can lead to significant cost savings, especially when it comes to contractor labor and material pricing. The home improvement industry experiences seasonal fluctuations, with peak demand occurring in spring and summer, when more people undertake renovations. As a result, contractors tend to charge higher rates due to increased demand. However, scheduling a bathroom retiling project during the off-season, typically late fall and winter, can lead to lower labor rates, as contractors are less busy and may offer discounted pricing to secure projects.
Beyond labor costs, retailers also offer discounts on tile materials and installation supplies during slower months, particularly after major holidays and year-end inventory clearances. For instance, shopping for tiles during Black Friday, holiday sales, or early spring promotions can yield substantial savings on porcelain, ceramic, and specialty tile options. Additionally, manufacturers often introduce new tile collections in early spring, meaning last season’s designs are frequently available at clearance prices, making it a prime opportunity to purchase high-quality materials at a fraction of the cost.
For those hiring professional tilers, maintaining flexibility with scheduling can lead to even greater savings. In many cases, contractors are willing to offer discounts for weekday or last-minute openings, especially when they have gaps in their schedules. Furthermore, requesting multiple quotes and negotiating labor pricing during slower months can result in better rates and potential savings on additional services, such as demolition, waterproofing, and subfloor preparation. By carefully planning the timing of a bathroom retiling project, you can take advantage of lower costs while still ensuring high-quality workmanship and materials.
Final Cost Considerations for a Successful Retiling Project
Ultimately, the cost of retiling a bathroom is a multifaceted equation, influenced by material quality, installation expertise, and project complexity. By carefully considering the elements and leveraging the diverse range of tile solutions offered by Edward Martin, you can achieve a balance between aesthetic appeal and financial prudence.
To help you make the best choice for your bathroom, Edward Martin’s request samples service lets you see and feel tiles firsthand before making a purchase. This hands-on experience allows you to assess color accuracy, texture, and finish in real lighting, giving you confidence in your selection. Whether you're refreshing a small space or tackling a full renovation, careful planning ensures the best results. With a commitment to quality, Edward Martin provides the expertise and materials needed to bring your vision to life.