


Transitioning between hardwood floors and marble look tiles can dramatically reshape how a space feels, but how do you make the shift look intentional rather than abrupt? Whether you’re considering a marble threshold between hardwood and tile or exploring sleek marble transition strips, the goal is to create a connection that feels both seamless and thoughtfully designed. When done right, this transition doesn’t just join two materials, it enhances the overall flow and elevates the entire room.
Beyond visual appeal, achieving a smooth transition also requires careful planning and the right materials, from selecting the proper transition molding to ensuring structural compatibility beneath the surface. Factors like layout, height differences, and installation methods all play a role in how well the two flooring types come together. In this guide, we’ll walk through everything you need to know to create a balanced, durable, and visually refined transition from hardwood floors to marble look tiles.

Planning Your Transition For Optimal Results
A well-planned transition from hardwood floors to marble look tiles requires proper preparation. Each phase of the planning process requires careful evaluation of the existing flooring conditions, strategic material selection, and a well-structured installation approach.
Assessing Your Space And Existing Conditions
A thorough assessment of your space lays the foundation for a successful transition. Start by evaluating the subfloor material and condition, as the requirements for hardwood and tile differ significantly. Wood flooring typically requires a flexible underlayment to accommodate natural expansion, whereas marble look tiles demand a stable, level surface to prevent cracking. If your subfloor consists of plywood, a cement backer board or a self-leveling underlayment may be necessary to create a firm base for tile installation.
Considering Layout and Functional Flow
Beyond structural considerations, room layout and functionality also help in your planning. For instance, open floor plans require a more deliberate approach to transitions, as abrupt changes in material can disrupt visual continuity. In contrast, doorways and thresholds naturally define separate spaces, making them ideal locations for transitioning from hardwood to marble look tile. Foot flow patterns should also be considered, as busy areas may require additional reinforcement or specific transition materials to ensure durability.
Addressing Height Differences
Height differences between hardwood and marble look tile must also be measured to prevent tripping hazards and uneven flooring. While solid hardwood and engineered wood typically range from ½ to ¾ inches in thickness, porcelain tiles vary based on size and design, with large format tiles often being thicker than standard ones. If the height variation exceeds ⅛ inch, transition strips, underlayment adjustments, or a slight slope in the subfloor may be necessary to create a level connection.
Marble Look Tiles And Transition Pieces
Choosing the right marble look tiles is only part of achieving a seamless transition, as the transition detail itself plays an equally important role in the overall design. Whether using a marble threshold between hardwood and tile or opting for more understated marble transition strips, the goal is to create a connection that feels intentional rather than abrupt. Coordinating the tile’s color, veining, and finish with the existing wood flooring also helps maintain visual harmony across both surfaces.
Beyond aesthetics, the type of transition you choose should respond to both function and layout. A marble floor transition strip offers a clean, low-profile connection suited for open spaces, while transition molding such as T-molding or reducer strips helps manage slight height differences between materials. For more defined separations, especially in doorways or between rooms, a marble threshold provides a durable and visually grounded solution.
More contemporary interiors may benefit from sleek metal profiles, which introduce a crisp edge without drawing too much attention to the transition itself. In contrast, traditional or warmer spaces often favor stone-based elements, where marble transition strips or thresholds enhance continuity and reinforce a more cohesive material palette. Ultimately, selecting the right transition detail ensures that the shift from hardwood to marble look tile feels deliberate, balanced, and well integrated into the overall space.
Developing A Detailed Installation Plan And Budget
An installation plan ensures efficiency, and cost control throughout the transition process. Begin by outlining a step-by-step approach, including subfloor preparation, tile layout, adhesive selection, and finishing touches.
Budget Planning
Budget planning should account for both material costs and labor expenses. High-quality marble look tiles vary in price depending on the manufacturer, finish, and size, with large format tiles typically being more expensive due to their durability and upscale aesthetic. Transition strips, grout, and adhesives also add to the total cost, along with any necessary subfloor modifications to ensure a level surface. If you're planning to hire a professional installer, labor fees will depend on the complexity of the transition, with intricate layouts or custom cuts increasing overall expenses.
Tile Placement
Precision in tile placement is also a factor, particularly at transition points where slight misalignments can become noticeable. Dry-fitting tiles before installation allows for adjustments to the layout, ensuring an even flow between materials. If opting for a diagonal or staggered tile pattern, additional calculations may be necessary to maintain proportionality at the transition.
Post-Installation Finishing
Post-installation steps, such as sealing the grout and applying protective treatments, can enhance durability and ease of maintenance. While porcelain marble look tiles are inherently stain-resistant, sealing the grout prevents moisture penetration and discoloration over time. Hardwood adjacent to the tile transition should also be inspected for any necessary refinishing to maintain a consistent sheen across surfaces.

Preparing The Subfloor For Marble Look Tile Installation
A well-prepared subfloor is essential for a durable and flawless marble look tile installation. Proper preparation ensures structural stability, enhances performance, and creates a smooth, even surface for optimal results.
Removing Existing Hardwood Flooring And Underlayment
Before installing marble look tiles, the existing hardwood flooring and underlayment must be carefully removed to expose the subfloor. This ensures that the new tile installation sits on a stable base without inconsistencies that could lead to cracks or uneven surfaces.
Dismantling the Hardwood Flooring
The removal varies based on the type of hardwood floor installed. Solid and engineered hardwood can be nailed, glued, or floated over the subfloor, requiring different removal techniques. However, for complex or adhesive-bonded flooring, professional assistance is recommended to ensure safe and efficient dismantling. Always follow manufacturer guidelines and safety precautions or consult a qualified contractor for best results.
Nailed hardwood flooring, commonly found in older homes, is secured with nails or staples, requiring a pry bar and mallet to lift the planks carefully and prevent damage to the subfloor. In contrast, glued hardwood flooring presents a more labor-intensive challenge, as the adhesive bonds the planks tightly to the subfloor. To loosen the glue, professionals use a flooring scraper or heat gun, making removal more manageable.
The easiest type to remove is floating hardwood flooring, which is not directly attached to the subfloor. These planks can simply be lifted and separated along their locking edges, allowing for a quick and straightforward dismantling process.
Eliminating the Underlayment
Once the hardwood is removed, the next step is addressing the underlayment, which could be plywood, particleboard, or an old adhesive layer. If plywood underlayment is present, it must be carefully lifted using a drill to remove screws or a crowbar for nailed sheets. Particleboard underlayment, often found in older homes, must also be completely replaced, as it lacks the strength needed for tile support. Any residual adhesive from glued flooring should be thoroughly scraped to ensure a smooth surface for the next steps.
Leveling And Reinforcing The Subfloor
Ensuring a level and reinforced subfloor is critical to preventing tile lippage, cracking, and grout failure. Since tile does not flex like hardwood, any inconsistencies in the subfloor can cause stress fractures over time. It is always best however to follow industry standards and use appropriate leveling compounds or reinforcements.
Assessing Subfloor Flatness and Stability
Before proceeding, check the subfloor’s flatness using a 6-foot or 10-foot straightedge. Industry standards recommend that the subfloor should not deviate more than ⅛ inch over 10 feet for large format tiles; if uneven areas exceed this tolerance, corrective measures must be taken.
To correct subfloor imperfections, both high and low spots must be addressed. High spots can be carefully removed using a belt sander or grinding tool, gradually leveling raised sections to prevent uneven tile placement. Meanwhile, low spots require the application of a self-leveling compound (SLC), which spreads evenly across depressions and hardens quickly, creating a stable and reliable base for tile adhesion.
Reinforcing the Subfloor for Tile Support
The subfloor must also be strong enough to prevent deflection, which can cause tile and grout to crack under stress. The deflection rating for tile installation should not exceed L/360, meaning the subfloor must not flex more than 1/360th of the span’s length under load.
If the existing subfloor is less than ⅝-inch thick plywood, adding an additional ½-inch exterior-grade plywood layer strengthens the structure, providing a more rigid surface for tile application. To further enhance stability, secure all subfloor panels using screws every 6 inches, which helps eliminate movement and prevent squeaks or shifting. Unlike nails, which can loosen over time, screws offer a more secure and long-term solution. Additionally, if the subfloor still exhibits flex, installing cross-bracing or solid blocking between joists helps minimize movement, ensuring a firm, level base that supports the weight and durability of the tile.
Installing A Moisture Barrier And Backer Board
After leveling and reinforcing the subfloor, the next step is installing a moisture barrier and cement backer board. These layers enhance moisture resistance, provide additional support, and improve the bond between the tile and subfloor.
Moisture Barrier Installation for Tile Protection
Moisture barriers are essential for preventing water infiltration, especially in bathrooms, kitchens, and entryways, where exposure to humidity and spills is common. The choice of moisture barrier also depends on the subfloor material, ensuring effective protection against water damage.
For wood subfloors, a liquid waterproofing membrane or 15-pound roofing felt should be applied and securely stapled to the surface before installing the backer board. This layer prevents moisture from seeping into the wood, reducing the risk of warping or mold growth. For concrete subfloors, applying a concrete primer followed by a waterproofing membrane helps seal the surface and block moisture transmission.
Cement Backer Board
Cement backer board is an essential underlayment that provides a stable, non-flexing base for marble look tiles. Unlike plywood, which expands and contracts, cement board is dimensionally stable and resists moisture absorption.
Installing cement backer board begins with measuring and cutting the cement board to fit the installation area, using a utility knife or carbide-tipped scoring tool for clean and accurate cuts. Once the pieces are prepared, a layer of polymer-modified thin-set mortar is spread across the subfloor with a ¼-inch notched trowel to ensure proper adhesion before laying the backer board.
To secure it firmly in place, alkali-resistant screws should be driven every 8 inches, taking care to avoid positioning seams directly over subfloor joints. Finally, all seams must be reinforced by applying alkali-resistant fiberglass mesh tape, followed by a thin layer of mortar to create an even transition between boards.
Final Pre-Tile Inspection
Once the moisture barrier and backer board are installed, a final inspection is essential to ensure a long-lasting foundation for tile installation. Begin by checking that the surface is completely flat and free of gaps or irregularities, as any inconsistencies can compromise tile adhesion and lead to uneven placement.
Next, confirm that all screws are flush with the board, ensuring there are no protruding fasteners or sharp edges that could interfere with the tile application. Lastly, verify that all seams are properly sealed, preventing moisture intrusion and reinforcing the subfloor’s durability.

Installing Marble Look Tiles
Proper installation of marble look tiles is key to achieving a seamless and professional finish that enhances both durability and aesthetics. From planning the layout to securing transition pieces, each step ensures a well-structured and long-lasting design. Below, we’ll go over essential techniques to help you install marble look tiles correctly, though achieving a precise and lasting result often depends on proper installation techniques and, in some cases, professional expertise.
Laying Out The Tile Pattern And Dry Fitting
Before installing marble look tiles, planning the layout and conducting a dry fit is essential to achieving a balanced arrangement. Proper tile placement enhances the room’s aesthetics, minimizes awkward cuts, and ensures alignment with transition points and architectural features.
Determining the Tile Layout
A well-thought-out tile pattern establishes symmetry and flow across the space. Whether opting for a straight lay, diagonal pattern, or herringbone design, careful measurement and alignment are necessary to maintain proportionality. The layout should start from the room’s center or a focal point, extending outward to ensure an even distribution of tile cuts along the edges.
To maintain symmetry and minimize unsightly slivers of tile along walls, installers use the rule of thirds or adjust grout joint spacing slightly. Additionally, factoring in room transitions is essential, aligning tiles with doorways and adjoining flooring ensures a smooth connection between materials.
Dry Fitting for Placement and Adjustments
Dry fitting involves laying out the tiles without adhesive to assess spacing, alignment, and potential cut requirements. This step allows installers to identify misalignments or uneven gaps before committing to mortar application.
To achieve a natural appearance, it is essential to check for pattern continuity by ensuring that the veining and movement in marble look tiles flow cohesively across the surface. Rotating tiles or adjusting their placement can also enhance the realism of the marble effect, creating a more organic design.
Additionally, identifying and marking cut lines in advance allows for precise trimming, ensuring that tiles fit neatly against walls, cabinetry, and transition strips without irregular edges. Equally important is maintaining a ¼-inch expansion gap along walls and fixed objects to accommodate structural movement, preventing potential tile cracking and ensuring long-term durability.
Applying Thin-Set Mortar And Setting The Tiles
Once the layout is finalized, securing the tiles with thin-set mortar is the next critical step. This adhesive provides a strong bond between the tiles and subfloor, ensuring long-term stability and preventing lifting or shifting.
Choosing the Right Thin-Set Mortar
Selecting the correct polymer-modified thin-set mortar is crucial, as it enhances adhesion and flexibility, accommodating slight subfloor movements. For large format marble look tiles, a medium-bed mortar is recommended to prevent lippage and support heavier tiles effectively.
Mortar consistency is important as well; if too thick, it can create unevenness, if too thin, it may not provide adequate support. The ideal consistency should resemble peanut butter, ensuring proper adhesion without excessive slippage.
Troweling Techniques for Proper Adhesion
Using the correct notched trowel size helps distribute the mortar evenly and ensures full tile-to-mortar contact. For tiles larger than 12x12 inches, a ½-inch by ½-inch square-notched trowel is ideal to provide sufficient mortar coverage.
Working in small sections also prevents premature drying, allowing for better control and ensuring that the mortar remains workable throughout the process. For large format tiles, using the back-buttering technique where applying a thin layer of mortar directly to the back of each tile enhances adhesion by eliminating air pockets and ensuring full contact with the substrate. Once positioned, each tile should be pressed firmly into place and slightly shifted in a sliding motion, which helps distribute the mortar evenly and creates a strong, secure bond.
Ensuring Level Installation and Preventing Lippage
Tile lippage, when edges of adjacent tiles are uneven, can be avoided by using a tile leveling system, which consists of clips and wedges that maintain uniform spacing. Checking for levelness with a bubble level during installation ensures an even tile surface. Allowing the mortar to cure for at least 24 hours before applying grout also prevents movement and ensures a durable bond.
Choosing the Right Grout and Application Method
The choice between sanded and unsanded grout depends on the width of the grout joints. Unsanded grout is ideal for narrow joints ranging from 1/16 to 1/8 inch, as its smooth texture prevents scratching delicate tile surfaces while providing a clean, refined finish. In contrast, sanded grout is recommended for wider joints exceeding 1/8 inch, as its added aggregate enhances structural integrity, reducing the risk of cracking and shrinkage over time.
To apply grout effectively, begin by mixing it to the right consistency, following the manufacturer's guidelines to achieve a smooth texture that spreads evenly without excess water. Using a rubber float, press the grout firmly into the joints at a 45-degree angle, ensuring complete coverage and eliminating air pockets. After 15–20 minutes, wipe away excess grout with a damp sponge, carefully removing residue without pulling grout from the joints. Once the grout haze has dried, buff the tile surface with a soft cloth to restore its luster and achieve a clean, polished finish.
After the grout has cured for 48 to 72 hours, applying a penetrating grout sealer prevents moisture absorption, staining, and discoloration. This step is particularly important for high-moisture areas like kitchens and bathrooms, where exposure to spills and humidity can degrade unsealed grout over time.
As shown in the photo above, Edward Martin’s Blair 2x2 Matte Porcelain Mosaic Tile in Oniciata Beige exemplifies how a well-sealed grout line enhances both durability and appeal in a bathroom setting. The marble look mosaic tile format naturally increases grout joints, making proper sealing essential for preventing water infiltration, especially in shower floors or wet areas. Properly sealed grout also ensures that installations like this remain resistant to water damage and staining, preserving their beauty and longevity for years to come.

Design Integration And Styling
Achieving a refined transition between hardwood floors and marble look tiles goes beyond installation, it requires thoughtful design integration. When approached intentionally, the contrast between materials can enhance depth, texture, and spatial definition rather than feel disconnected. By focusing on how each element interacts within the space, you can create a transition that feels both cohesive and visually purposeful.
Blending Textures
The interplay between hardwood and marble look tile introduces a balance of warmth and polish, making texture an essential design consideration. Natural wood flooring often carries a matte or satin finish, while marble look tiles can range from softly honed to high-gloss surfaces that reflect light differently across the space. Selecting finishes that complement rather than compete ensures the transition feels cohesive rather than visually fragmented.
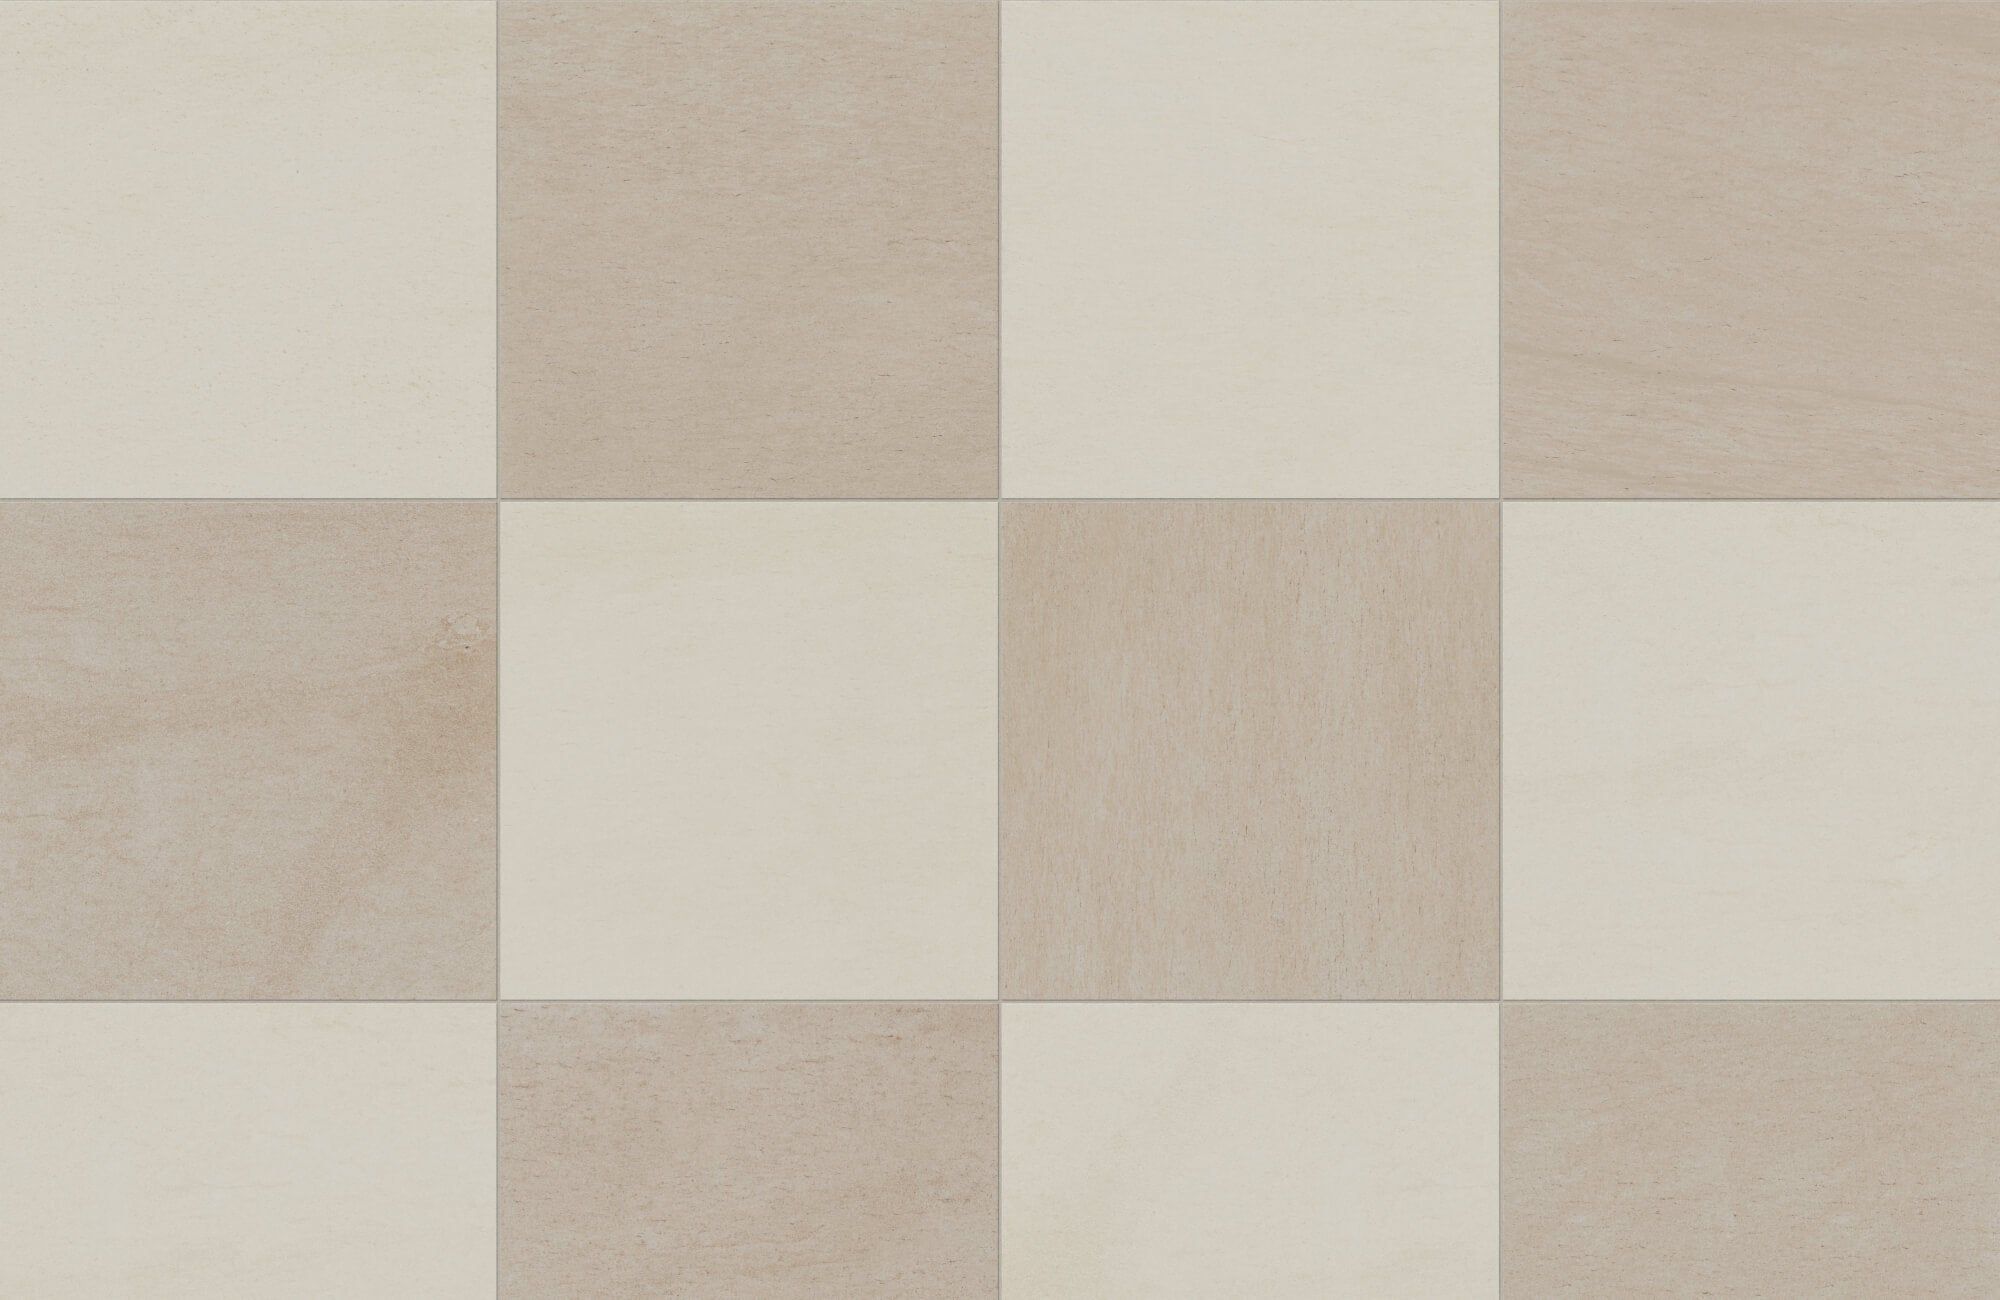
For a more seamless effect, matte marble look tiles can echo the understated quality of wood while still offering subtle variation through veining. A piece like the Leona 24x24 Checkerboard Matte Porcelain Tile in Calacatta and Amani Bronze, as shown in the photo above, demonstrates how controlled contrast and soft surface texture can bridge materials without overwhelming the design. This approach allows the transition to feel intentional, with each surface enhancing the other rather than standing apart.
Beyond flooring, extending similar materials into vertical elements, such as incorporating marble wainscot with wood floor pairings, can further unify the space. This layering of materials creates continuity, especially in transitional areas like hallways or bathrooms where shifts in surface are more noticeable. When textures are thoughtfully repeated, the overall design feels more connected and visually grounded.
Furniture and Accessory Placement
Furniture and accessories play a key role in softening the transition between hardwood and marble look tiles, helping guide the eye naturally across both surfaces. Thoughtful placement can visually connect zones without emphasizing where one material ends and another begins. Instead of treating the transition as a dividing line, it becomes part of a broader, cohesive layout.
One of the most effective techniques is layering rugs, which helps bridge the visual gap between materials while adding warmth and comfort underfoot. In open spaces, rugs that extend across both hardwood and tile can unify the area, while in narrower spaces, runners create a gradual shift that feels more natural. Choosing tones and textures that complement both surfaces ensures the transition remains subtle and well-integrated.
To further refine your design decisions, tools like our Augmented Reality (AR) Visualization Tool can help you preview how marble look tiles interact with your existing flooring and furnishings. This allows you to experiment with tone, scale, and placement before committing, ensuring a more confident and cohesive outcome. By combining thoughtful styling with the right visual tools, transitions can feel intentional, balanced, and tailored to your space.
Mastering the Transition From Hardwood Floors to Marble Look Tiles
Successfully transitioning from hardwood floors to marble look tiles requires a balance of structural preparation, material selection, and design cohesion. By carefully considering each phase, you can achieve a transition that is both stylish and structurally sound.
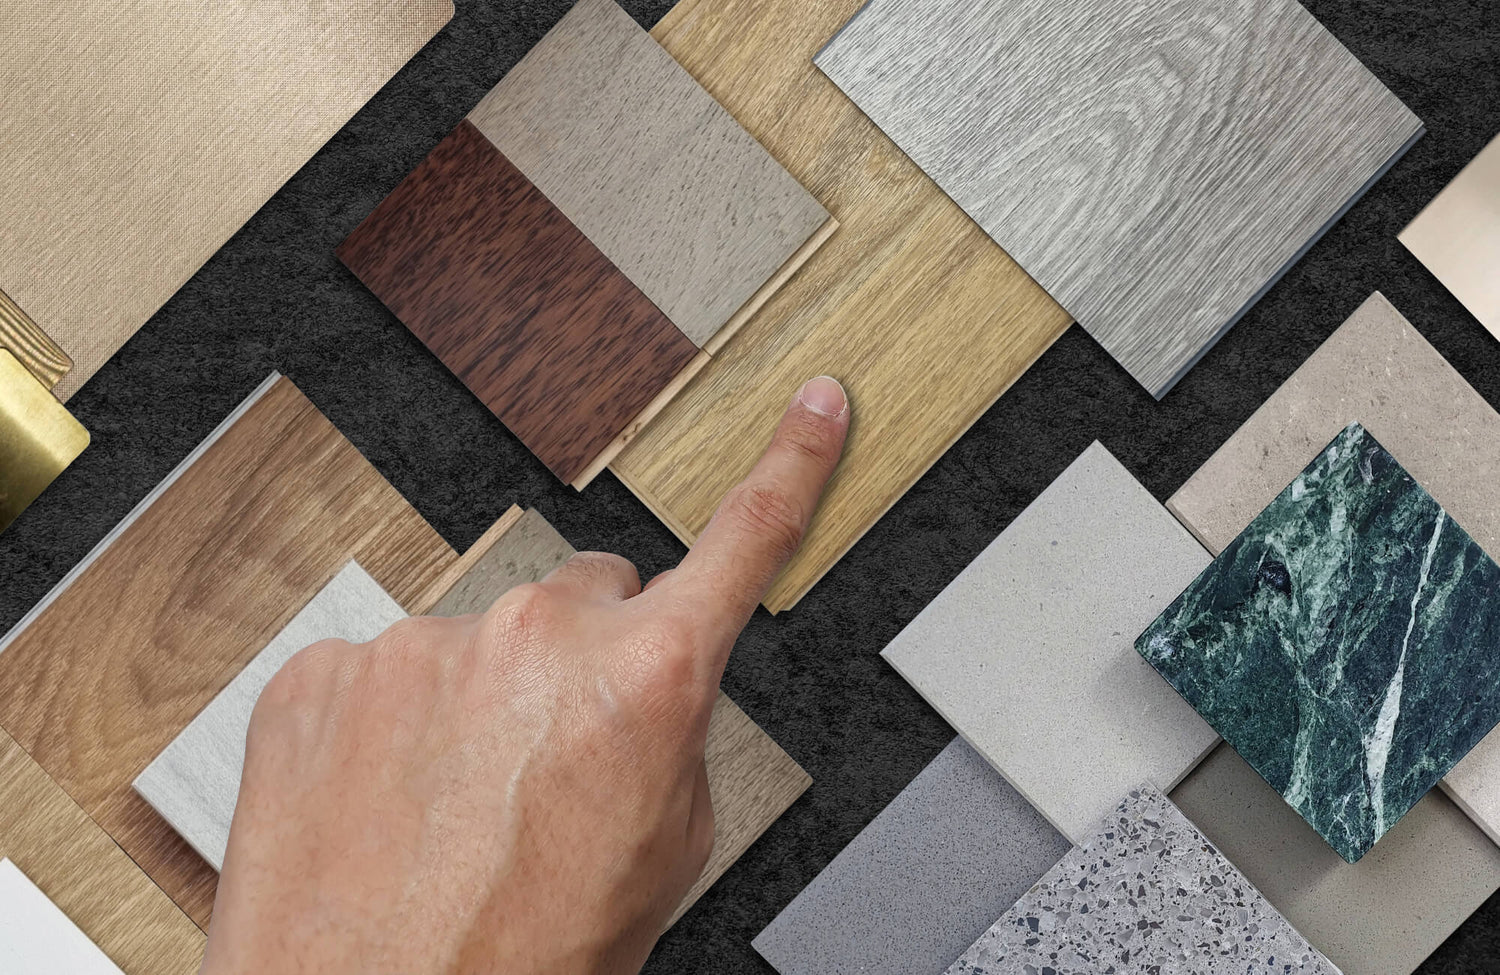
To ensure you select the perfect tile for your space, Edward Martin offers a convenient tile sample service, allowing you to experience the look and feel of the tiles before making a purchase. As you explore your options, browse our diverse marble look tile collection, which features a variety of designs and textures tailored to different styles and preferences. With this hands-on approach, you can confidently choose a tile that not only enhances your space but also complements your existing hardwood floor.
