


Lighting plays a defining role in the atmosphere of any home. Over time, even the most stylish fixtures can start to feel outdated or fail to meet your lighting needs. One of the easiest and most transformative updates you can make is replacing an old light with a new flush mount fixture. Whether you’re upgrading a builder-grade ceiling light or swapping out an older style for something sleeker and more modern, this project is both manageable and rewarding for most homeowners.
In this guide, we’ll walk you step by step through the process, from preparing your tools to wiring and testing your new fixture. With a little patience and attention to detail, you can safely replace a light and instantly elevate your space.

Step 1: Gather Your Tools and Prepare Your New Fixture
Before you remove a single screw, it’s important to set yourself up for success. Taking the time to organize your tools and inspect your new light ensures a smooth, frustration-free installation.
Collect Your Essential Tools and Safety Gear
Replacing a ceiling light isn’t complicated, but having the right tools and safety equipment on hand makes all the difference.
You’ll need a Phillips-head and a flat-head screwdriver to remove fixture screws and secure new wire connections, along with wire strippers for trimming and stripping electrical wires cleanly without damaging the copper inside. A non-contact voltage tester is a must-have for confirming that the power is off before you touch any wiring, while a pair of pliers or wire cutters will come in handy for twisting wire ends together and trimming away excess material.
Make sure you also have a sturdy ladder or step stool that allows you to reach the ceiling comfortably without overextending, as well as a roll of electrical tape to provide extra insulation around your wire connections. For safety, wear protective glasses to shield your eyes from dust or debris, and consider using gloves for added grip and protection.
Before you start, it’s smart to lay down a drop cloth beneath your workspace to catch any screws, wire caps, or dust that may fall during the process, this keeps cleanup quick and easy once the installation is complete.
Unbox and Inspect Your New Flush Mount Light
When your new fixture arrives, resist the temptation to install it immediately. Begin by unboxing the light and carefully checking that all the necessary components are included and in good condition.
You should find the fixture base or canopy, a mounting bracket or crossbar, the required mounting screws and wire connectors, a shade or glass diffuser, and the instruction manual.
Inspect each piece closely for any cracks, scratches, or missing parts before you proceed. If you notice damage, reach out to the manufacturer for replacements rather than attempting to install a compromised fixture. It’s also important to confirm that your new flush mount is compatible with your existing electrical box, most modern lights are designed to fit standard ceiling junction boxes, but verifying this in advance helps prevent frustration during installation.
Taking these few careful steps ensures that your new light is ready to go and that your installation process will be smooth and problem-free.
Read the Manufacturer’s Instructions
Every fixture has its quirks. While most follow the same general installation principles, small variations in wiring color, mounting hardware, or design can make a difference. Carefully reading the manufacturer’s instructions helps you understand any unique requirements or warnings specific to your fixture model.
This quick review also prevents mistakes later, especially when it comes to weight ratings, bulb compatibility, and mounting methods. Take five minutes to familiarize yourself now, it could save you thirty later.

Step 2: Safely Remove Your Old Light Fixture
This is where the real work begins, and safety takes center stage. Even a straightforward lighting project can be dangerous if electricity isn’t handled correctly. Always take the time to confirm that your circuit is completely off before you start disconnecting anything.
The Most Important Step: Turn Off the Power
Before touching your existing fixture, whether it’s a ceiling light, flush mount, or wall sconce, locate your home’s electrical panel and turn off the circuit breaker that powers the light you’re replacing. Most breakers are labeled, but if yours aren’t, switch them off one by one until the light goes out.
To be extra cautious, tape a small note over the breaker switch that reads “Do not turn on, working on circuit,” so no one accidentally restores power while you’re mid-project. Never rely solely on the wall switch being off, as that doesn’t necessarily mean the wires in the ceiling or wall are fully de-energized.
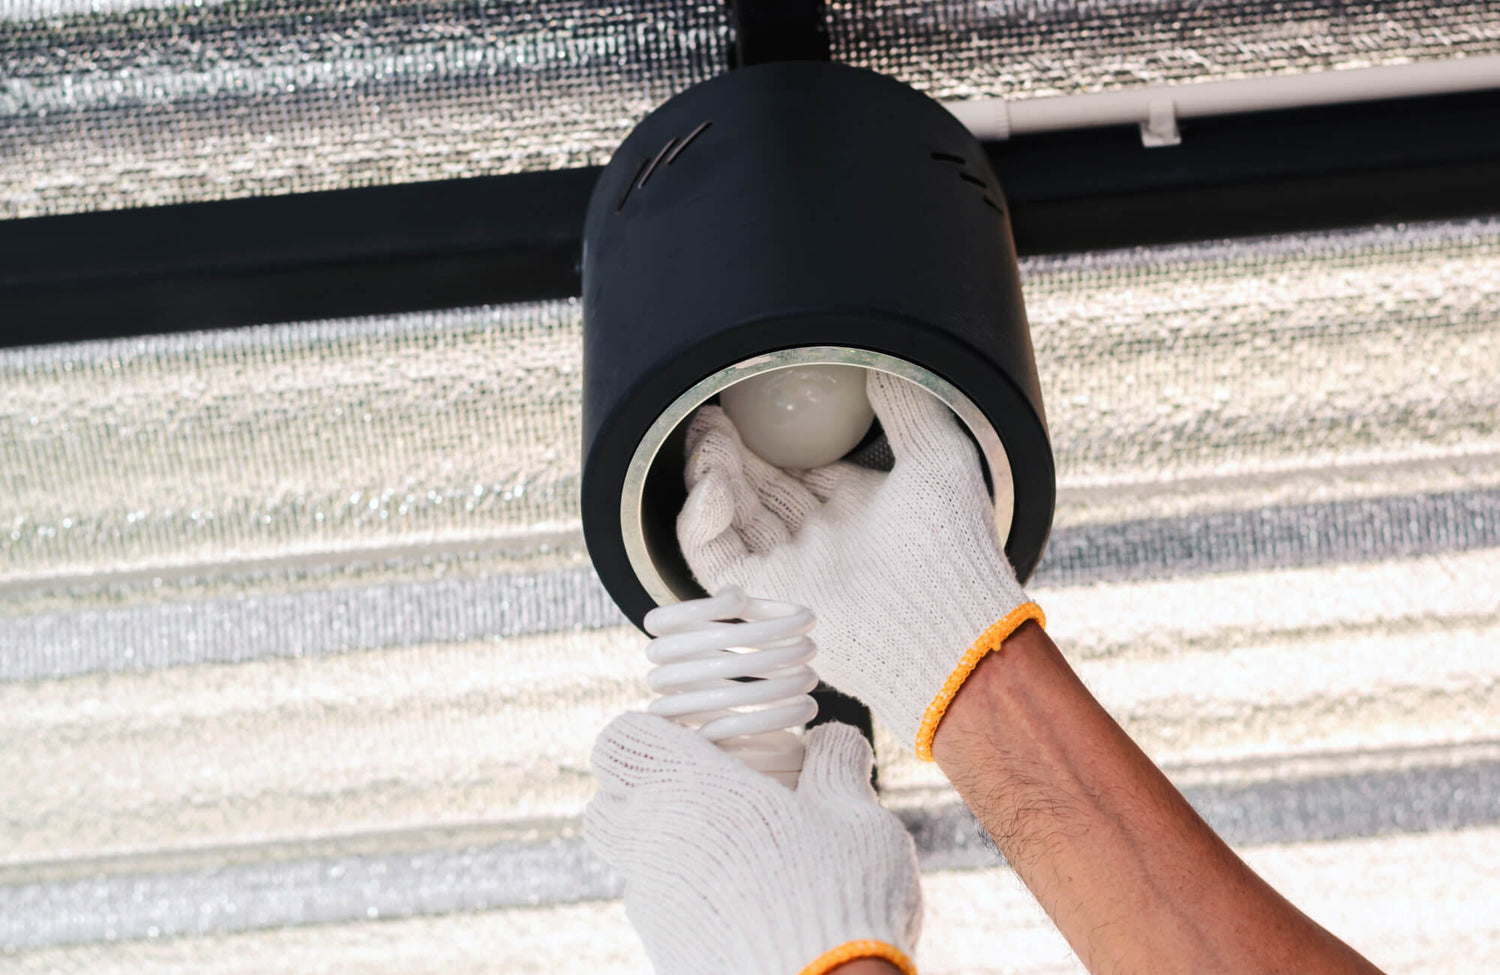
Confirm the Power Is Off With Your Voltage Tester
After the breaker is off, use your voltage tester to confirm there’s no live current running to the fixture. Remove the old light bulb and touch the tester’s probe to the exposed wires or metal parts where the light connects. If it lights up or beeps, power is still present, stop and double-check your breaker box.
Only when your tester indicates zero voltage should you proceed. This simple step is one of the most critical safety checks in any electrical project.
Disconnect and Detach the Old Fixture
Once you’re certain the power is off, you can safely begin removing the old fixture.
Start by unscrewing the canopy or cover, most flush mount or semi-flush fixtures are secured with decorative nuts or screws. Carefully loosen these and lower the fixture base to expose the wiring beneath. As you do this, support the fixture with one hand, or ask a helper to assist you if it’s heavy or awkward to handle.
Next, take a moment to identify the wires connecting your old fixture to the ceiling. You’ll typically see three: a black “hot” wire, a white “neutral” wire, and a bare copper or green “ground” wire. Unscrew the wire nuts connecting these wires and gently separate them, taking care not to damage the exposed copper ends. Once the wires are disconnected, remove the mounting bracket from the electrical box if it doesn’t match the hardware provided with your new light.
When the old fixture is completely free, set it aside in a safe spot, or recycle it if you no longer plan to use it. At this point, you should be looking at a clean, standard round or octagonal electrical box in your ceiling, ready to support your new flush mount fixture.

Step 3: Install the New Bracket and Wire Your Flush Mount
Now that you have a clean slate, it’s time to attach your new fixture. This step requires attention to detail, especially when it comes to wire connections and secure mounting.
Install the New Mounting Bracket
Most new lights come with a crossbar or mounting bracket that attaches to the electrical box. Line up the holes in the bracket with those on the box and secure it using the included screws.
Ensure the bracket sits flush against the ceiling, this stability is what will hold your entire fixture. For heavier lights, double-check that your electrical box is rated for fixture support; ceiling boxes should be securely fastened to framing, not just drywall.
Some brackets have a threaded post or center stud that will later help anchor the fixture canopy. Verify that it’s oriented correctly according to the instructions.
Connect the Wires Color to Color
This is the stage where precision truly matters. Correctly wiring your flush mount fixture ensures safe operation, proper performance, and long-term reliability.
Begin by matching the corresponding wires from your ceiling to those on your new fixture. The black wire connects to the black “hot” wire, the white wire connects to the white “neutral” wire, and the green or bare copper wire connects to the fixture’s grounding screw or green ground wire.
Once you’ve identified and paired each connection, twist the wire ends together in a clockwise direction and secure them with the provided wire nuts. Give each connection a gentle tug to confirm that it’s tight and won’t come loose. For an added layer of safety, wrap each wire connection with electrical tape, this helps keep the wire nuts in place over time, especially if the fixture is bumped or adjusted later.
If your ceiling box doesn’t contain a dedicated ground wire, attach the fixture’s ground wire directly to the metal box using the grounding screw. Proper grounding is crucial, as it protects against electrical faults and ensures that the metal parts of your fixture remain safe to touch.
Taking care during this step not only guarantees a successful installation but also provides peace of mind knowing your new light is securely and safely connected.
Tuck Wires and Secure the Fixture Base
After wiring is complete, carefully tuck the wires into the ceiling box, making sure none are pinched or strained. Align your fixture’s canopy or base with the mounting bracket and secure it using the provided screws or decorative nuts.
Check that everything sits evenly against the ceiling. An uneven fixture can indicate that wires are bunched behind the canopy, loosen slightly, reposition the wires, and re-tighten until snug and level.

Step 4: Final Assembly and Testing Your Work
With the electrical work done, it’s time for the satisfying final touches, assembling your light, adding bulbs, and turning it on for the first time.
Install Your Light Bulbs
Before reattaching any decorative shade or globe, screw in your bulbs to confirm the sockets are properly connected. Check the wattage limits listed on your fixture’s label, exceeding them can create excessive heat and shorten both bulb and fixture lifespan.
For most flush mount lights, LED bulbs are the best choice. They provide bright, efficient illumination while generating minimal heat. If your fixture supports dimmable LEDs, consider pairing them with a compatible dimmer switch for even greater control over ambiance and brightness.
Attach the Shade or Globe
Once your bulbs are in, attach the fixture’s shade or glass cover according to the manufacturer’s instructions. Depending on the design, this might involve small screws, clips, or a twist-lock mechanism.
Handle glass components with care, fingerprints, dust, or smudges can dull the final look. Wipe the inside and outside of the shade with a microfiber cloth before securing it in place.
Turn On the Power and Admire Your Work
Now comes the moment of truth. Return to your breaker panel, switch the power back on, and test your new light fixture. If it illuminates immediately and evenly, congratulations, you’ve successfully installed your new flush mount light. The satisfaction of seeing your work shine, quite literally, makes the effort worthwhile.
If the light doesn’t turn on right away, don’t panic. Start by double-checking that each bulb is securely screwed into its socket. Then verify that the circuit breaker controlling the fixture is fully switched on. If the light still refuses to work, turn the breaker off again and carefully inspect your wire connections to ensure everything is properly secured and matched.
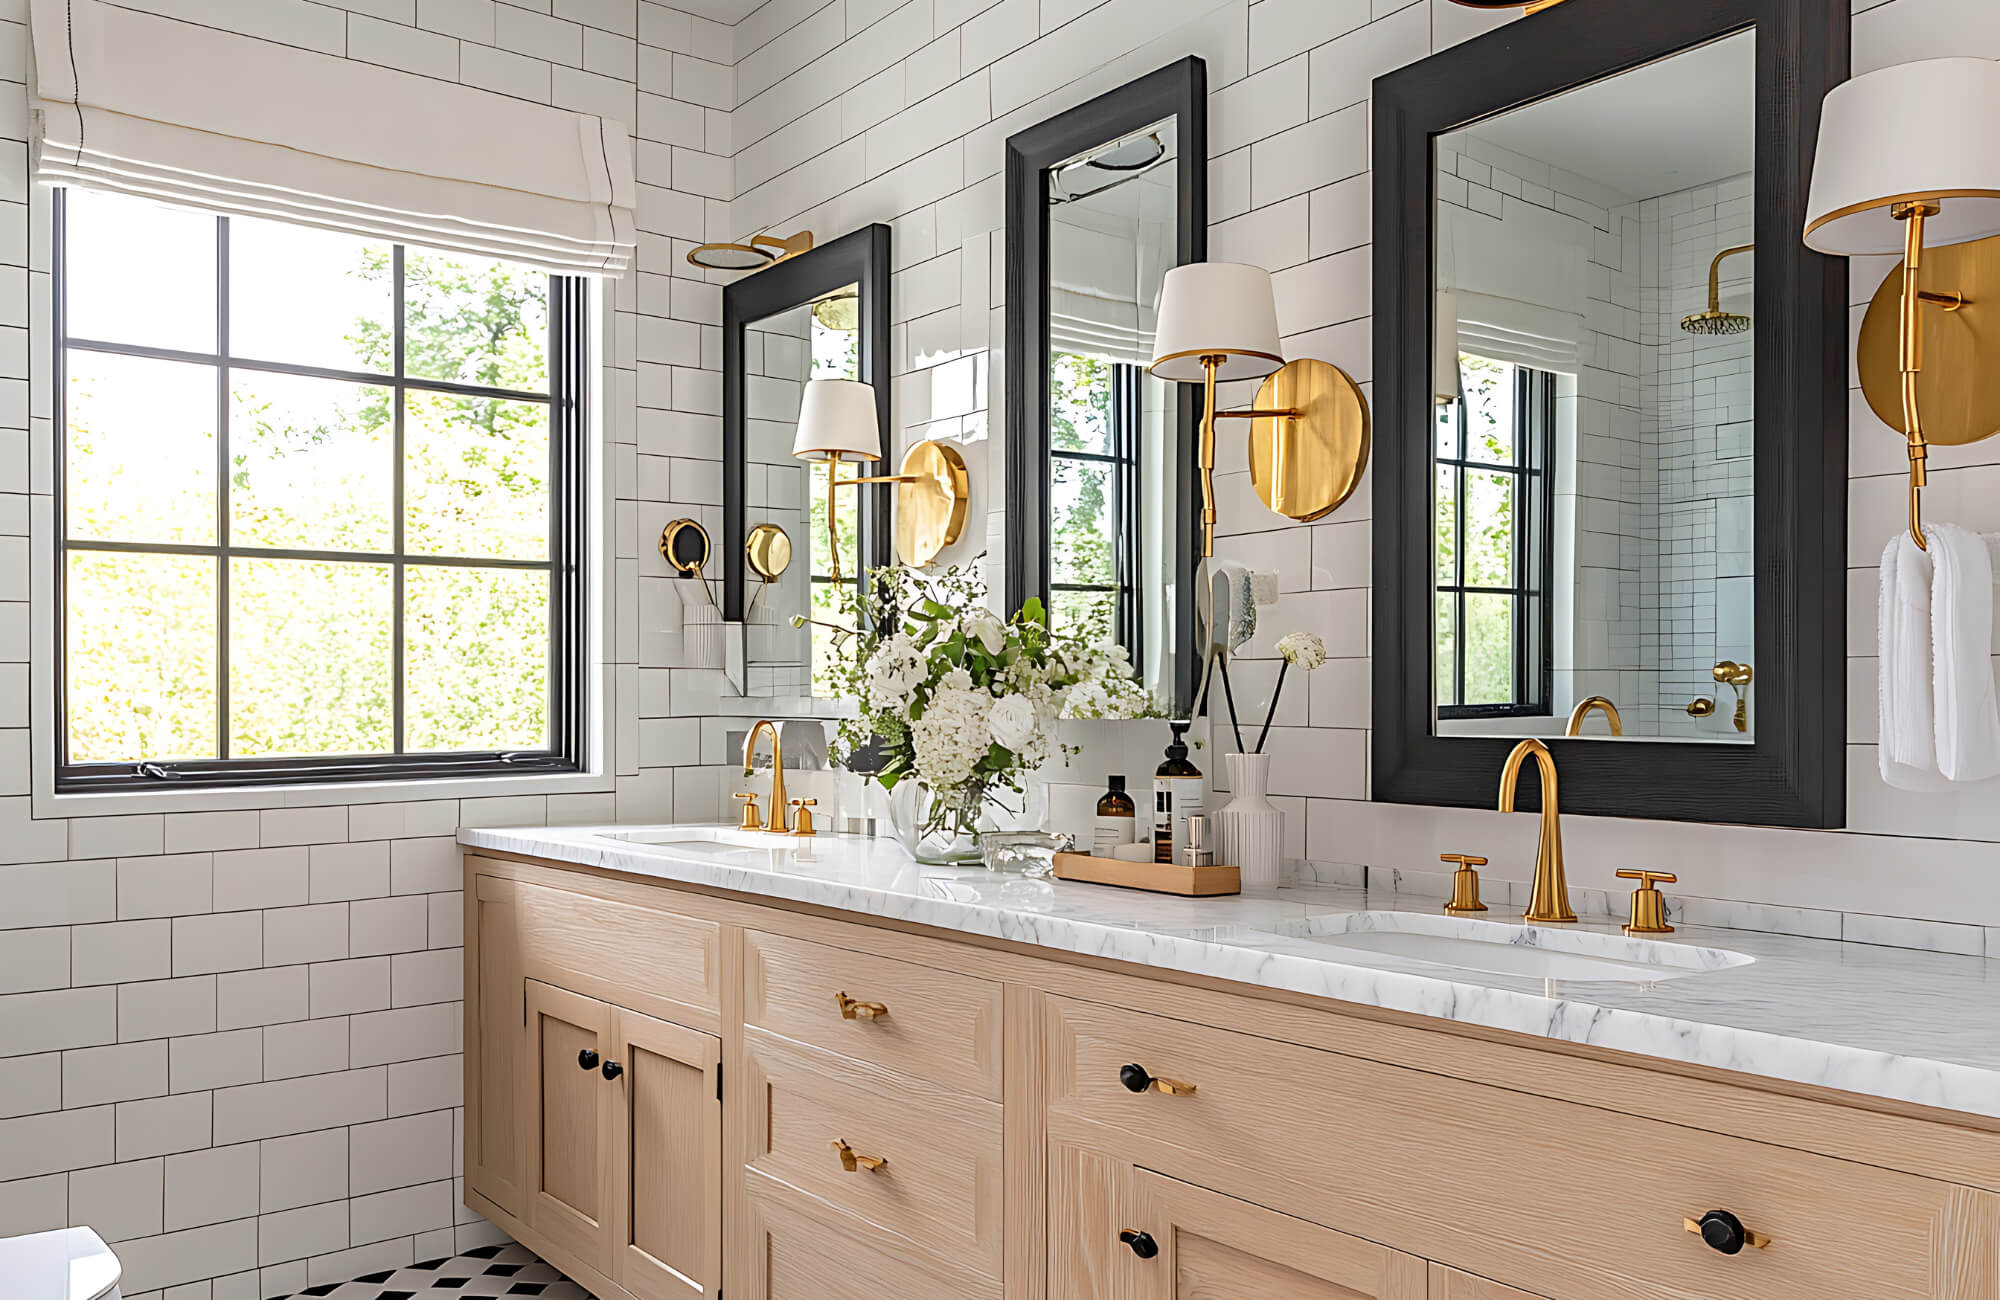
Once your fixture is operating as it should, take a moment to appreciate the transformation. Edward Martin’s Mulligan 17" Flush Mount in Aged Brass, shown in the image above, beautifully demonstrates how a simple lighting upgrade can elevate a room’s elegance and warmth. A new flush mount light can completely refresh your space, brightening hallways, bedrooms, kitchens, or bathrooms with a clean, timeless glow that enhances both functionality and style.
A Simple Upgrade for a Brighter Home
Replacing an old light fixture with a modern flush mount is one of the easiest ways to refresh your home’s interior without major renovation costs. The project takes less than an hour for most homeowners, requires only basic tools, and can dramatically improve both function and style. Beyond aesthetics, upgrading your lighting also enhances safety and energy efficiency.
If you’re unsure which fixture best complements your space, Edward Martin’s design consultation service can help you make confident style choices tailored to your home and preferences. Whether you need personalized recommendations, or guidance on selecting complementary pieces, don’t hesitate to contact Edward Martin for expert support.
With professional insight and hands-on assistance, you can ensure every detail of your lighting upgrade, and your overall design vision, comes together beautifully.