


Designing a subway tile layout for a pantry backsplash requires a careful balance of aesthetics, functionality, and precision, especially when aiming for a design that enhances both style and everyday usability. While the classic offset brick pattern remains a popular choice, modern layouts such as herringbone, vertical stack, and basketweave can elevate the look of a pantry while maintaining durability and easy maintenance.
Beyond layout selection, understanding tile material and finish is key to both performance and longevity of your backsplash. In this guide, we’ll explore the best subway tile patterns for pantry backsplashes, along with expert installation tips and essential design considerations to help you create a space that is both stylish and highly functional.

Exploring Pantry Backsplash Needs
Designing a pantry backsplash involves more than just selecting stylish subway tiles. It requires careful consideration of the space’s size, function, and lighting. By evaluating these factors, you can create a backsplash that not only enhances the pantry’s aesthetic but also improves its practicality and durability.
Assessing Pantry Size and Configuration
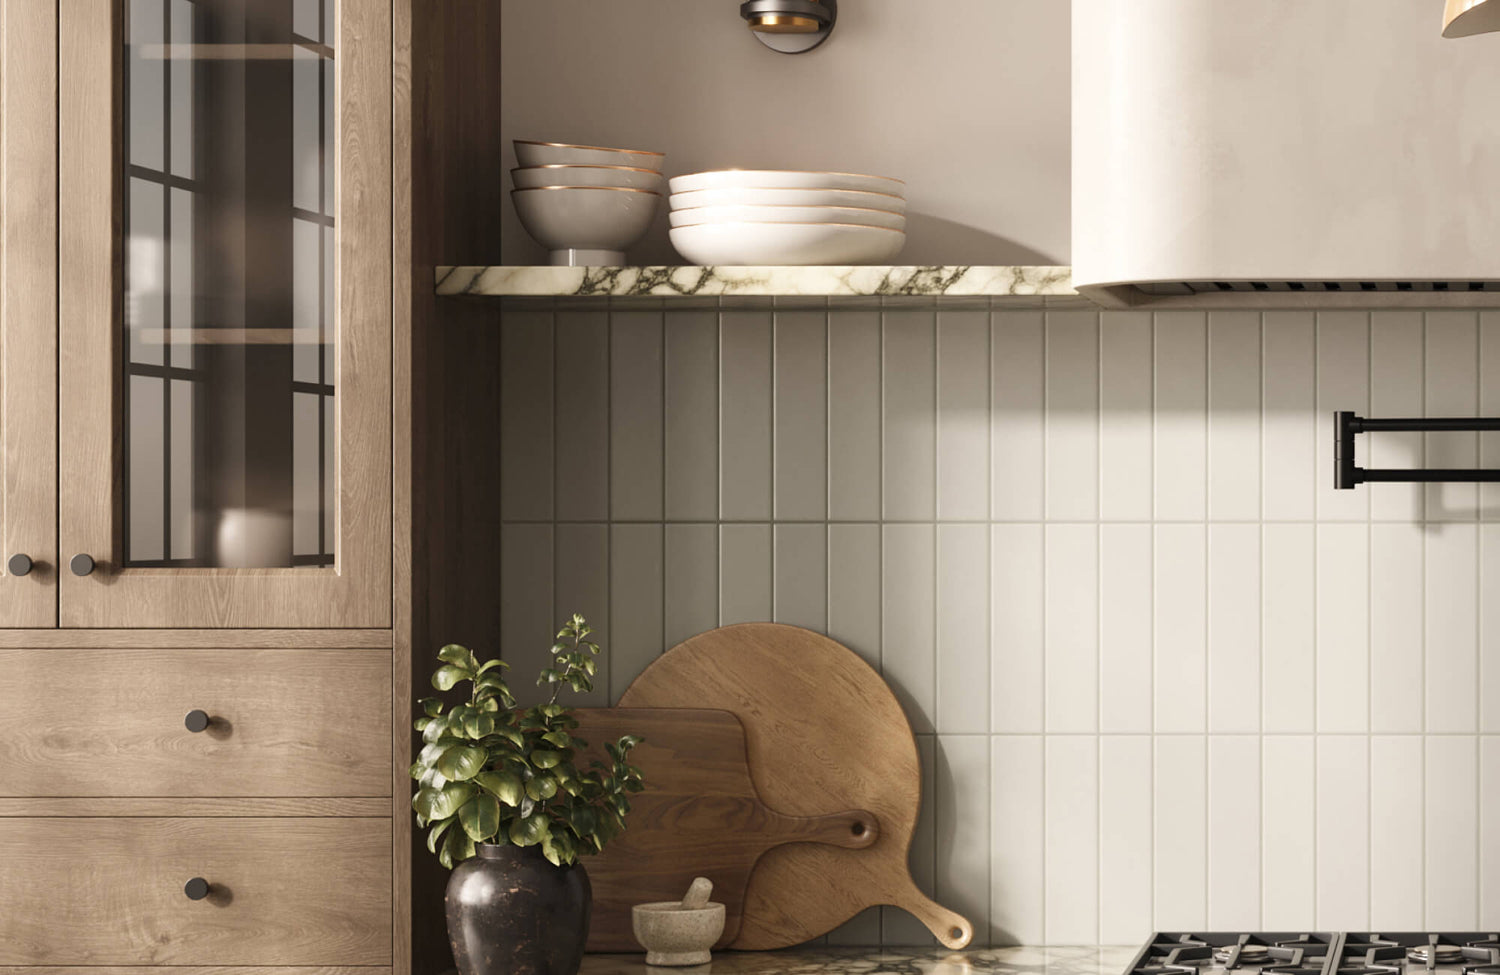
The size and layout of a pantry dictate how a backsplash should be designed for both efficiency and aesthetics. In smaller butler’s pantries, where counter space is often limited, a full-height backsplash extending from the countertop to the upper cabinets can create a visually expansive effect. This continuous tiling approach also minimizes interruptions and gives the space a high-end appearance. Alternatively, for walk-in pantries with open shelving, a half-height backsplash behind countertops or work surfaces offers adequate protection while allowing flexibility in wall design above.
Wall geometry also influences tile layout choices. Straight, unobstructed walls allow for traditional subway tile patterns, while angled or asymmetrical layouts may require custom tile cuts or adjustments to maintain alignment. If the pantry includes multiple workstations, ensuring consistent grout line alignment across different sections can enhance visual cohesion.
Identifying Pantry Usage and Style
A pantry’s backsplash should be designed with daily functionality in mind, considering how the space is used. In prep-heavy pantries where countertops are frequently used for food preparation, a moisture- and stain-resistant backsplash is essential. In pantries that function as beverage stations or coffee nooks, heat-resistant materials should be prioritized, especially behind small appliances like espresso machines or kettles.
From a design perspective, the backsplash should complement the pantry’s overall aesthetic. A traditional or farmhouse-style pantry benefits from handmade look subway tiles with slightly uneven edges for a rustic charm, whereas modern, minimalist designs pair well with stacked layouts or glossy finishes for a streamlined look.
Addressing Lighting and Visibility
Lighting significantly influences both the visual impact and practicality of a pantry backsplash. In well-lit pantries with ample natural light, matte subway tiles help diffuse brightness, reducing glare while maintaining a soft, inviting ambiance. Conversely, in dimly lit or windowless pantries, glossy or reflective tile finishes can amplify available light, making the space feel more open and airy.
Beyond natural lighting, under-cabinet lighting helps in enhancing task visibility in pantry workstations. When paired with a subway tile backsplash, integrated LED strips or puck lights highlight the tile’s texture and pattern, especially in designs like herringbone or beveled subway tiles that create depth and dimension. For pantries where lighting is limited, opting for light-colored tiles, such as white or soft neutrals, ensures better light distribution across the backsplash surface.
Moreover, proper placement of light fixtures relative to the backsplash, prevents unwanted shadows or uneven illumination. A well-lit pantry backsplash not only improves usability but also emphasizes its texture, grout details, and design impact.

Choosing the Right Subway Tile Size and Finish
Selecting the ideal subway tile size and finish for a pantry backsplash helps in both its functionality and visual appeal. Considering how these elements can work together ensures a backsplash that not only complements the pantry’s design but also enhances its durability and ease of maintenance.
Standard vs. Oversized Subway Tiles
The choice between standard and oversized subway tiles directly impacts the pantry’s visual proportions and installation efficiency. Understanding the benefits of each size helps ensure a design that complements both the space and its intended style. A 3”x6” subway tile remains a versatile and enduring choice, adapting to various layout patterns such as brick offset, herringbone, and basketweave designs. This size works well in both small and large pantries, complementing cabinetry, shelving, and other design elements.
For those seeking a sleek, contemporary aesthetic, oversized subway (4”x12”, 3”x8”, 6”x12”) tiles are an excellent alternative. Their larger format reduces visual interruptions, allowing the backsplash to appear more expansive and streamlined. This makes them particularly well-suited for walk-in pantries with open shelving, where their elongated shape helps enhance the sense of depth in the space. For those leaning toward a streamlined, marble-inspired look, elongated formats like Edward Martin’s Julianna 4x12 Glossy Ceramic Tile in Carrara, as shown in the photo above, create a more continuous visual flow while introducing soft veining that adds depth and refinement. Its soft veining and glossy finish create an elegant backdrop that complements neutral cabinetry and warm metallic accents, adding a touch of sophistication to the space.
Glossy, Matte, Polished, Crackled, and Satin Finishes
The finish of subway tiles helps in both aesthetics and functionality, influencing how light interacts with the space and determining maintenance requirements. From high-shine surfaces to subtle textures, understanding the unique characteristics of each finish ensures a pantry backsplash that aligns with both design preferences and practical needs.
Glossy Finish
A glossy subway tile finish reflects significant amounts of light, making it an excellent choice for dark or windowless pantries. This finish enhances brightness, giving the space a more open and airy feel. Additionally, glossy tiles are highly water-resistant and easy to wipe clean, making them ideal for pantries with beverage stations or food prep areas where splashes are common. However, they can also show fingerprints, water spots, and smudges more easily, requiring frequent upkeep.
Matte Finish
For a low-sheen look, matte subway tiles provide a modern yet understated aesthetic. This finish is excellent for contemporary, industrial, or farmhouse-style pantries, as it creates a more subtle, muted effect compared to glossy tiles. Matte surfaces also do not reflect light as strongly, making them well-suited for well-lit pantries where glare may be an issue. Additionally, they are less prone to showing fingerprints or smudges, making them a low-maintenance option. However, due to their more porous nature, matte tiles may require slightly more effort to clean in busy areas.
Polished Finish
A polished subway tile finish provides a glossy, mirror-like appearance, similar to glossy tiles but with an even smoother, more reflective surface. This finish enhances color vibrancy, particularly in bold hues like navy, emerald green, or black, making it an excellent choice for luxurious or contemporary pantry designs. Like glossy tiles, polished finishes are also moisture-resistant and easy to clean but require frequent wiping to prevent visible smudges or streaks. Due to their high reflectivity, they work best in pantries with controlled lighting to avoid excessive glare.
Crackled Finish
For a unique, vintage appeal, crackled-glaze subway tiles introduce an artisanal, handcrafted look with a fine web-like texture. These tiles are particularly well-suited for traditional, farmhouse, or cottage-style pantries where character and texture are considered. However, because the crackled glaze contains microscopic fissures, they must be sealed before installation to prevent moisture penetration. While this finish adds a distinct aged elegance, it does require periodic resealing to maintain long-term durability.
Satin Finish
A satin subway tile finish strikes a balance between glossy and matte, offering a soft glow without excessive shine. This finish is versatile and works well in both classic and modern pantry designs, providing some reflectivity without the maintenance concerns of glossy or polished surfaces. Satin tiles are also easier to clean than matte finishes, making them a practical choice for busy pantries.

Classic Subway Tile Layout Patterns
The layout of subway tiles can dramatically impact the look and feel of a pantry backsplash, influencing everything from perceived space to design style. Whether you prefer a classic brick pattern, or a more intricate herringbone design, understanding these layouts will help you create a backsplash that balances appeal and functionality.
Horizontal Straight Lay Pattern
The horizontal straight lay pattern is one of the simplest and modern subway tile arrangements, making it an excellent choice for contemporary and minimalist pantry designs. In this layout, subway tiles are aligned in perfect rows and columns, maintaining uniform grout lines that create a structured and grid-like appearance.
Another advantage of this pattern is its ease of installation, making it one of the most DIY-friendly subway tile layouts. Because tiles are stacked in a straightforward manner, this design minimizes tile cuts and grout line misalignment, reducing installation complexity. However, since the tiles are placed directly on top of one another, any wall imperfections or uneven surfaces can become more noticeable.
Offset or Brick Pattern
The offset brick pattern, often referred to as the traditional subway tile layout, is one of the most iconic and widely used arrangements. Recognized for its everlasting style and adaptability, this layout features each row of tiles staggered by half the width of the tile below it, closely resembling classic brickwork.
One of the standout advantages of this pattern is its ability to introduce subtle movement through its staggered grout lines, preventing the backsplash from looking overly rigid or uniform. Additionally, its design is highly forgiving when it comes to wall imperfections, as the offset arrangement naturally disguises minor uneven surfaces. This makes it an excellent choice for older homes or spaces where perfectly level walls may not be guaranteed.
Beyond its visual and structural benefits, the offset layout also enhances installation efficiency. By minimizing awkward tile cuts, this pattern is cost-effective and straightforward to execute, making it a practical option for both DIY projects and professional installations.
To give this classic layout a more modern edge, elongated options like Edward Martin’s Jaden 2.5x16 Glossy Ceramic Tile in Ink introduce added depth and contrast, elevating the traditional brick pattern with a bold, contemporary presence. The elongated 2.5x16 tile size, paired with its deep black color and glossy finish, adds depth and timeworn grandeur, making it ideal for creating a dramatic statement in a pantry backsplash.
Herringbone
For those seeking a more dynamic or visually intricate design, the herringbone layout consists of subway tiles arranged in a 45-degree or 90-degree zigzag pattern, creating a striking geometric effect. This layout works particularly well for accent walls or pantries that need a bold focal point, as its angled arrangement draws the eye upward or diagonally, enhancing spatial depth. It is especially beneficial in pantries with high ceilings, where its directional movement amplifies vertical space. Additionally, the choice of grout color further refines the look. For a more eye-catching aesthetic, contrasting grout enhances the pattern’s sharp, intricate details. Conversely, matching grout creates a seamless, elegant finish that blends well into the design.
For a more refined interpretation, mosaic formats such as our Chantel 12x15 Matte Porcelain Herringbone Mosaic Tile in Imperial, as displayed in the photo above, simplify installation while delivering a layered, stone-inspired look with added texture and dimension. Featuring a matte finish, this porcelain mosaic tile introduces an organic aesthetic, making it ideal for both modern and rustic-inspired spaces. Its gray tones and subtle veining mimic the look of natural stone, providing an enduring appeal while ensuring durability and easy maintenance.
Vertical Stacked
In contrast, the vertical stacked layout takes a more structured and modern approach by arranging subway tiles in aligned vertical columns. This height-enhancing pattern works exceptionally well in compact or low-ceilinged pantries, as the vertical orientation elongates the walls and makes the space feel taller and more open. It also pairs well with sleek cabinetry and open shelving, reinforcing a clean aesthetic that complements modern kitchen designs.
While the vertical stacked layout is easier to install than herringbone, it still requires meticulous attention to grout line alignment, as any uneven spacing becomes immediately noticeable. To maintain visual balance and proportion, this layout is best executed with large format subway tiles, such as 3”x12” or 4”x12”, as smaller tiles may result in excessive grout lines that could overwhelm the design.
Diagonal Subway Tile Pattern
For a more visually dynamic and distinctive approach, the diagonal subway tile pattern transforms traditional subway tiles into a 45-degree diamond arrangement. This pattern is often used to break up long, narrow walls, creating a more expansive feel in small spaces. By tilting the standard brick pattern, this layout introduces movement and depth, making it particularly effective in pantries with limited wall space. It can also serve as a subtle decorative touch without being as intricate as herringbone or crosshatch designs.
However, while the diagonal layout offers aesthetic benefits, it also comes with technical considerations. Because tiles must be precisely cut along the edges, this pattern results in higher material waste and longer installation times. To achieve a professional finish, careful pre-planning and measurement are critical, particularly when aligning tiles against adjacent surfaces, corners, and cabinetry. Proper execution also ensures that the diagonal pattern remains balanced and visually cohesive throughout the space.
Crosshatch or Basketweave Pattern
The crosshatch or basketweave pattern is a more intricate subway tile layout, incorporating pairs of horizontal and vertical tiles to mimic the look of woven fabric. This layout introduces a layered, textural element, making it an eye-catching choice for feature walls or backsplashes in larger pantries. While this layout works well in both traditional and transitional designs, it pairs especially well with contrasting grout to emphasize the woven effect.
However, because the basketweave pattern involves alternating tile orientations, achieving perfect alignment is very important. The precise spacing and symmetry required make it more challenging than standard layouts, requiring expert craftsmanship for best results.
To simplify your tile selection and planning process, Edward Martin’s Augmented Reality (AR) Visualization Tool allows you to preview your chosen subway tile in real time before committing to a final decision. This interactive feature eliminates guesswork by providing an accurate representation of scale, color, and alignment. With this tool, achieving a precisely executed, well-balanced subway tile backsplash has never been easier.

Integrating Design Elements and Practical Considerations
Designing a subway tile backsplash goes beyond just selecting the right tiles, it’s about incorporating decorative details, and functional storage, to create a space that is both stylish and efficient. By integrating these, you can enhance both the beauty and everyday usability of your pantry backsplash.
Incorporating Decorative Accents and Borders
Adding decorative accents and borders is an effective way to personalize a subway tile backsplash while introducing depth and visual contrast. These elements can range from contrasting tile insets and patterned tile strips to metallic liners and custom mosaic inserts, all of which enhance the design without overwhelming the space.
One of the most popular ways to integrate decorative accents is by incorporating a contrasting row of patterned or textured tiles. This technique creates a subtle focal point and can define different sections of the pantry, such as a beverage station or prep area. Glass, natural stone, or metal trim pieces can also be used to add a refined touch, framing subway tiles for a polished, high-end finish.
Additionally, border tiles can introduce structure and definition to the backsplash, particularly when using a single tile color throughout the space. A coordinating or contrasting border at the top or bottom of the backsplash can help delineate sections and add architectural interest. However, when selecting decorative accents, it’s also important to maintain a balanced approach, ensuring that additional elements complement rather than overpower each other.
Adding Shelving and Storage Solutions
A pantry backsplash can serve as both a functional backdrop and a support structure for integrated shelving and storage solutions. Thoughtfully designed storage elements maximize efficiency while enhancing the visual composition of the space.
One effective strategy is to incorporate floating shelves above the subway tile backsplash, creating accessible storage for frequently used items like spice jars, glassware, or decorative canisters. These shelves not only add practicality but also contribute to a layered design aesthetic, breaking up the expanse of tile with warmth and texture. For a cohesive look, shelving materials should be chosen carefully. Wooden shelves are a good example for adding warmth and contrast, while metal or glass shelves are ideal for maintaining a contemporary feel.
In addition to floating shelves, wall-mounted racks, hooks, and under-shelf storage can further optimize the backsplash area. Installing stainless steel rails with hanging baskets or utensil hooks can provide easy access to cooking tools and ingredients, making the space more efficient without compromising design. When planning these elements, it’s important to ensure that the shelving and hardware coordinate with the grout lines and tile placement, maintaining an intentional look.
For those seeking professional design guidance, Edward Martin’s design consultation service streamlines the tile selection and storage integration process. With options ranging from free expert recommendations to fully customized mood boards and 3D room visuals, this service ensures that every design choice is curated for optimal style and functionality.

Choosing Subway Tile Styles to Complement Home Design
Having the right subway tile style is key to creating a cohesive and visually appealing pantry backsplash that complements your home's design. Whether you're drawn to the elegance of marble look tiles or the organic texture of stone look tiles, these options provide both charm and practicality, ensuring your backsplash enhances the overall space seamlessly.
Marble Look Subway Tiles
Marble look subway tiles combine the sophistication of natural marble with the practical benefits of ceramic or porcelain tiles. Designed to replicate the intricate veining and soft color variations found in Carrara, Calacatta, and Statuario marbles, these tiles offer a luxurious aesthetic without the high maintenance of real stone.
With their versatile design potential, marble look subway tiles bring an elevated look to a pantry backsplash, making them ideal for homes with classic, transitional, or contemporary interiors. Depending on the marble variation and veining intensity, these tiles can complement a range of design styles.
| Classic Kitchens | Modern Interiors | Grandiose Settings |
| Enhances refined elegance by complementing detailed cabinetry, crown molding, and neutral color palettes. | Creates bold visual contrast, especially when paired with dark cabinetry and striking hardware, adding depth and contemporary charm. | Elevates the ambiance with a high-end aesthetic, particularly when accented by gold or brass fixtures, enhancing opulence and grandeur. |
For example, Edward Martin’s Aniston 3x12 Polished Porcelain Tile in Carrara Bianco beautifully exemplifies how marble look subway tiles can enhance a pantry backsplash. As shown in the photo above, featuring delicate veining on a crisp white background, this polished porcelain tile brings an airy aesthetic, perfect for creating a bright, open feel in small or enclosed pantries. The elongated 3x12 format further adds a modern touch, making it a stunning choice for both vertical and horizontal installations while minimizing grout lines for a sleek appearance.
Stone Look Subway Tiles
For those who prefer a more rustic, earthy, or industrial aesthetic, stone look subway tiles offer the perfect blend of natural texture and durability. These tiles replicate the organic grain, depth, and raw beauty of materials like limestone, slate, travertine, and sandstone, bringing character and warmth to a pantry backsplash.
Among the many options available, limestone look subway tiles offer a soft, neutral palette with subtle movement, making them a perfect fit for transitional and rustic kitchens. For a bolder statement, slate inspired tiles, available in black, deep gray, and earthy brown tones, also bring a naturally varied texture that enhances industrial style interiors.
Meanwhile, travertine look tiles, with their warm beige and taupe undertones, complement Tuscan, Mediterranean, or farmhouse settings, reinforcing an inviting, old-world charm. For those who prefer a more refined organic touch, sandstone look subway tiles feature soft, linear patterns that blend well into modern and earthy design themes, offering both visual interest and a grounded, natural appeal.
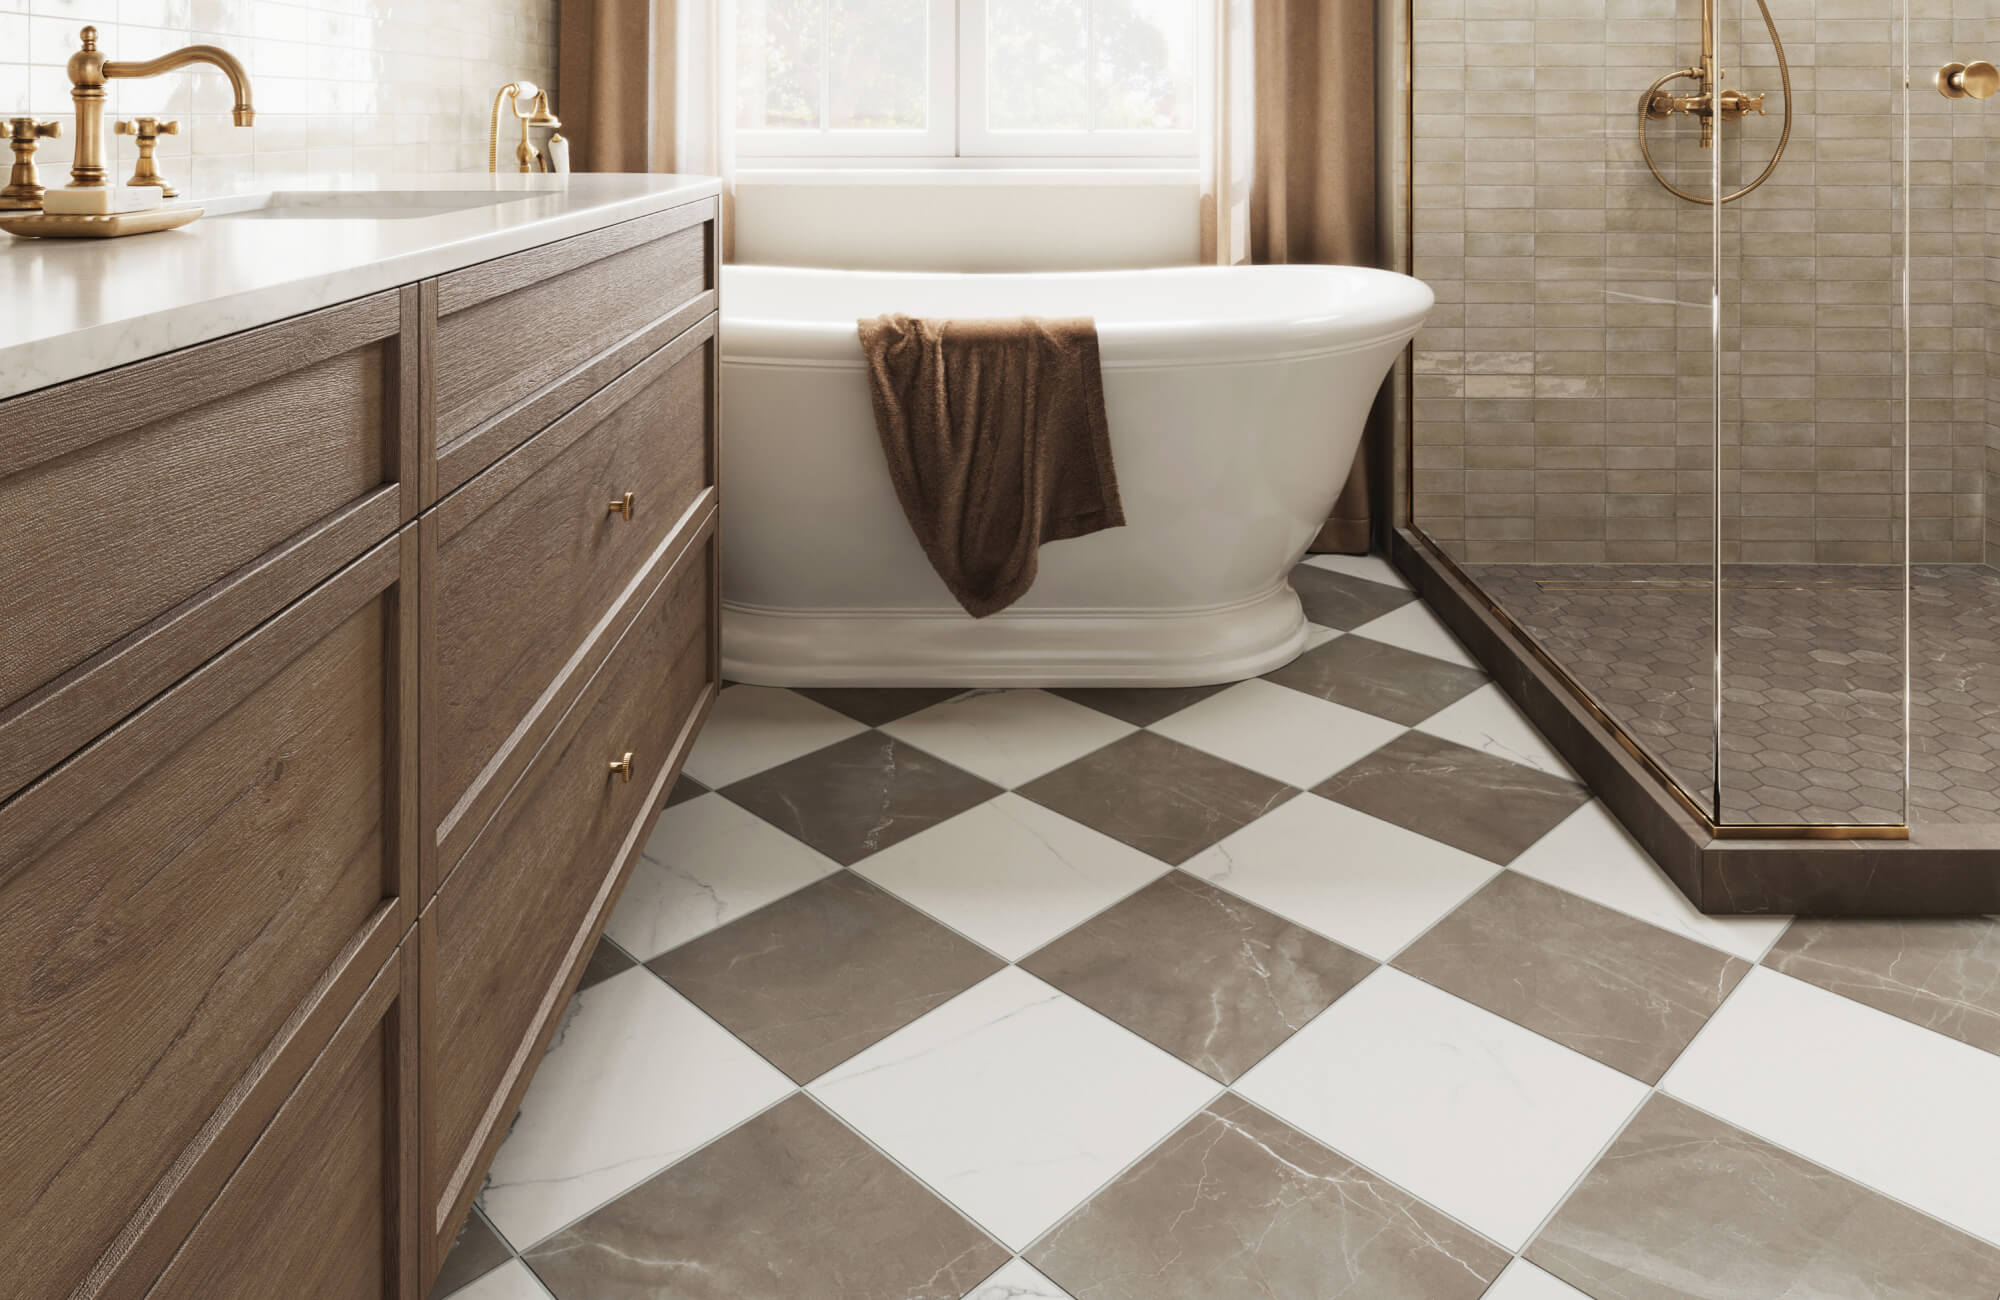
When narrowing down your design, it also helps to match layouts with pantry types. Vertical stacked patterns work well in compact spaces by drawing the eye upward, while horizontal or offset layouts suit wider walls by maintaining balance. For statement backsplashes, more intricate patterns like herringbone or basketweave introduce visual depth and create a striking focal point.
Achieving a Thoughtfully Designed Pantry Backsplash with Subway Tiles
Designing a subway tile layout for a pantry backsplash requires a thoughtful balance of aesthetics, functionality, and precision, where every detail from layout to finish contributes to the overall result. Taking into account the specific demands of a pantry, such as space limitations, lighting conditions, and usage patterns, ensures that the backsplash enhances both the home’s design and everyday practicality. By incorporating industry best practices and making informed design choices, you can achieve an enduring and well-integrated backsplash. For expert insights on tile selection, and layout planning, consult with Edward Martin to create a professionally executed, high-quality finish that elevates your pantry space.