


Mixing two different tile styles in one shower can transform a simple bathroom into a dynamic, design-forward space. But when done haphazardly, it can just as easily feel chaotic or visually heavy. The key lies in understanding the principles of balance, cohesion, and intentional contrast. By curating your tile choices with purpose, you can achieve a space that feels layered, elegant, and distinctly personal.
This guide breaks down how to confidently combine two different tile styles in one shower, from establishing a visual hierarchy to defining clean transitions. Let’s explore how professional designers create cohesive pairings that elevate any bathroom from basic to beautifully composed.

Establish a Clear Visual Hierarchy
Before diving into color or texture, start by setting the visual foundation of your shower design. Establishing a clear hierarchy between your tiles ensures that one leads the eye while the other provides balance. This step gives your space direction and helps every design choice that follows feel purposeful.
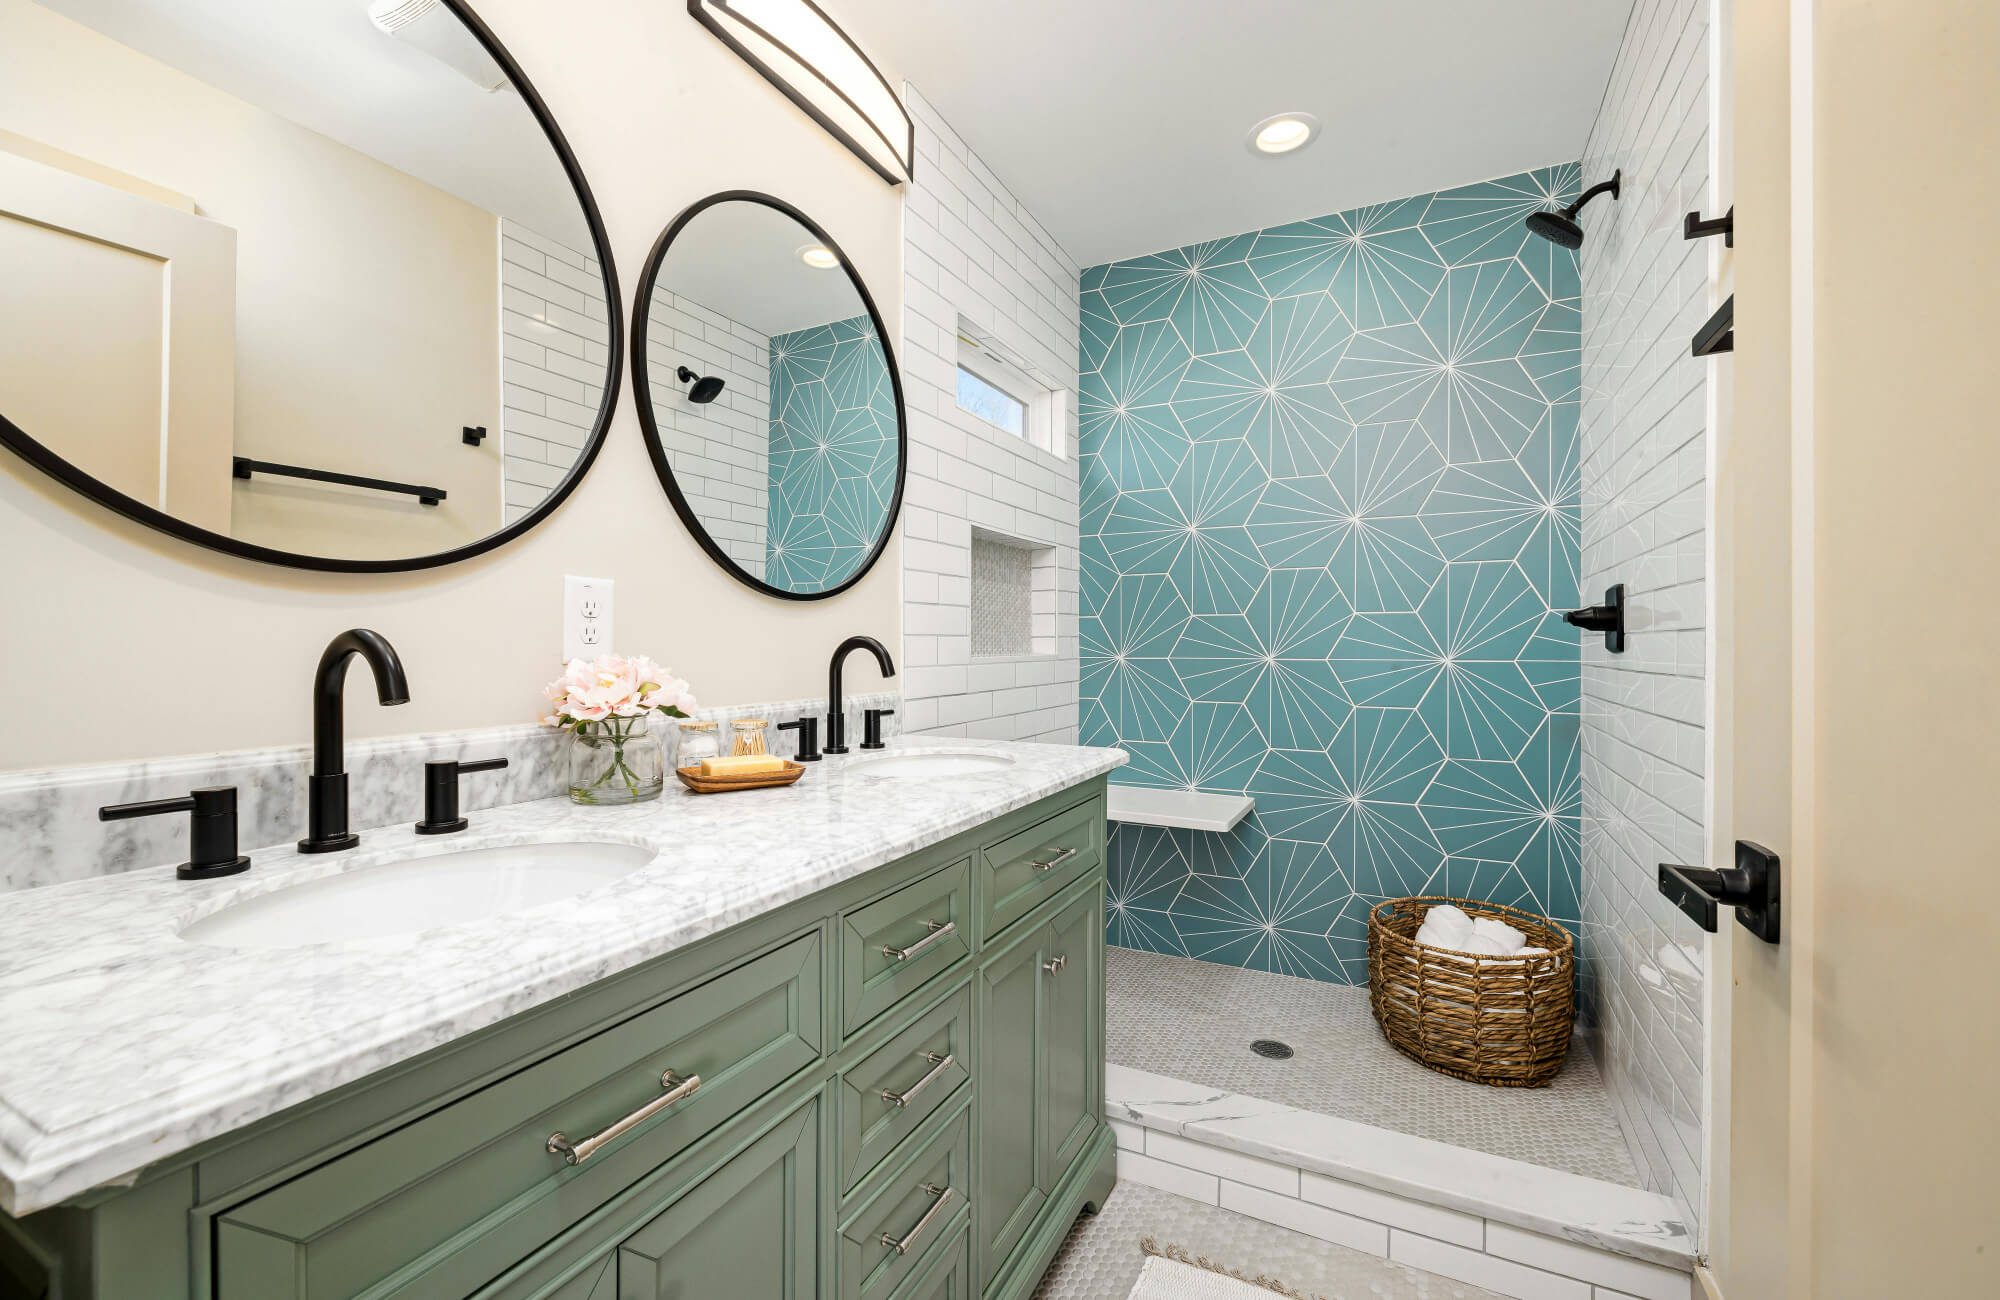
Choose Your Main Tile (The Star)
Your main tile sets the tone for the entire shower. It covers the largest surface area, typically the walls or the floor, and should embody the overall aesthetic you’re aiming for.
In the image above, Edward Martin’s Maisie 4x4 Glossy Ceramic Tile in Pistachio defines the shower’s look with its soft green hue and reflective surface, creating a serene and refreshing atmosphere.
Designers often use the main tile as a calm backdrop, allowing architectural elements like the niche or accent wall to stand out. The main tile’s finish, scale, and tone should support longevity, something you’ll love for years, not just this season’s trend.
Select Your Accent Tile (The Supporting Act)
Once your main tile is established, the accent tile plays a complementary role. This is where you can introduce character, pattern, or texture without overwhelming the space. Accent tiles are ideal for niches, shower floors, or a single feature wall.
For example, if your main tile is a smooth, matte porcelain in warm gray, consider a handmade-look ceramic or glass mosaic for the accent. The shift in materiality and finish adds depth and tactile variation while maintaining visual cohesion.
When selecting your accent tile, think about emotional balance. If your primary tile feels sleek and modern, choose an accent that adds warmth or organic texture. If your main tile is bold and veined, let the accent tile stay understated and subtle.
Avoid the 50/50 Visual Split
The most common mistake homeowners make when mixing tiles is dividing the surfaces equally, half one tile, half another. This creates a disjointed look that feels indecisive rather than intentional.
Instead, aim for a dominant-to-accent ratio. A 70/30 split often works best, giving your primary tile clear dominance while still allowing the accent to make a statement. Think of the accent as a highlight, not an equal partner. This approach ensures the shower feels balanced and composed, not busy or cluttered.

Create Cohesion Through a Unified Color Palette
Once you’ve defined which tile takes the lead, it’s time to make sure both tiles speak the same visual language. A unified color palette ties your design together, keeping mixed styles from feeling chaotic. Think of color as the thread that seamlessly connects your chosen tiles into one harmonious story.
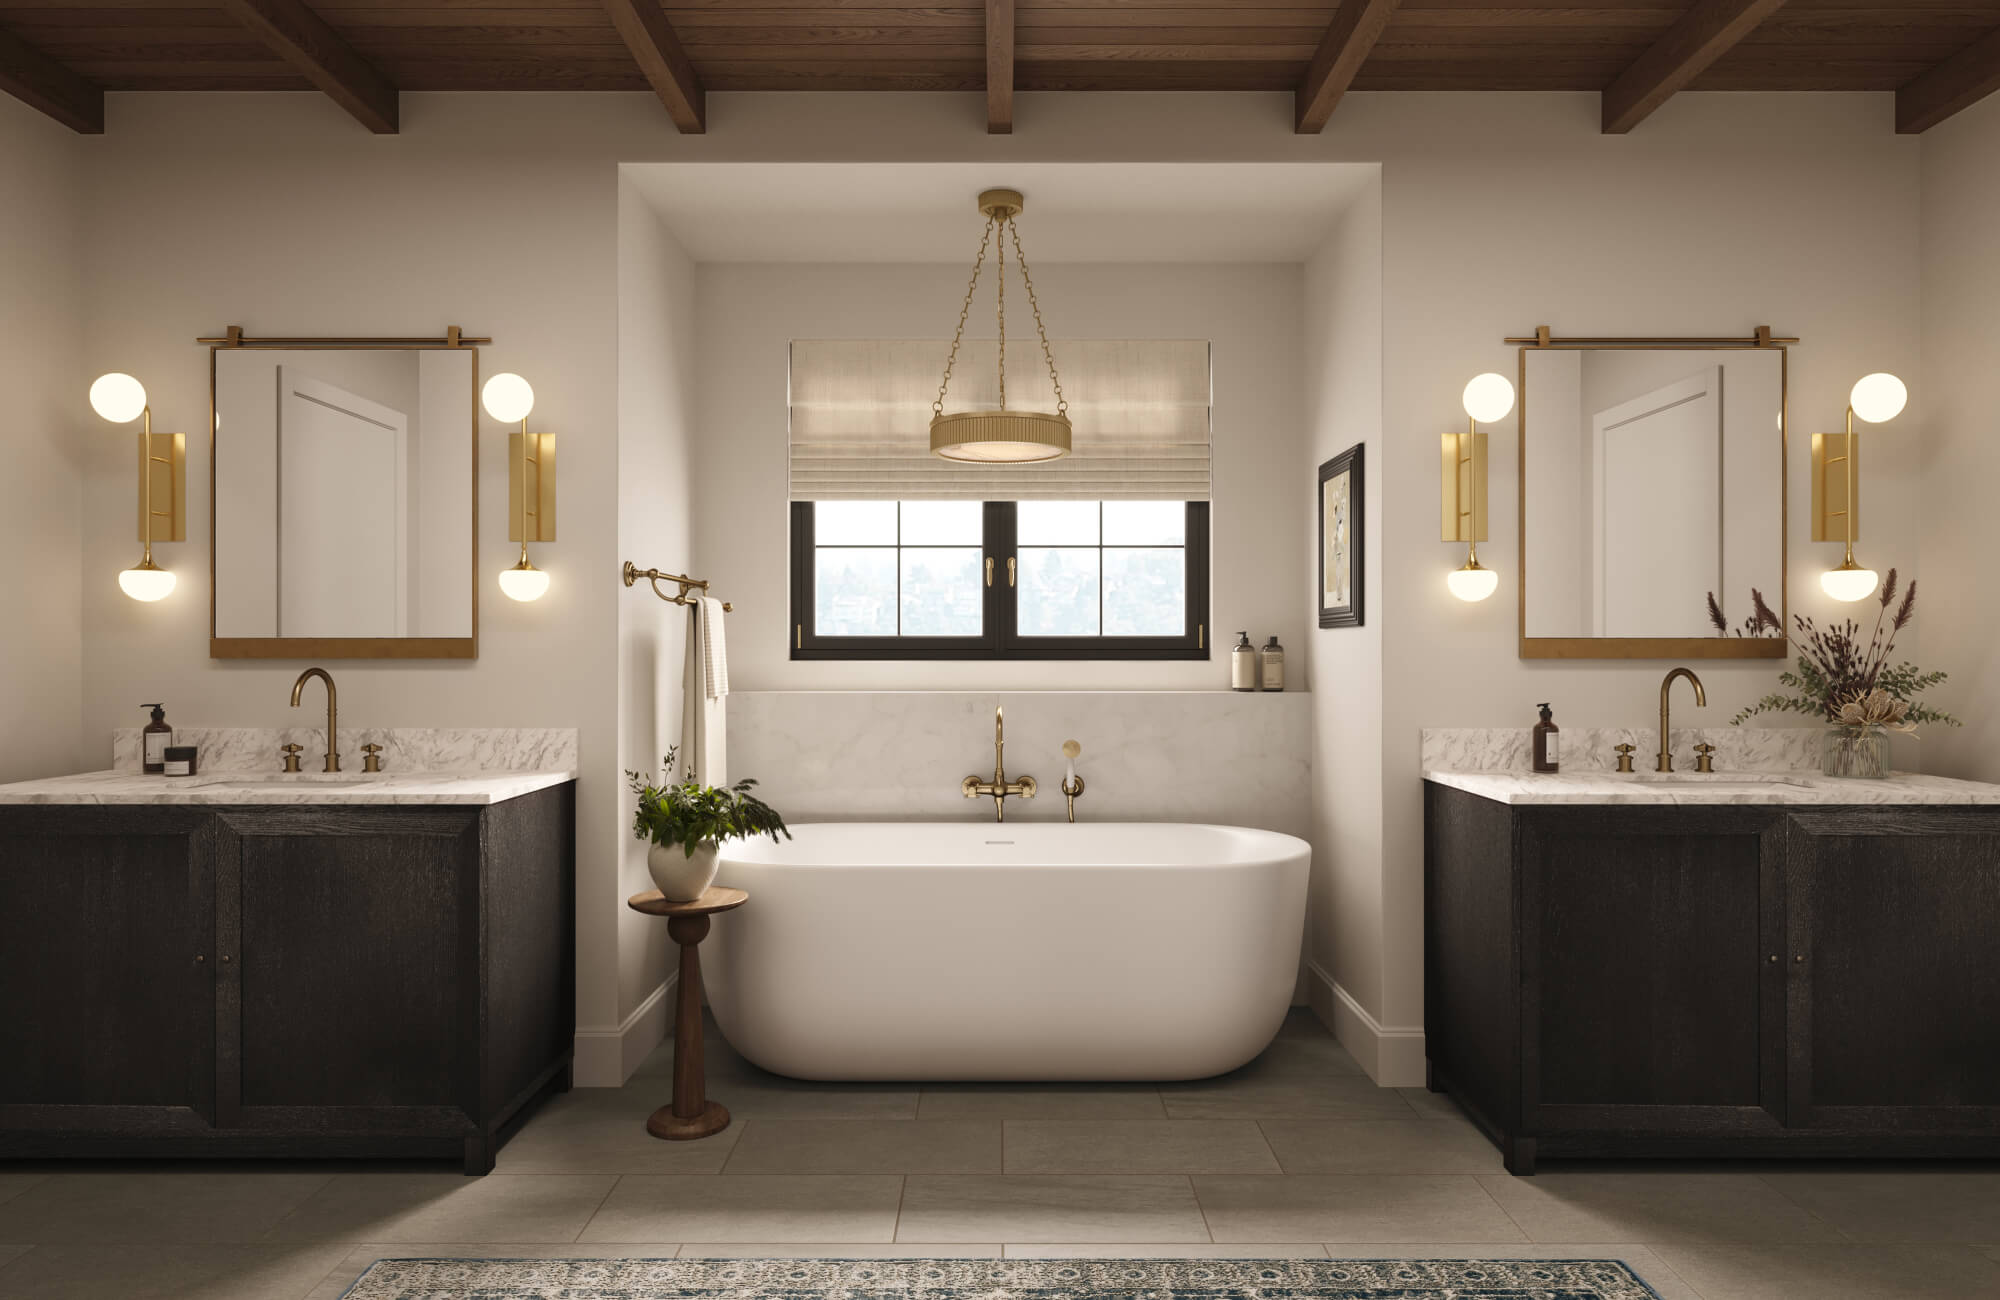
Use One Unifying Base Color
Start by identifying a shared base tone, whether it’s a warm beige, a cool gray, or a creamy white. This base acts as your visual anchor. Both tiles should share this underlying hue, even if one is solid and the other patterned.
As shown in the image above, Edward Martin’s Juliet 2.5x10 Matte Porcelain Tile in Rust brings a cohesive warmth through its earthy tone, unifying the space while allowing natural light and brass fixtures to glow. This connection helps the eye move seamlessly across surfaces, creating continuity instead of contrast overload.
Pair a Complex Pattern with a Simple Solid
If one of your tiles has a strong pattern, like a marble vein, geometric print, or intricate mosaic, the other tile should play a quieter role. This push-and-pull dynamic allows the patterned tile to shine without competition.
A matte white subway tile, for example, pairs beautifully with a bold marble-look porcelain. Similarly, a simple limestone-look tile can ground a playful Moroccan-inspired accent. The contrast in visual “noise” between the two tiles keeps the design readable and sophisticated.
Use Tonal Shades of the Same Color
Another refined strategy is to use two tiles in varying shades of the same color family. This tonal layering adds dimension without introducing chaos. Think of pairing a light gray wall tile with a charcoal floor, or combining creamy white walls with a sand-colored mosaic niche.
This approach is ideal for homeowners who want subtle variation and depth but prefer a minimalist palette. The result is a space that feels cohesive yet dynamic, proof that two tiles can coexist beautifully without stark contrast.

Balance Scale and Shape Intentionally
With color harmony in place, the next layer of design is proportion. The relationship between tile size and shape can make or break the overall balance of your shower. By playing with scale and orientation intentionally, you create rhythm and flow that feel artful, not accidental.
The Classic “Large with Small” Combination
Pairing large-format tiles with smaller ones is a timeless designer trick. The contrast in scale immediately adds visual interest and sophistication. For example, pairing a 12x24-inch porcelain wall tile with a small hexagon or penny tile floor offers balance without visual tension.
Seen in the image above, Edward Martin’s Brody 2x2 Matte Porcelain Mosaic Tile in Sienna adds texture and balance underfoot, complementing the sleek marble-look walls and bronze framing with refined contrast.
Why Two Large or Two Small Patterns Clash
Using two large-format tiles or two small-scale mosaics in one shower often leads to competition. Both demand attention, making the space feel crowded or monotonous.
If both tiles are similar in scale, they should differ significantly in tone or texture to maintain contrast. But as a rule, contrast in scale is the most effective way to ensure each tile style enhances rather than overwhelms the other.
Creating Interest by Varying Tile Orientation
Beyond scale, orientation can be another design lever. Consider laying the same or similar tiles in different directions, like vertical subway tiles on one wall and horizontal on another, to subtly define zones or draw the eye upward.
In a smaller shower, vertical orientation elongates walls, creating a sense of height. Horizontal layouts, on the other hand, visually widen the space. When used thoughtfully, directional variation can create architectural rhythm without needing to introduce a third material.

Use Material and Finish as a Subtle Pairing Tool
After nailing the right proportions, it’s time to explore texture and finish, those quiet design details that bring dimension to your space. Mixing materials like glossy ceramics with matte stone looks adds tactile contrast that feels sophisticated yet cohesive. This layer gives your shower depth and visual interest without overwhelming the senses.
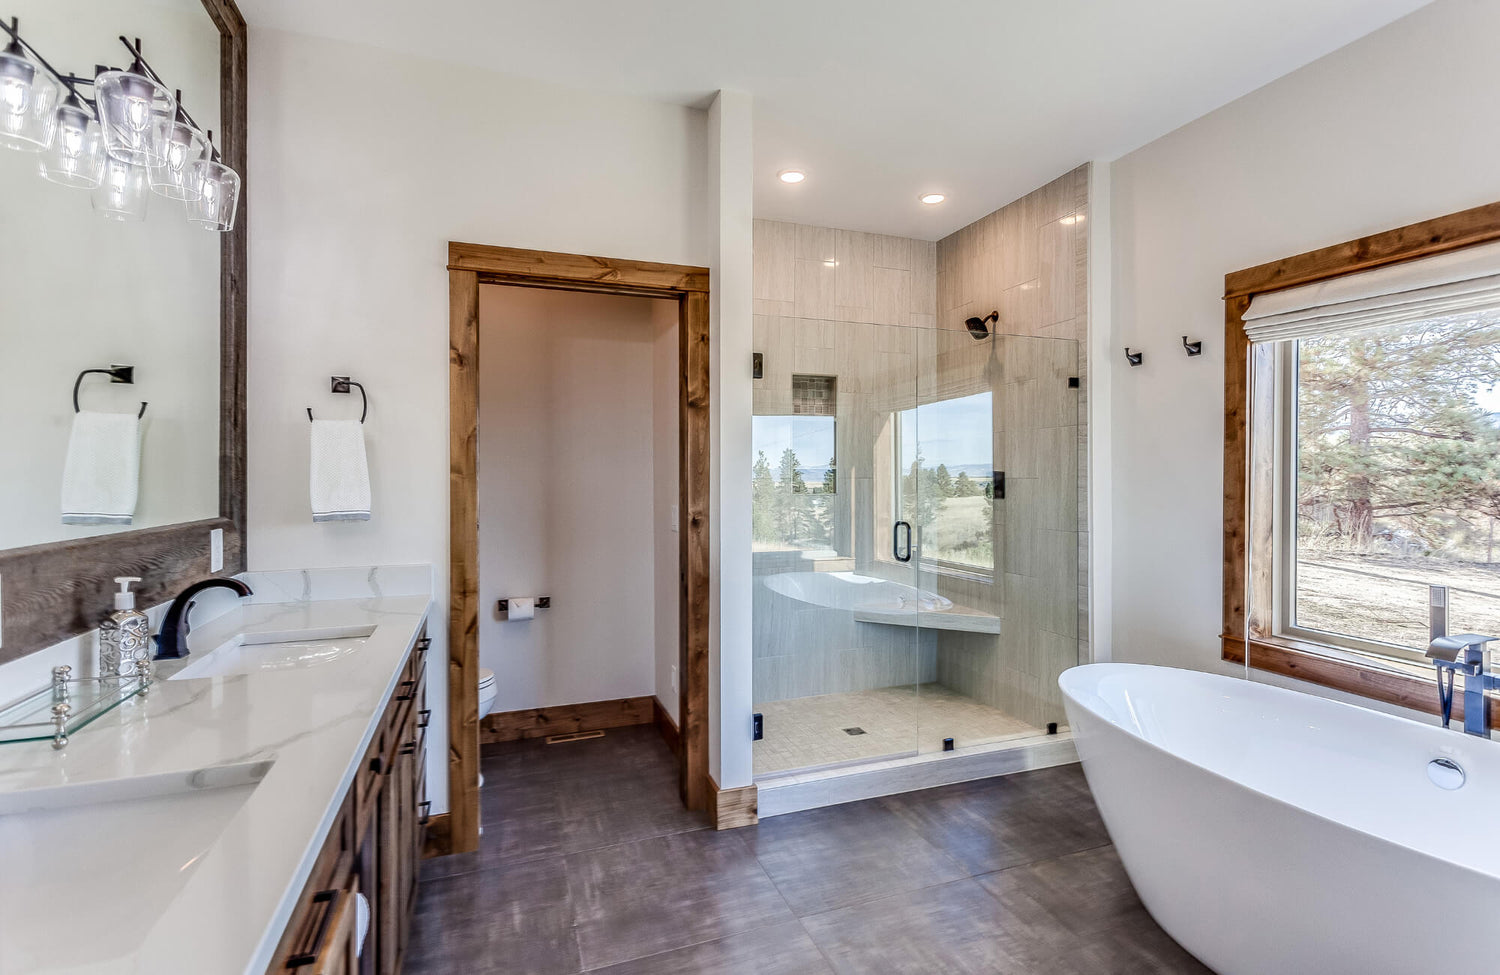
Combining a Glossy Wall with a Matte Floor
Glossy wall tiles reflect light, brightening the shower and creating an airy feel. Pair them with a matte floor tile to anchor the space and add slip resistance. The contrast feels deliberate, providing both visual and practical balance.
As illustrated in the image above, Edward Martin’s Cleo 2x6 Glossy Ceramic Tile in Bone enhances the walls with a luminous finish, beautifully offset by a matte porcelain floor that adds both depth and function. The reflected light bounces around the shower, giving a sense of openness, while the matte finish ensures safety and durability underfoot.
Mixing Natural Stone with Porcelain or Ceramic
If you love the timeless beauty of natural stone but want a lower-maintenance solution, mix materials. Use marble, travertine, or limestone as a feature accent, and balance it with durable porcelain or ceramic for the rest of the surfaces.
This pairing works especially well when you want the authenticity of stone’s organic veining without committing to sealing and upkeep in every area. Keep the undertones consistent, warm stones with warm porcelains, cool with cool, to ensure cohesion.
Pairing Zellige or Handmade-Look Tile
Handmade or handmade-look tiles like zellige bring a tactile, artisanal charm to showers. Their subtle irregularities in glaze and surface texture add depth and authenticity. Because these tiles naturally draw attention, pair them with a smooth, understated companion tile.
For instance, use zellige on the main shower wall and balance it with a large-format porcelain floor in a complementary tone. The result feels curated and elevated, old-world craftsmanship meeting modern design sensibility.

Define Clear Transitions and Stopping Points
Once your materials are in perfect harmony, the final step is giving them structure. Clean transitions between tiles make your design feel intentional and well-edited, rather than busy or abrupt. Knowing where one tile should end and another should begin is what turns a good mix into a polished, professional finish.
The Shower Niche as a Contained Accent
A niche offers the perfect opportunity to introduce a second tile in a contained, controlled way. Lining the niche with an accent tile creates a visual focal point while maintaining cohesion. It’s a subtle touch that can echo your floor tile or bring in texture without overwhelming the design.
To keep it refined, frame the niche with trim pieces or use a grout color that complements both tile styles. This small detail goes a long way in ensuring your mix looks designer-approved.
Creating a Single Feature Wall
If you want to go bolder, dedicate one full wall to your accent tile. This could be the back wall of the shower or the wall behind the showerhead, somewhere naturally visible when you enter the space.
In the image above, Edward Martin’s Sarina 3x12 Glossy Ceramic Fishscale Tile in Cloud transforms the shower wall into a focal point. Its soft, scalloped pattern catches the light beautifully, adding subtle movement and sophistication without overpowering the serene palette.
The Classic Wall-to-Floor Transition
One of the simplest but most impactful transitions is the wall-to-floor meeting point. Using a contrasting tile on the floor naturally defines the shower zone, even in open-concept or curbless designs.
Designers often use this opportunity to change texture or tone for practical and visual distinction. A matte, darker floor tile paired with lighter, glossy walls feels both cohesive and grounded, a timeless combination that flatters any shower configuration.
Your Guide to a Perfectly Cohesive Mix
Mixing two different tile styles in one shower isn’t about following strict rules, it’s about crafting harmony through thoughtful contrast. Whether you’re pairing stone-look porcelain with handmade ceramics or combining sleek modern finishes with tactile natural textures, the secret lies in intention and proportion.
To bring your design vision to life, use Edward Martin’s Augmented Reality (AR) Visualization Tool to see how different tile combinations will look directly in your space. Once you’ve found a pairing that feels just right, you can easily order Edward Martin tile samples to experience the color, texture, and finish in person, ensuring your final choice is as cohesive and stunning in reality as it is on screen.